
3. Account Settings
Navigate to https://aicpanel.smsit.ai/users/company
Overview:
Discover the unparalleled power and flexibility of SMS-iT CRM, a cutting-edge customer relationship management solution designed for forward-thinking businesses. This robust platform combines state-of-the-art features with intuitive user controls, setting a new standard in CRM technology. From AI-driven insights to seamless multi-channel communication, SMS-iT CRM empowers you to take your customer engagement to the next level. The Account Settings section showcases the depth and breadth of customization available, allowing you to tailor every aspect of the system to your unique business needs. With features like intelligent call handling, automated data capture, and advanced analytics integrations, SMS-iT CRM doesn't just keep pace with your business - it propels you ahead of the competition. As you explore these settings, you'll see how SMS-iT CRM anticipates the evolving needs of modern businesses, offering solutions to challenges you might not even know you had. This isn't just a CRM; it's a comprehensive business enhancement tool that will revolutionize how you interact with your customers and manage your operations. Get ready to unlock the full potential of your business with SMS-iT CRM - where innovation meets efficiency, and customer relationships are transformed into lasting partnerships.
Click on "Account Settings"
Artificial Intelligence
Artificial Intelligence Settings: This section allows you to configure the AI capabilities of your SMS-iT CRM account. You can choose between different AI models: 1. ChatGPT 2. Bard 3. SMS-iT GPT
For ChatGPT, you have additional options: - Model selection: ChatGPT 3.5, ChatGPT 4o, or ChatGPT 4 - Attached Number: [Input field available] - Temperature: 0 [Adjustable] - Presence Penalty: 0 [Adjustable] - Frequency Penalty: 0 [Adjustable] - Top P: 0 [Adjustable] - Include Trained Data: [Checkbox]
These settings allow you to fine-tune the AI's behavior, including its creativity, response diversity, and use of trained data. The "Train" button at the bottom suggests you can train the AI model with your specific data or preferences.
![**Artificial Intelligence Settings:** This section allows you to configure the AI capabilities of your SMS-iT CRM account. You can choose between different AI models:
1. ChatGPT
2. Bard
3. SMS-iT GPT
**For ChatGPT, you have additional options:**
- Model selection: ChatGPT 3.5, ChatGPT 4o, or ChatGPT 4
- Attached Number: [Input field available]
- Temperature: 0 [Adjustable]
- Presence Penalty: 0 [Adjustable]
- Frequency Penalty: 0 [Adjustable]
- Top P: 0 [Adjustable]
- Include Trained Data: [Checkbox]
These settings allow you to fine-tune the AI's behavior, including its creativity, response diversity, and use of trained data. The "Train" button at the bottom suggests you can train the AI model with your specific data or preferences.](https://assets.guidejar.com/uploads/18e30f84-9328-498a-97a7-22b3b88dbe8b/Fn7AYqjYuCNi6qxp2rJ7maNAQdg1/226e33b4-68c6-4e5a-810a-bd781996c1b0/1722315236880.jpeg)
Automatic Call Recordings & Transcripts
Automatic Call Recordings & Transcripts: Use the toggle switch to enable or disable automatic call recording and transcription. When enabled, this feature will record your calls and provide transcripts, which can be useful for documentation and analysis purposes.

New Subscriber Alert
New Subscriber Alert: Configure how you receive notifications about new subscribers. Options include:
As They Happen: Receive real-time alerts for each new subscriber. Daily Summary: Get a daily digest of new subscribers. Toggle On/Off: Enable or disable new subscriber alerts entirely.
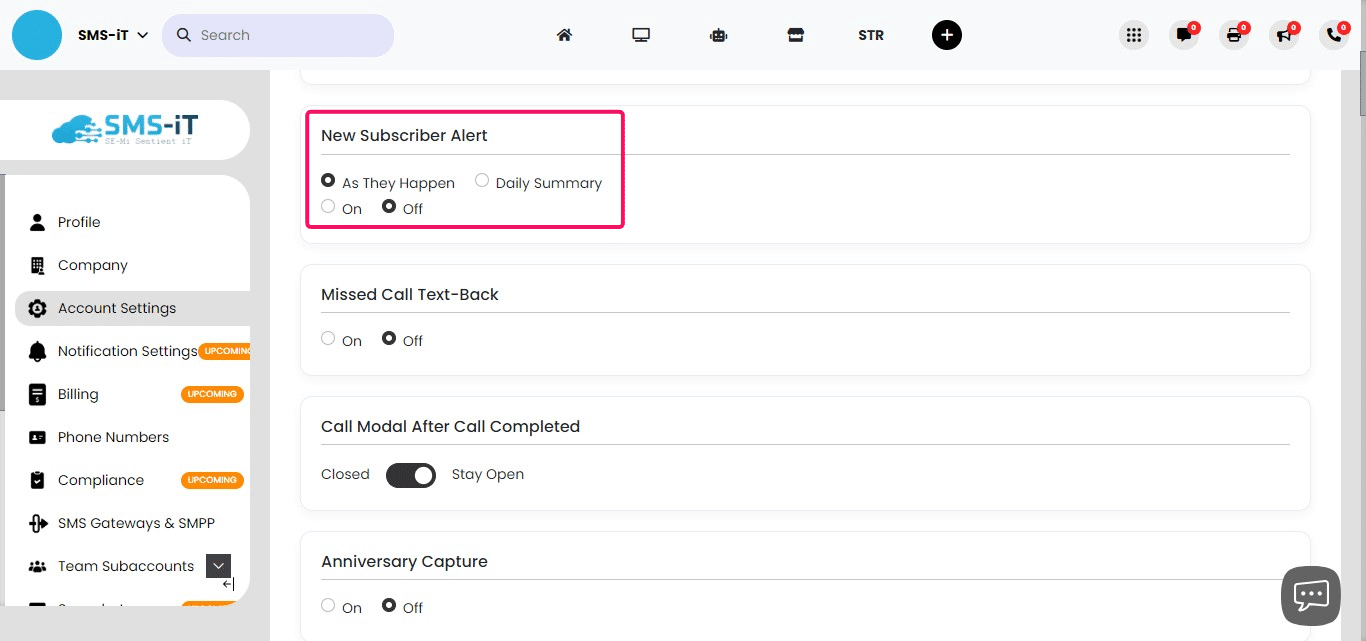
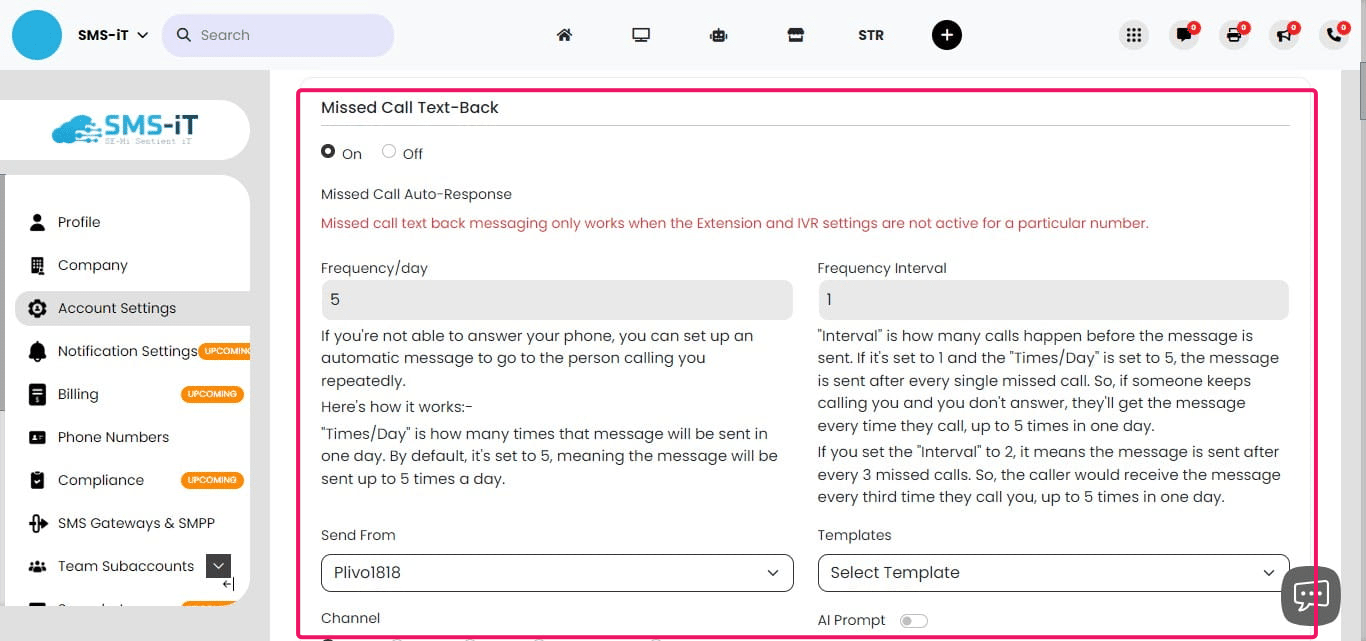
Missed Call Text-Back
Missed Call Text-Back: This feature allows you to set up an automatic text response for missed calls. Here's how to configure it:
Toggle the feature on or off. Set "Times/Day": This determines the maximum number of times the message will be sent per day (default is 5). Set "Interval": This defines how many missed calls trigger the message.
Example configurations:
If "Times/Day" is 5 and "Interval" is 1: The message is sent after every missed call, up to 5 times daily. If "Times/Day" is 5 and "Interval" is 2: The message is sent after every 2 missed calls, up to 5 times daily.
This feature helps maintain communication with callers when you're unavailable to answer their calls.
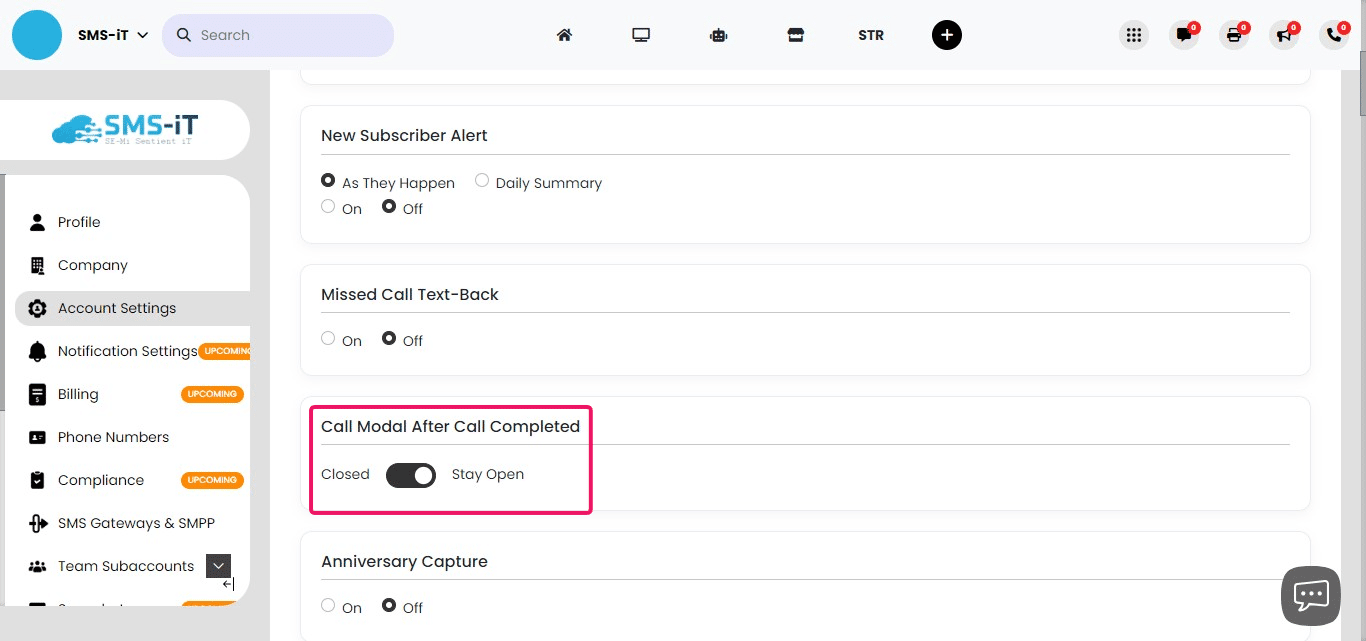
Call Modal After Call Completed
Call Modal After Call Completed: This feature allows you to control what happens with the call information window after a call ends.
Toggle between "Closed" or "Stay Open" options. When set to "Stay Open," the modal remains on screen after the call, allowing you to: - Complete call notes - Send follow-up emails or texts - Update customer profiles - Add customers to pipelines or campaigns - Perform any other CRM-related tasks
Manually close the modal when finished.
This feature promotes real-time information processing and eliminates the need to switch between screens for post-call tasks.
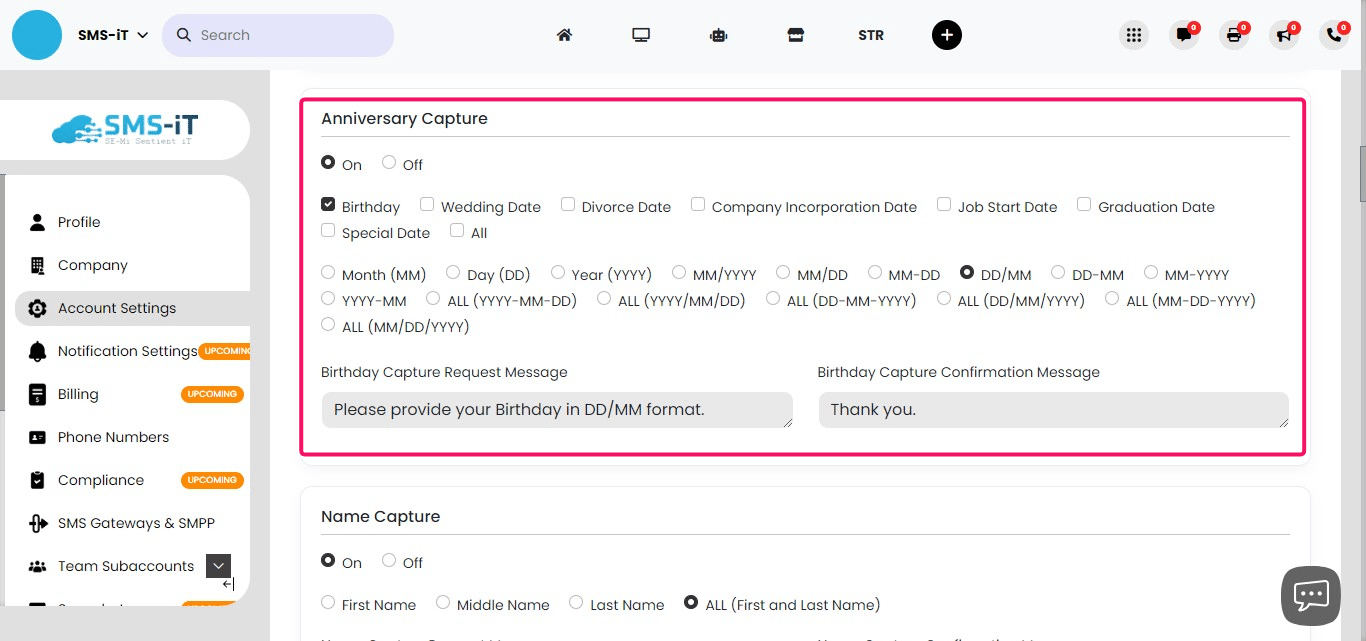
Anniversary Capture
Anniversary Capture: This feature allows you to collect and store important dates for your customers. To set it up: - Use checkmarks to select which anniversaries to capture (e.g., birthdays, wedding anniversaries). - Compose a capture request message (e.g., "Please provide your Birthday in DD/MM format."). - Create a confirmation message (e.g., "Thank you").
When a customer opts into a group, they'll receive the anniversary capture message. Their response will be added to their customer profile automatically.
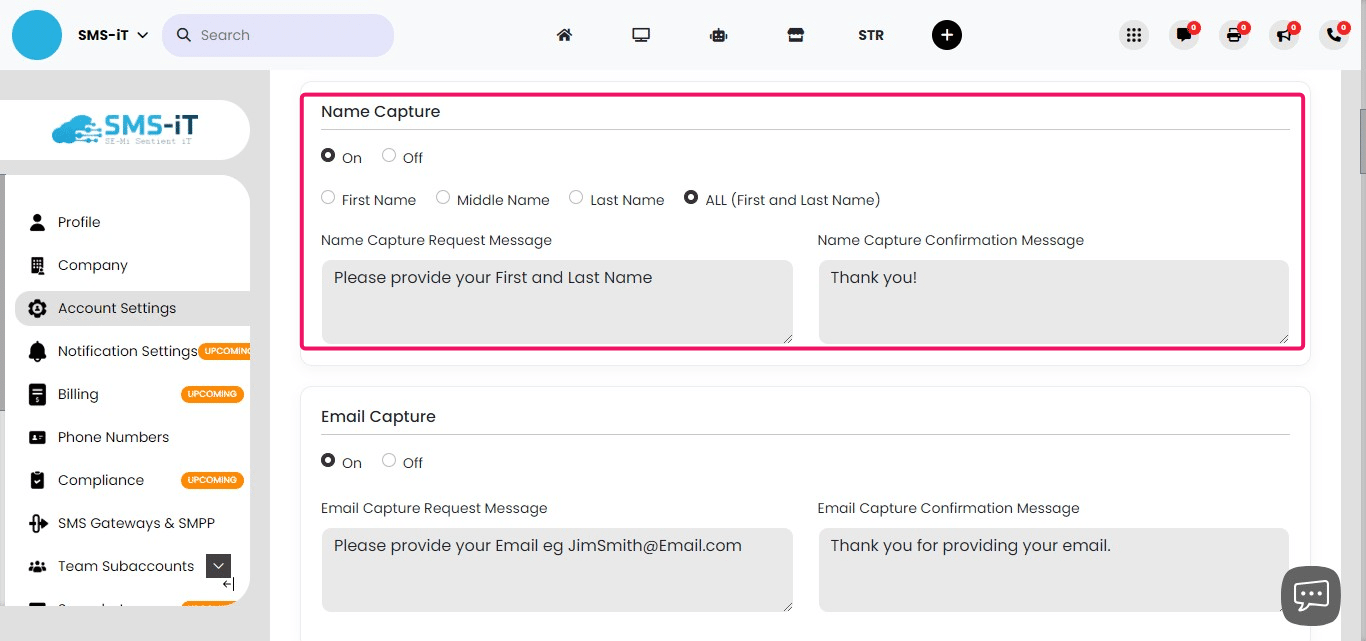
Name Capture
Name Capture: Enable this feature to collect customer names. Configuration options include: 1. Toggle the feature on or off. 2. Choose which name parts to request: first, middle, last, or all. 3. Compose a request message asking for the desired name information. 4. Create a confirmation message to send after receiving the customer's response.
This feature helps personalize your customer database and communication.
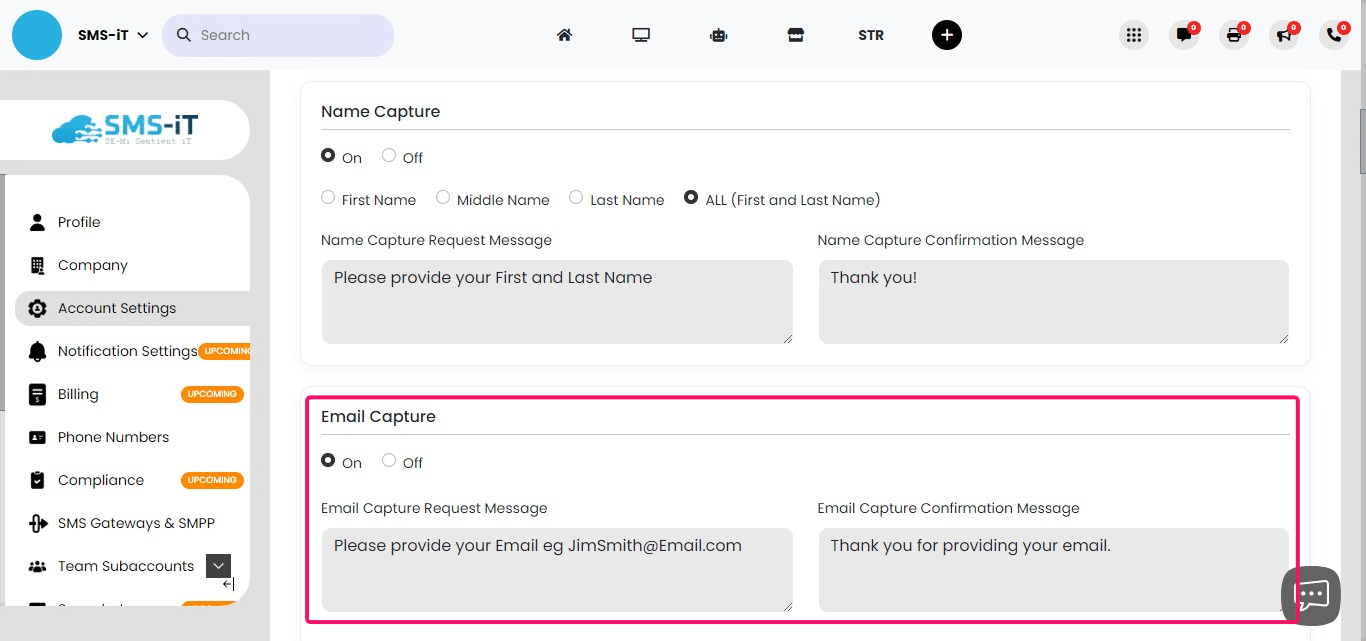
Email Capture
Email Capture: Use this feature to collect customer email addresses. To set it up: 1. Toggle the feature on or off. 2. Compose a request message asking for the customer's email address. 3. Create a confirmation message to send after receiving the email.
This feature helps build your email list for future marketing campaigns and communication.
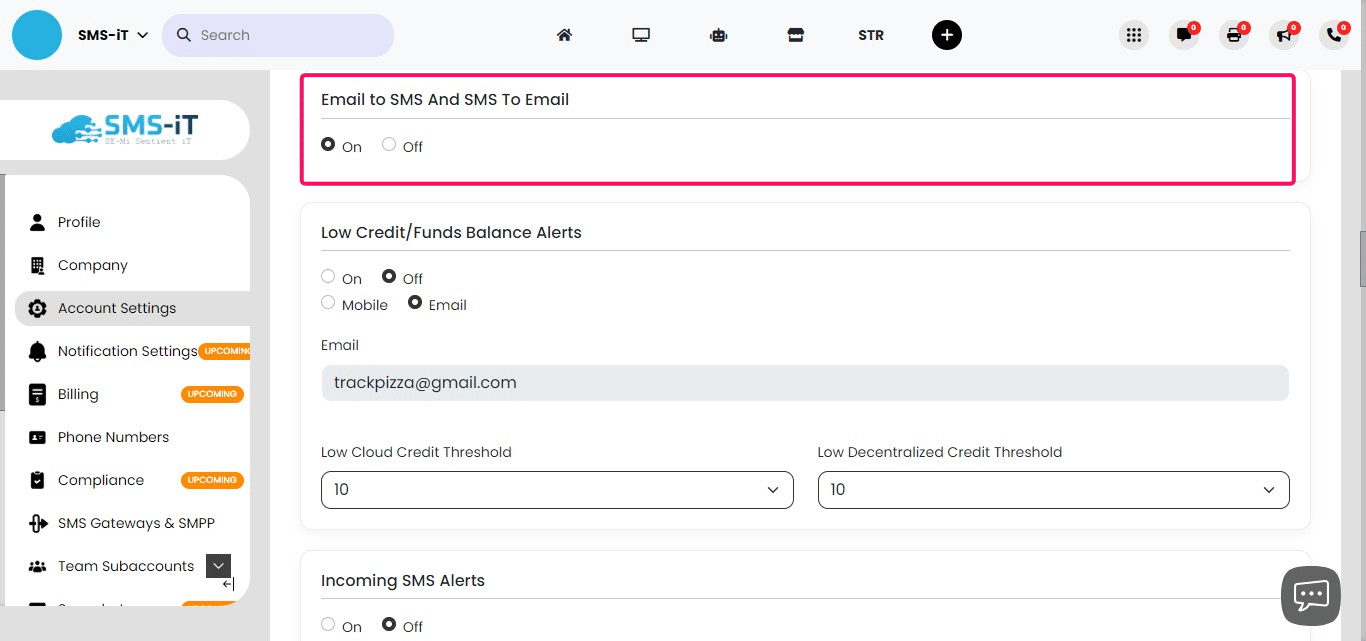
Email to SMS, SMS to Email
Email to SMS and SMS to Email: This feature enables seamless communication between email and SMS platforms. To use it:
Toggle the feature on or off.
When enabled:
Email to SMS: Emails sent to your SMS-iT account are converted to text messages and delivered to your mobile phone. SMS to Email: Text messages received on your SMS-iT number are converted to emails and sent to your specified email address.
Benefits:
Stay updated on important communications when away from your email inbox. Keep all messages organized in one place, regardless of the original format. Ensure no communication is missed, whether it comes via email or SMS.
Low Credit/Funds Balance Alerts
Low Credit/Funds Balance Alerts: Stay informed about your account balance with this feature. To configure: 1. Toggle the feature on or off. 2. Choose to receive alerts via mobile or email. 3. Set the low balance threshold that triggers an alert.
This feature helps you maintain sufficient funds in your account to ensure uninterrupted service.
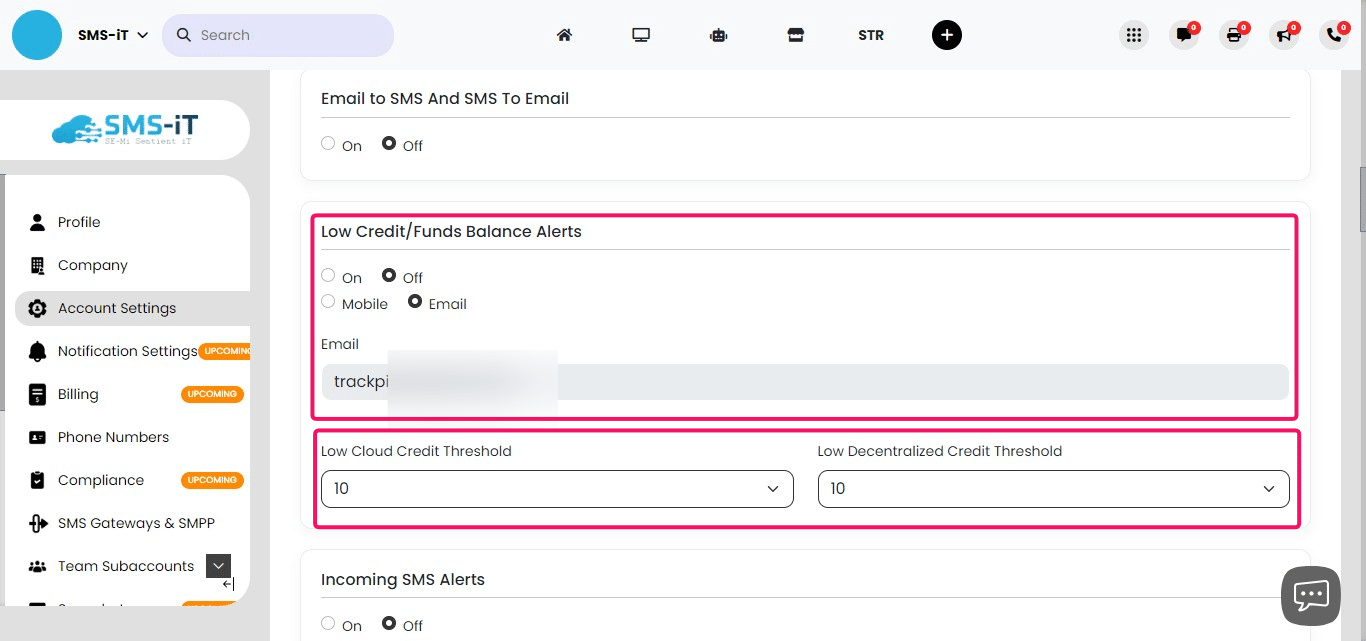
Incoming SMS Alerts
Incoming SMS Alerts: Get notified about new incoming text messages. To set up: 1. Toggle the feature on or off. 2. Choose to receive alerts via mobile or email. 3. Provide the mobile number or email address for forwarding alerts.
When enabled, you'll receive a notification on your chosen device whenever an SMS text comes into the system.
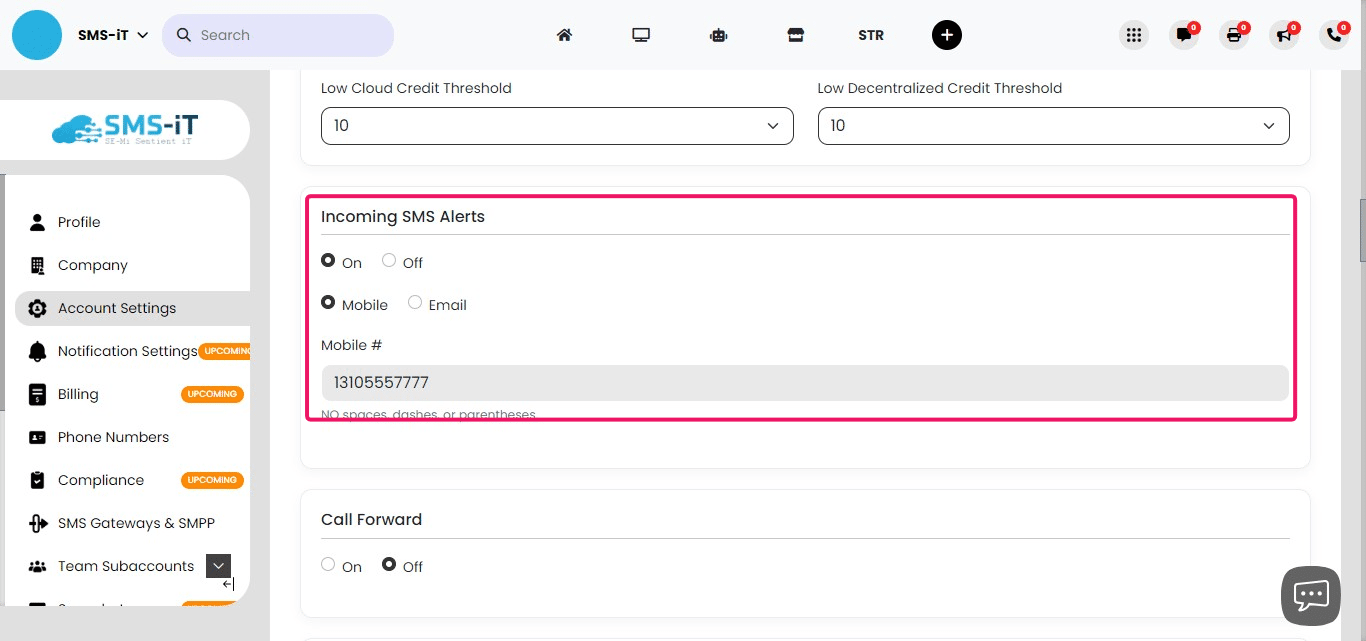
Call Forward
Call Forward: Redirect incoming calls to a specified mobile number. To use this feature: - Toggle the feature on or off. - Enter the mobile number to which you want calls forwarded.
When enabled, all incoming calls to your SMS-iT number will be automatically redirected to the provided mobile number.
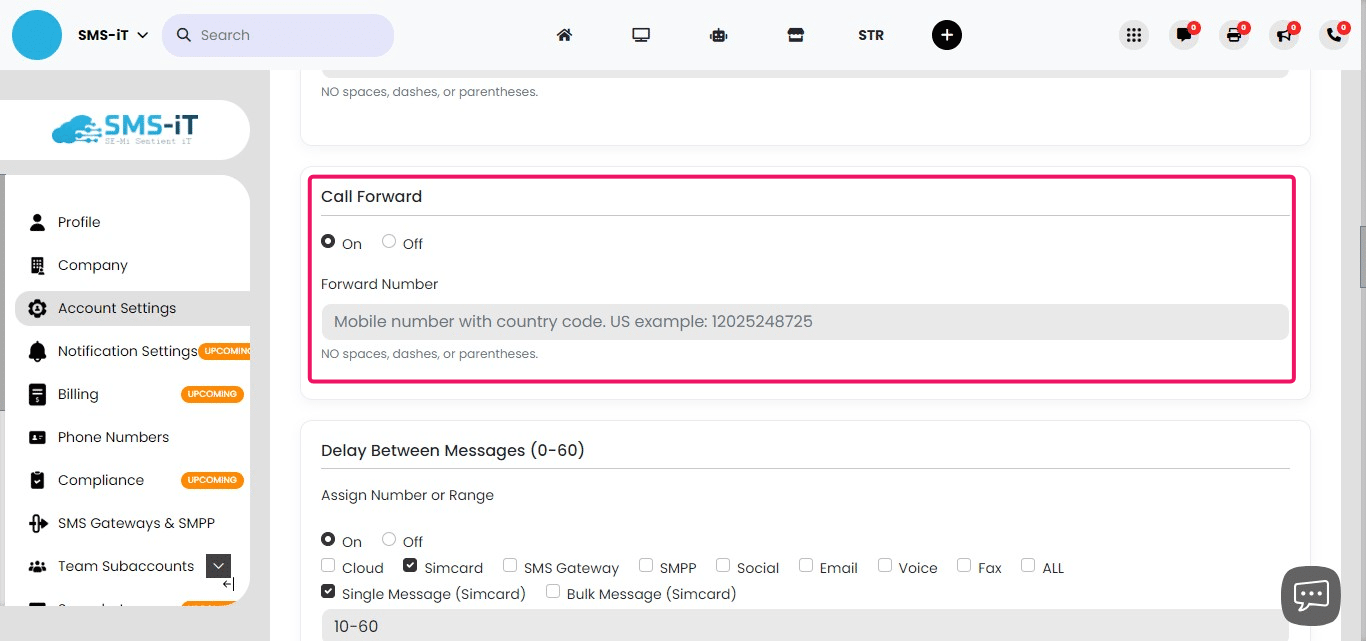
Delay Between Messages
Delay Between Messages: Configure the timing between sent messages for each communication channel. To set up:
Choose a delay range between 0-60 seconds for each channel. For SIMcard, it's recommended to use 10-60 seconds or higher for optimal results.
How it works:
If set to 10-60 seconds, messages will be sent with a random delay between 10 and 60 seconds. Example sequence: 10 seconds, 30 seconds, 20 seconds, 60 seconds, etc.
This randomized delay helps maintain a natural messaging pattern and adheres to network limitations.
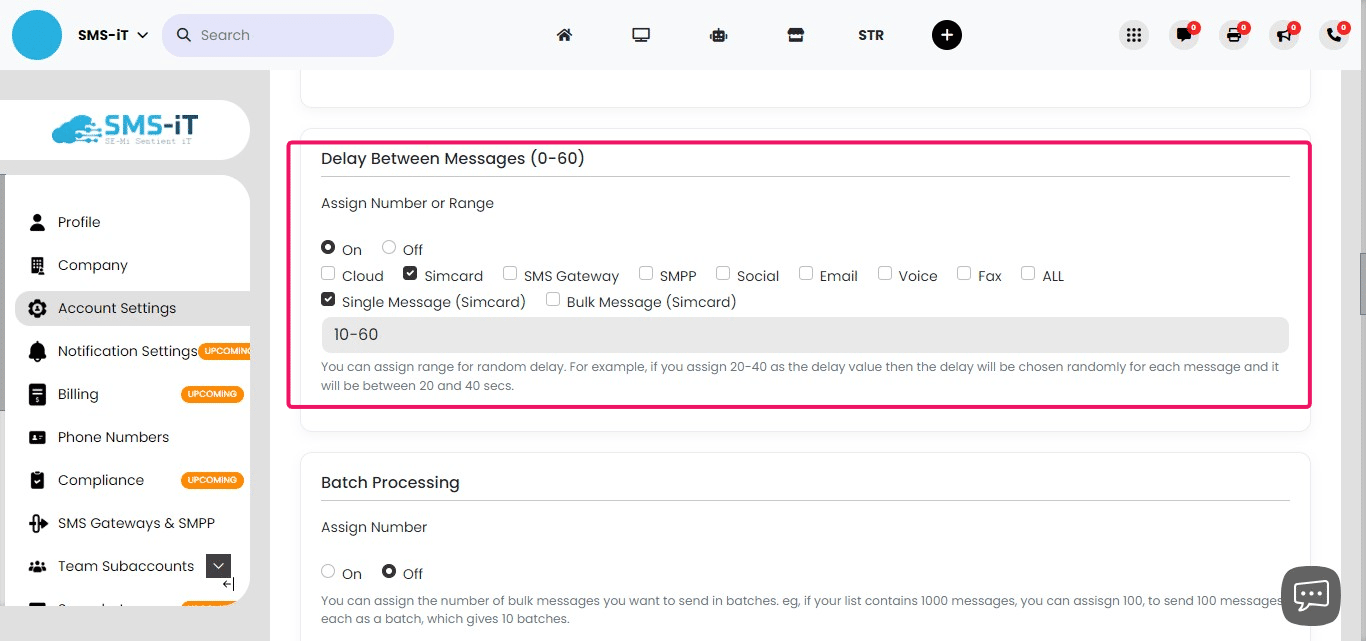
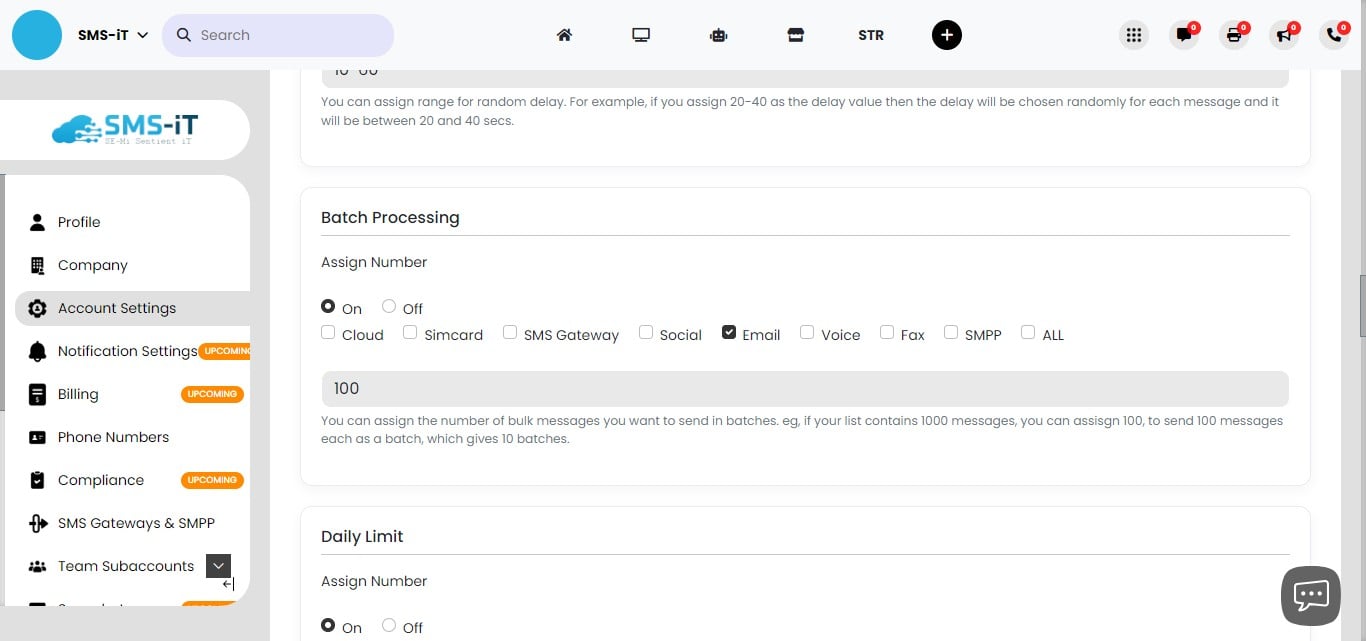
Batch Processing
Batch Processing: This feature allows you to send messages, particularly emails, in groups. To configure: 1. Toggle the feature on or off. 2. Check the email option to enable batch processing for emails. 3. Specify the number of messages to be sent in each batch.
Batch processing can help manage large volumes of messages more efficiently and reduce strain on your email server.
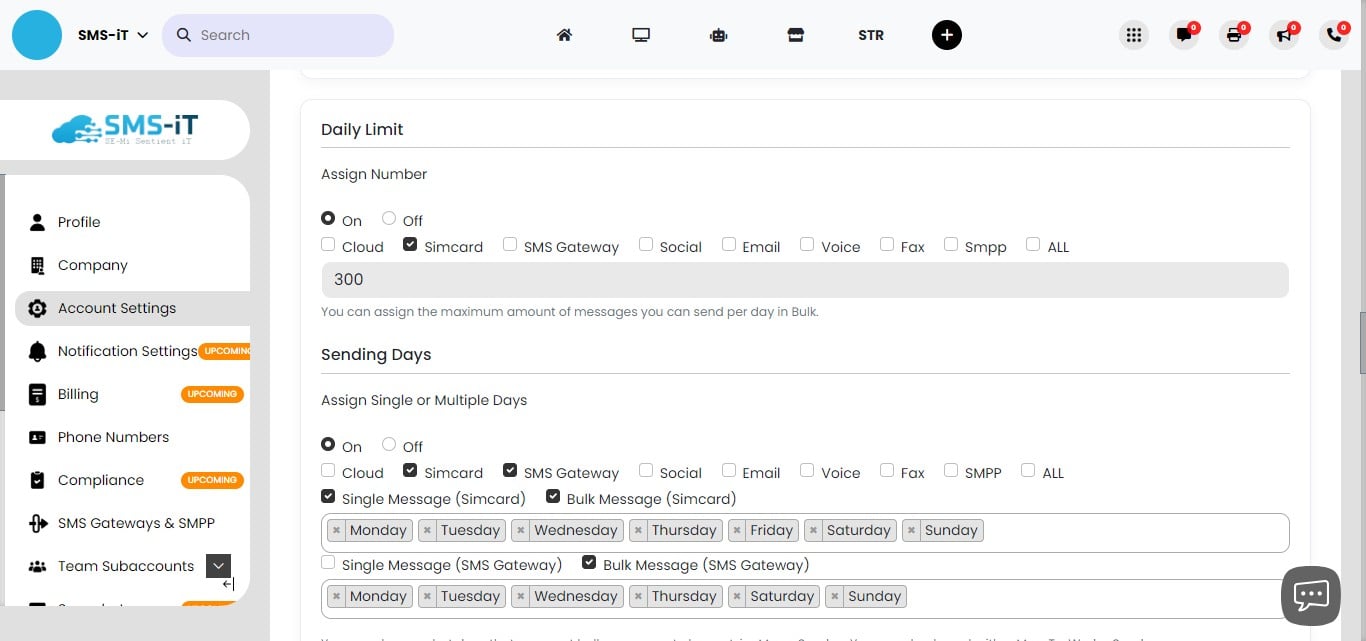
Daily Limit
Daily Limit: Set maximum daily message limits for each communication channel. To configure: 1. Toggle the feature on or off. 2. Choose specific limits for each channel (SMS, email, etc.). 3. For SIMcard, it's recommended to set a limit between 300-400 messages per day to comply with network restrictions.
This feature helps manage your messaging volume and ensures compliance with network limitations.
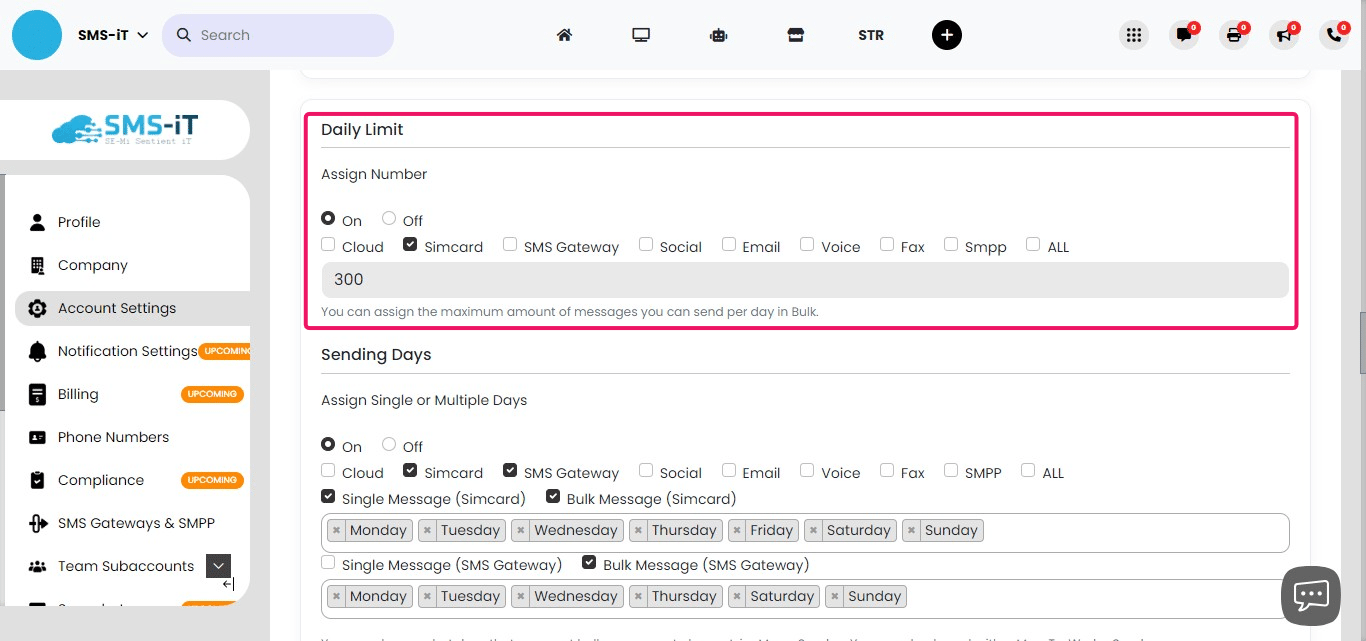
Sending Days
Sending Days: Customize your message sending schedule by selecting specific days for each communication channel. To set up: 1. Choose the desired channel (SMS, email, etc.). 2. Select the days of the week when messages should be sent for that channel.
This feature allows you to tailor your messaging schedule to your business needs and customer preferences.
Send Received Messages to Email
Send Received Messages to Email: Forward incoming messages from various channels to a specified email address. To configure: 1. Toggle the feature on or off. 2. Select the channels from which you want to forward messages (SMS, social media, etc.). 3. Enter the email address where you want to receive the forwarded messages.
This feature helps centralize your incoming communications in one place for easier management and response.
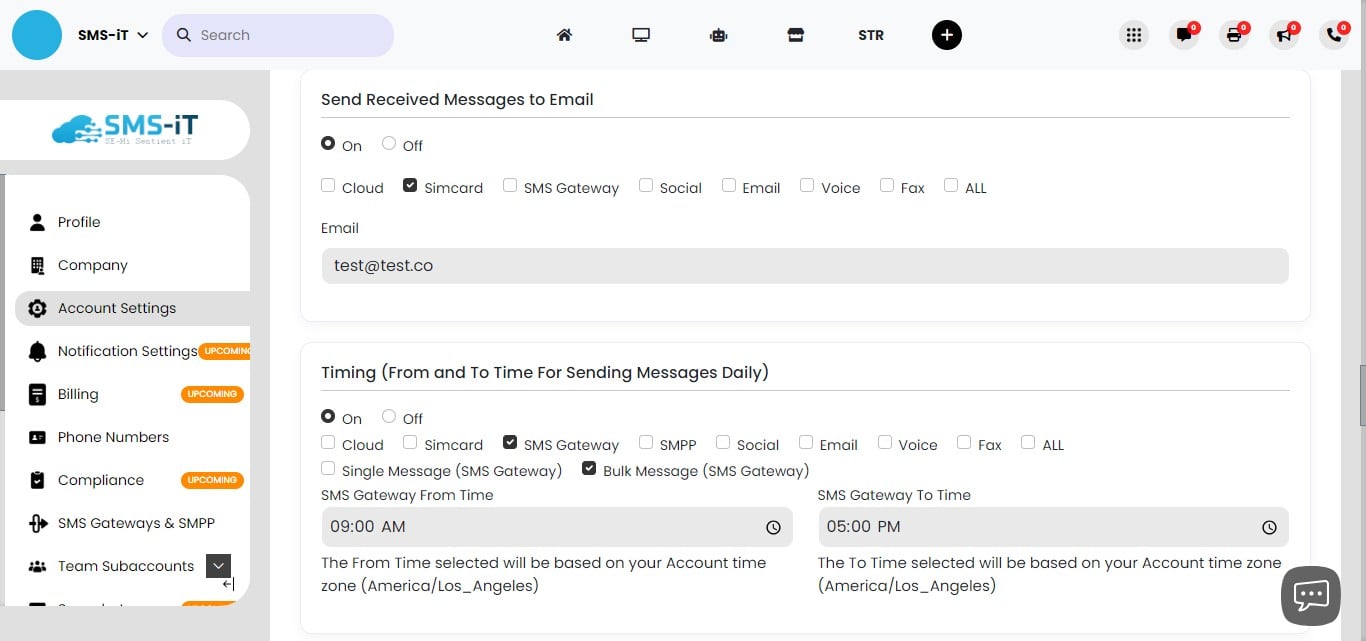
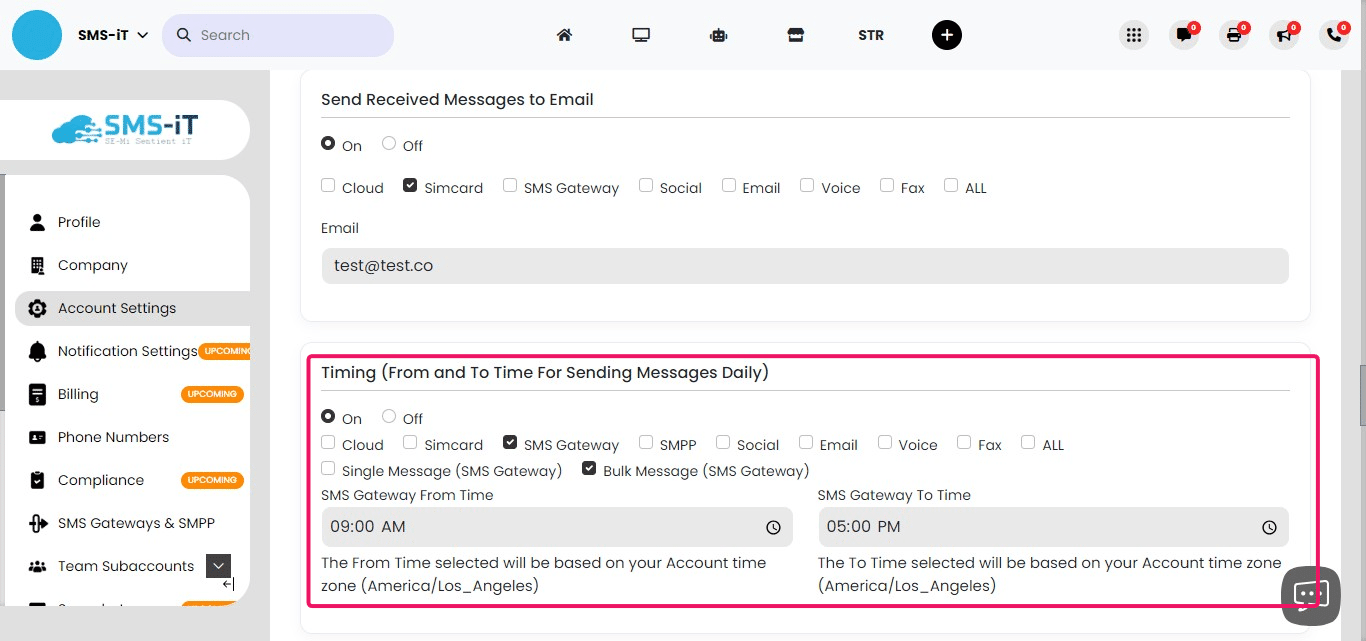
Timing (From and To Time For Sending Messages Daily)
Daily Message Sending Time Range: Set specific time frames for sending messages on each channel. To configure: 1. Toggle the feature on or off. 2. Select the desired channel (SMS, email, etc.). 3. Set the "From" time (when message sending should start each day). 4. Set the "To" time (when message sending should end each day).
This feature allows you to control when your messages are sent, ensuring they reach recipients at appropriate times.
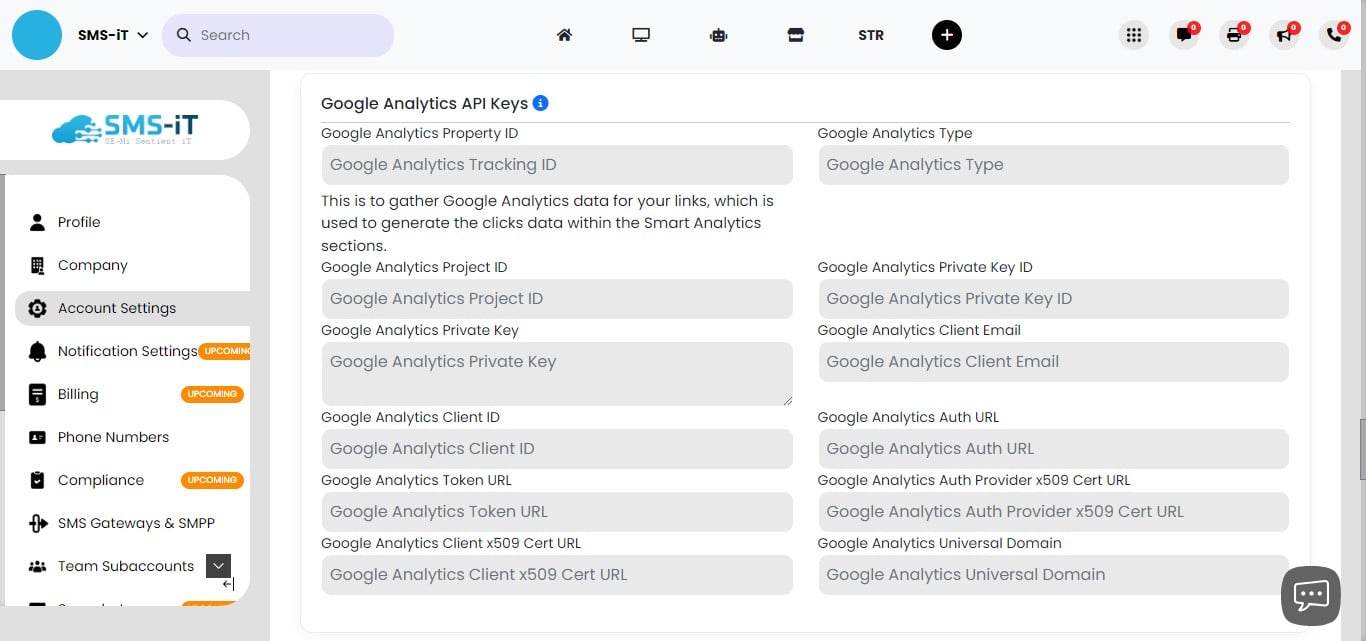
Google Analytics API Keys
Google Analytics API Keys: Integrate your Google Analytics account with SMS-iT CRM. To set up: 1. Enter your Google Analytics API credentials in the provided fields. 2. If you need help obtaining these credentials, click the blue "i" icon for detailed instructions.
This integration allows you to track and analyze your CRM-related web traffic and user behavior.
Facebook Analytics API Keys
Facebook Analytics API Keys: Connect your Facebook Analytics account to SMS-iT CRM. To configure: 1. Enter your Facebook Analytics API credentials in the designated fields. 2. For assistance in obtaining these credentials, click the blue "i" icon and follow the provided instructions.
This integration enables you to analyze your Facebook-related CRM activities and campaigns.
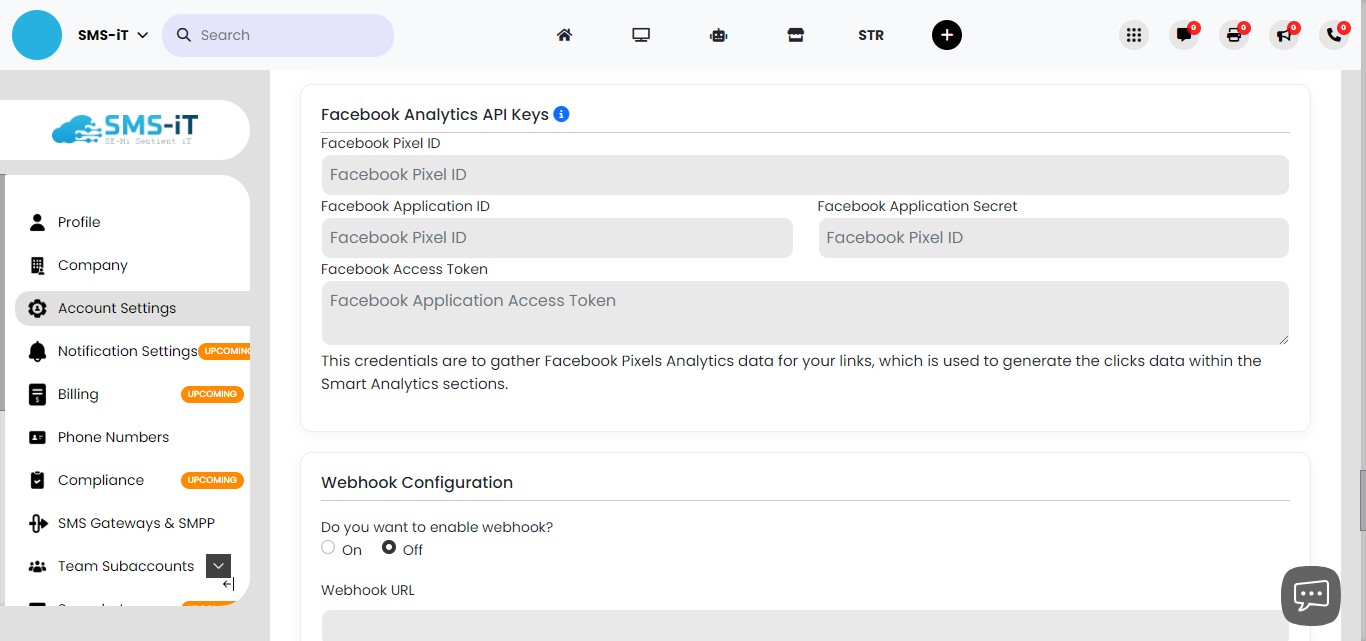
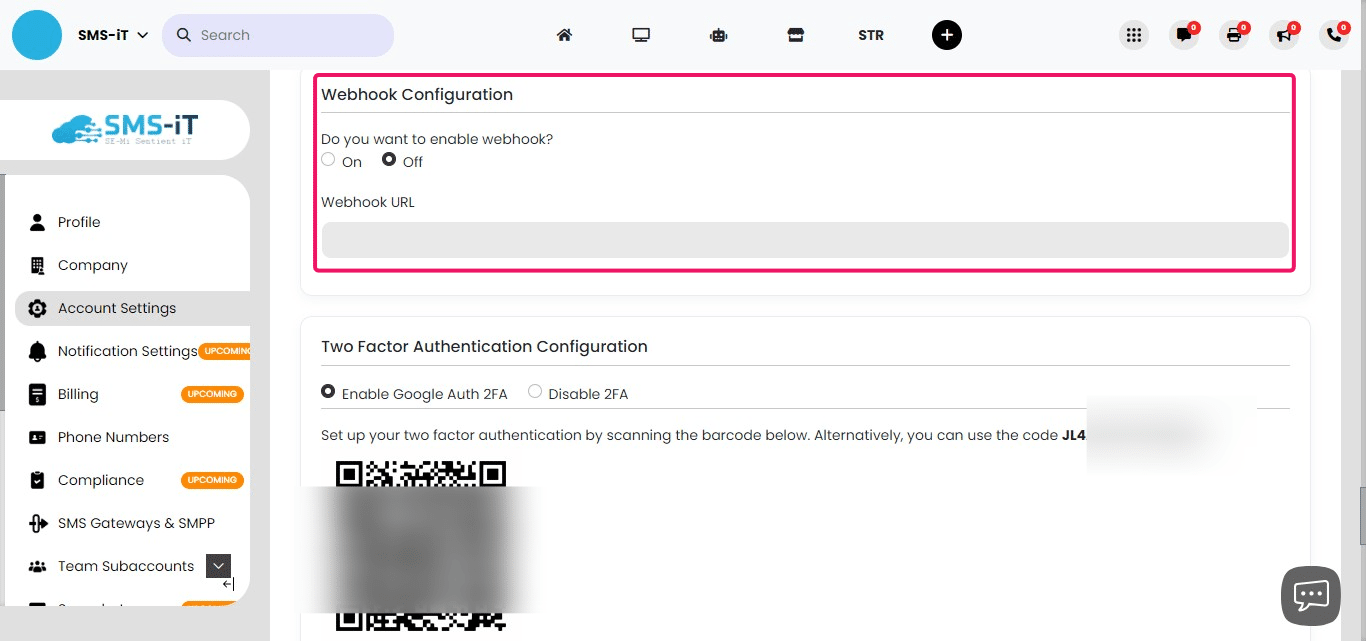
Webhook Configuration
Webhook Configuration: Set up webhooks to receive real-time data from SMS-iT CRM. To configure: 1. Enter the webhook URL in the provided field. 2. Toggle the switch to enable the webhook.
Webhooks allow you to receive instant notifications about specific events in your CRM, facilitating real-time data integration with other systems.
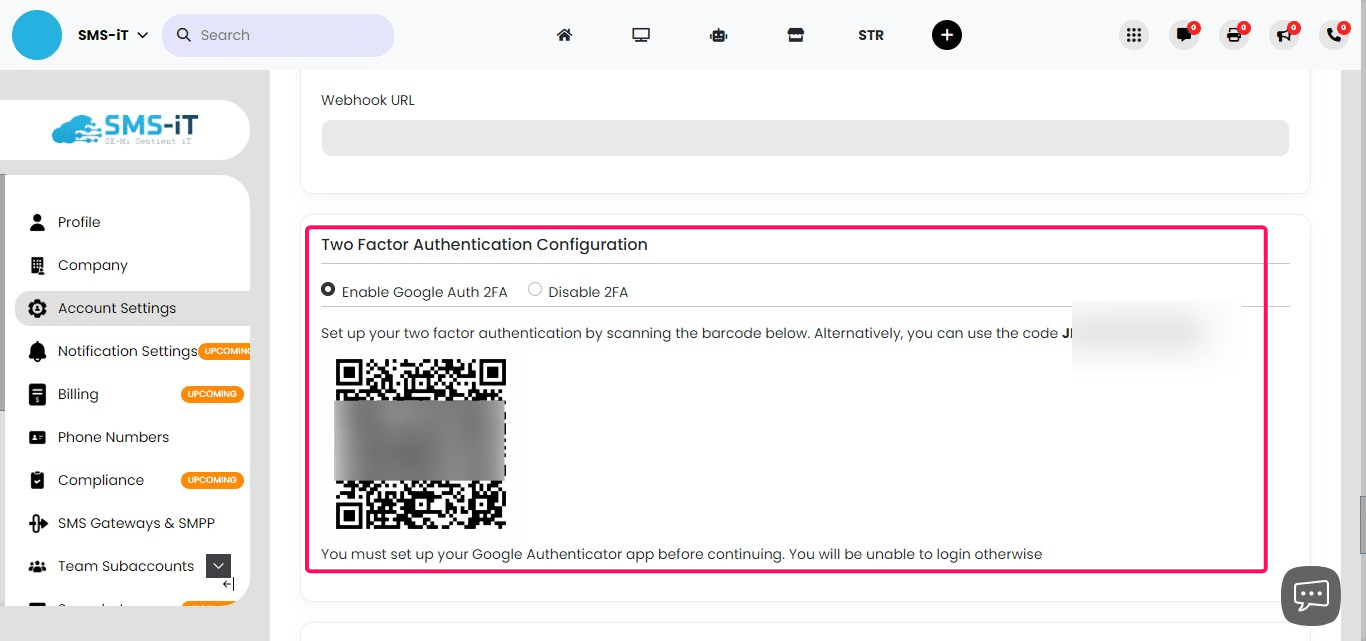
Two-Factor Authentication Configuration
Two-Factor Authentication (2FA) Configuration: Enhance your account security with 2FA. To set up: 1. Ensure you have the Google Authenticator app installed on your mobile device before proceeding. 2. Enable 2FA in your SMS-iT CRM settings. 3. Scan the provided barcode with the Google Authenticator app. 4. Follow the instructions in the app to complete the setup.
Warning: Once enabled, you'll need the Google Authenticator app to log in. Make sure you have access to it before activating 2FA.
Number Lookup
Number Lookup: Verify the validity of phone numbers in your CRM. To use this feature: 1. Toggle the feature on or off. 2. Select your preferred SMS gateway (e.g., Telnyx, Clearoutphone, or Numverify).
This feature is useful for: - Verifying numbers during campaign creation - Validating imported leads - Checking contacts before bulk sends
Number verification helps improve delivery rates and ensures you're contacting valid numbers.
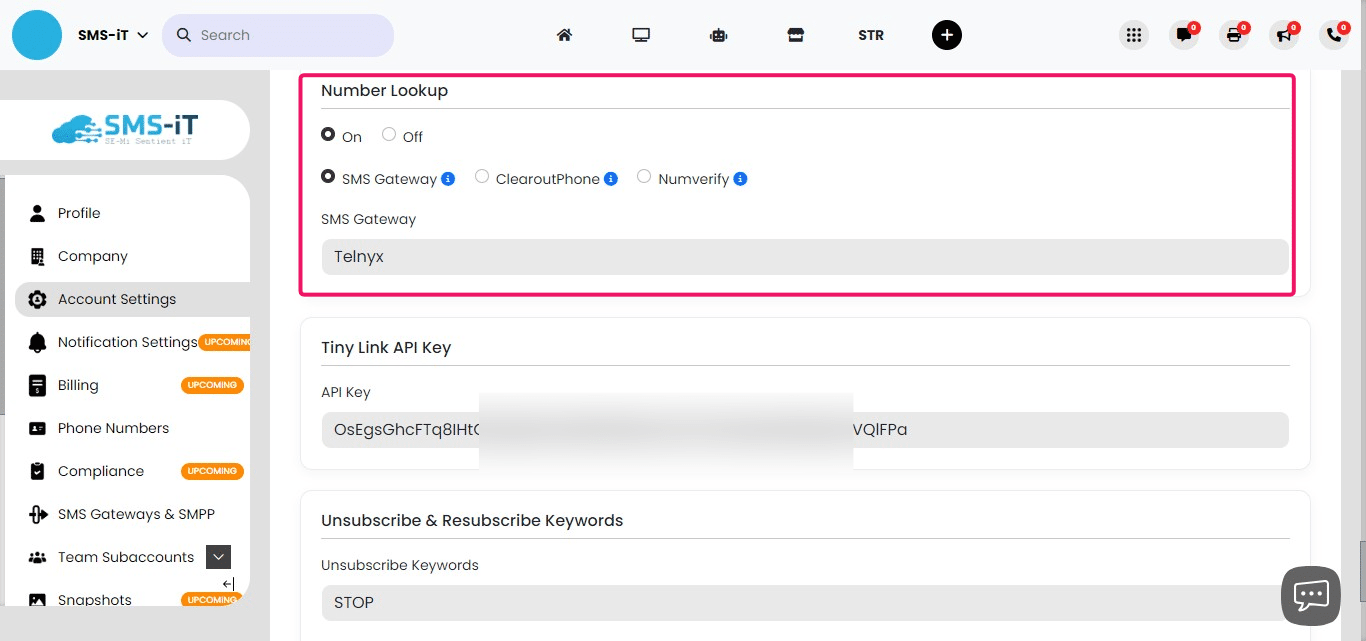
Tiny Link API Key
Tiny Link API Key: Integrate URL shortening capabilities into your CRM. To set up: 1. Insert your Tiny Link API key in the provided field. 2. For detailed instructions on obtaining and using the API key, click the provided link for a comprehensive guide. https://training.smsit.ai/guides/E3i9LIFDLC0vw05jvqqB This feature allows you to create and track shortened URLs directly within your CRM, useful for SMS and email campaigns.
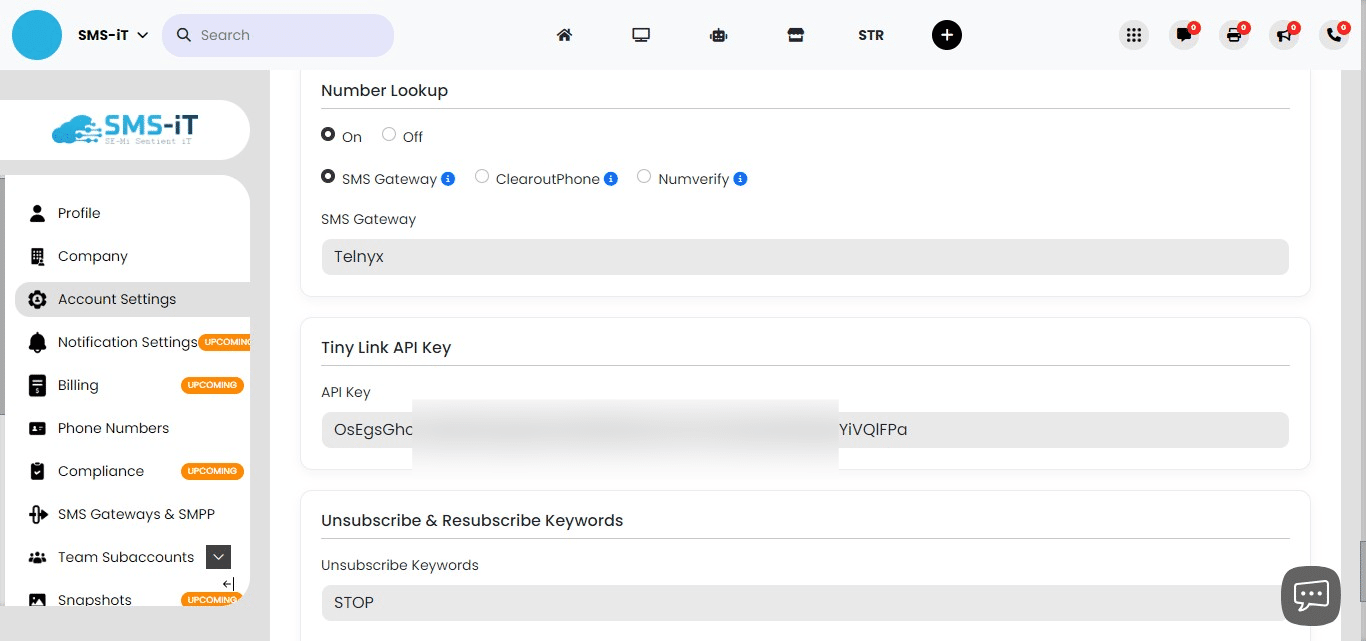
Unsubscribe & Resubscribe Keywords
Unsubscribe & Resubscribe Keywords: Customize opt-out and opt-in keywords for your messaging campaigns. To configure: 1. Set your unsubscribe keyword (commonly used: "STOP") 2. Set your resubscribe keyword (commonly used: "START") These keywords allow recipients to easily opt out of or rejoin your messaging lists, ensuring compliance with messaging regulations and respecting user preferences.

Double Optin Keyword & Message
Double Opt-in Keyword & Message: Implement an additional confirmation step for new subscribers. To set up: 1. Enable the double opt-in feature. 2. Set a confirmation keyword (commonly used: "Y"). 3. Compose a confirmation message, such as: "Reply Y to confirm that you want to receive occasional SMS messages from [Your Business Name]."
This feature provides extra assurance that users have intentionally subscribed to your messages, helping maintain a high-quality, engaged subscriber list.
![**Double Opt-in Keyword & Message:** Implement an additional confirmation step for new subscribers.
To set up:
1. Enable the double opt-in feature.
2. Set a confirmation keyword (commonly used: "Y").
3. Compose a confirmation message, such as: "Reply Y to confirm that you want to receive occasional SMS messages from [Your Business Name]."
This feature provides extra assurance that users have intentionally subscribed to your messages, helping maintain a high-quality, engaged subscriber list.](https://assets.guidejar.com/uploads/18e30f84-9328-498a-97a7-22b3b88dbe8b/Fn7AYqjYuCNi6qxp2rJ7maNAQdg1/ac643575-eb86-410e-bdcd-f46540939a90/1722404389417.jpeg)
Summary of the Account Settings section: This comprehensive guide to Account Settings in SMS-iT CRM covers a wide range of features designed to enhance communication, automate processes, and improve user experience. Key benefits for solo entrepreneurs, marketing agencies, small businesses, and blue-collar professionals include: 1. Customizable communication preferences (email, SMS, calls) to suit various business needs. 2. Automated responses and data capture to save time and improve customer engagement. 3. Integration with analytics tools for better insights into marketing efforts. 4. Security features like two-factor authentication to protect sensitive client data. 5. Compliance tools for managing opt-ins and opt-outs, crucial for maintaining a good reputation.
These features allow businesses to streamline their operations, maintain professional communication standards, and focus on growth while the CRM handles many routine tasks automatically.