Bandwidth connect to SMS-iT platform (Buy number in Bandwidth platform)
Navigate to https://aicpanel.smsit.ai/home
This guide will ensure that the API and all settings are configured correctly in SMS-iT and Bandwidth. It's designed for users who already have a number in Bandwidth or want to purchase a number in Bandwidth and want to connect it to the SMS-it Platform. This integration will enable you to utilize the Bandwidth SMS Gateway for various purposes, including bulk messaging, promotional campaigns, OTP (One-Time Password) delivery, and leveraging SMS-iT Smart Tools for customer acquisition and retention strategies.
Bandwidth does not provide an API for making or receiving live calls. You can only conduct voice broadcasts, receive voicemails, and utilize features like IVR. Texting SMS and MMS are allowed, along with any feature supported by the texting API including bulk messaging, promotional campaigns, OTP (One-Time Password) delivery, and leveraging SMS-iT Smart Tools for customer acquisition and retention strategies.
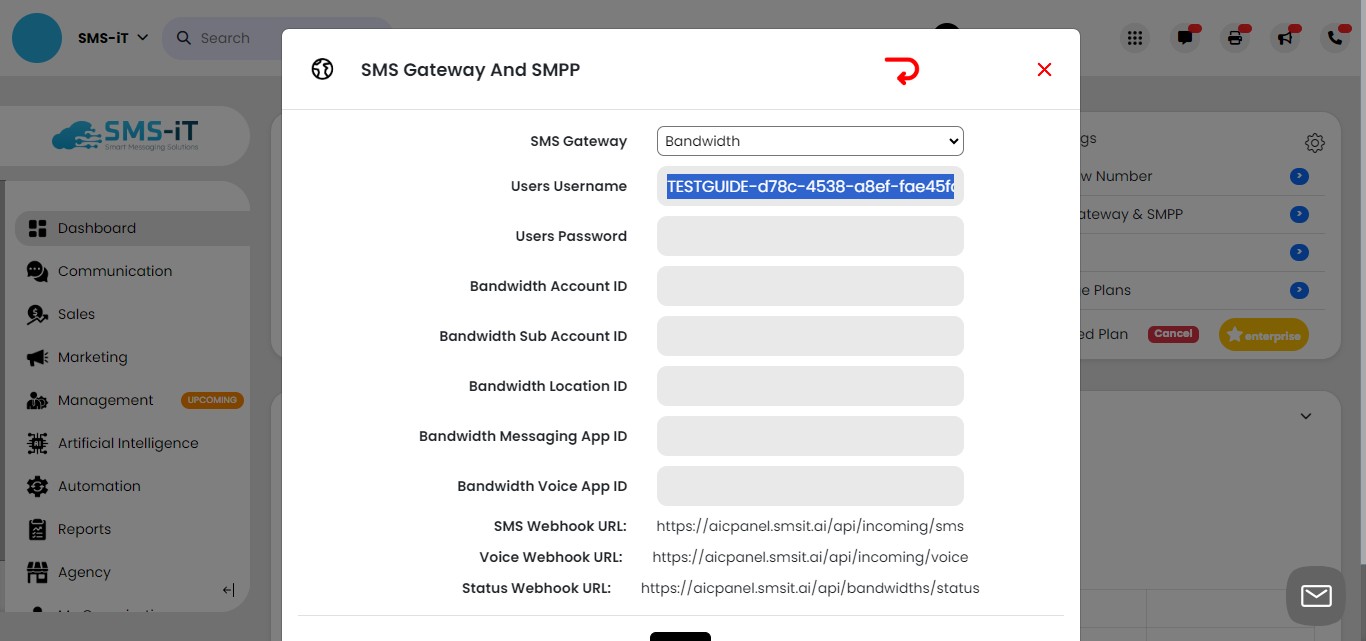
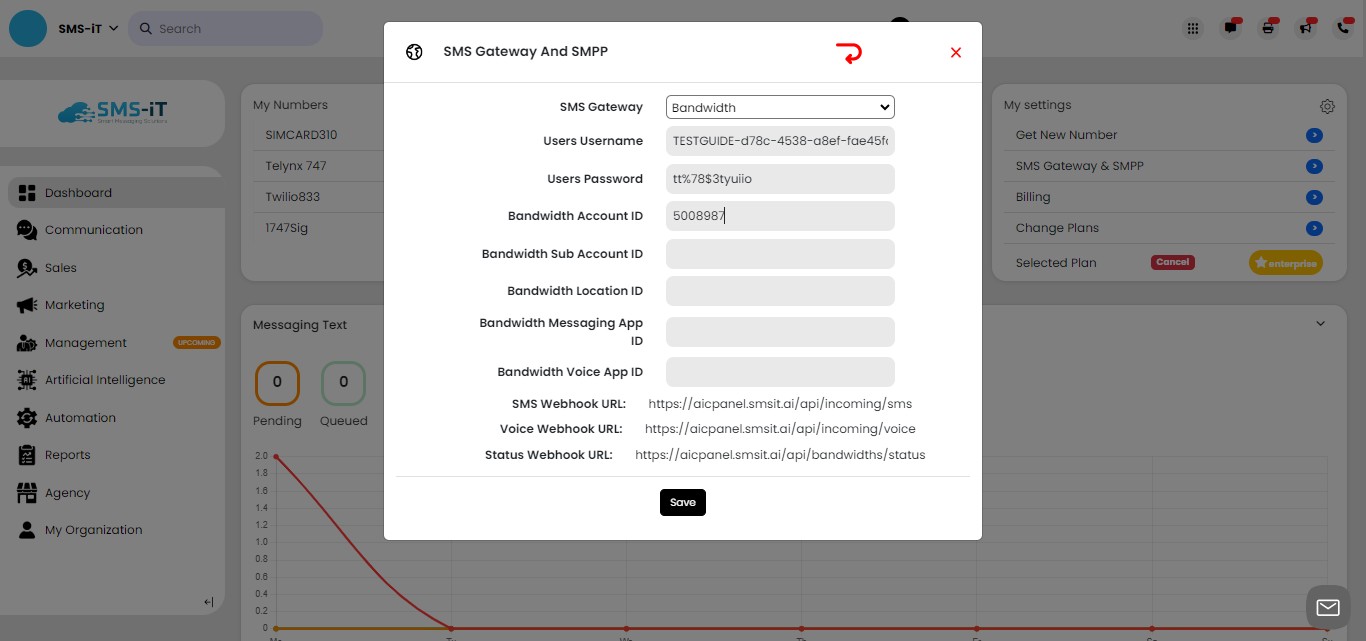
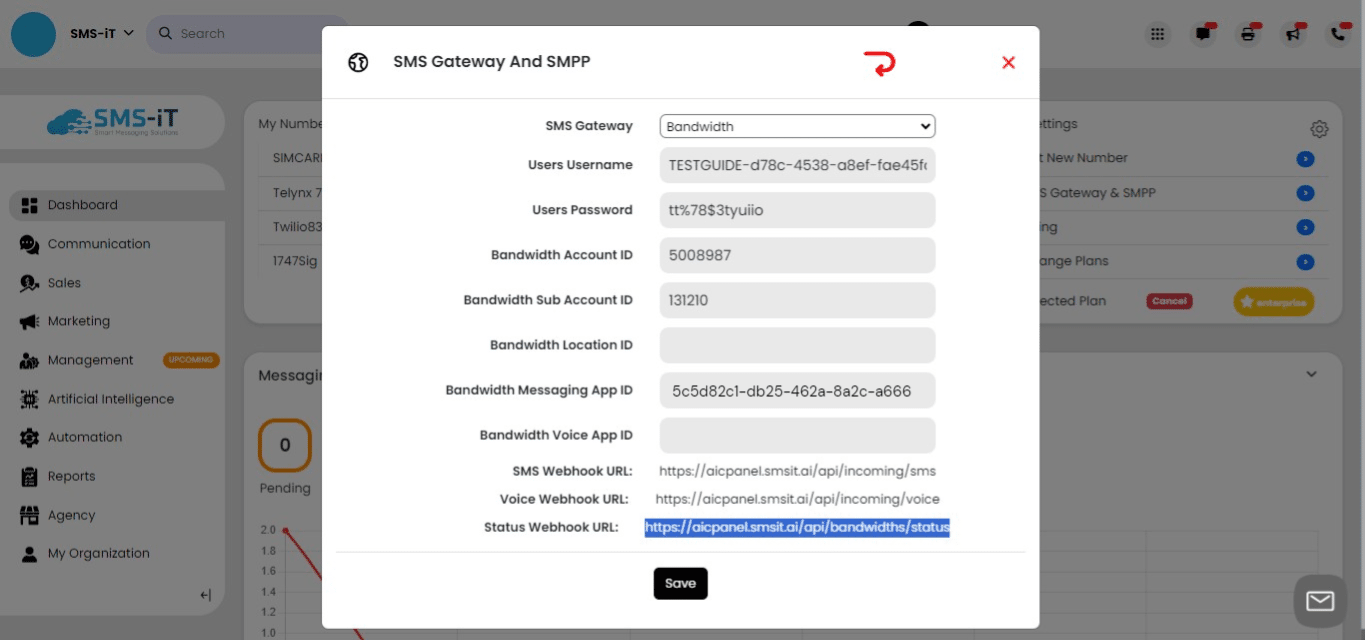
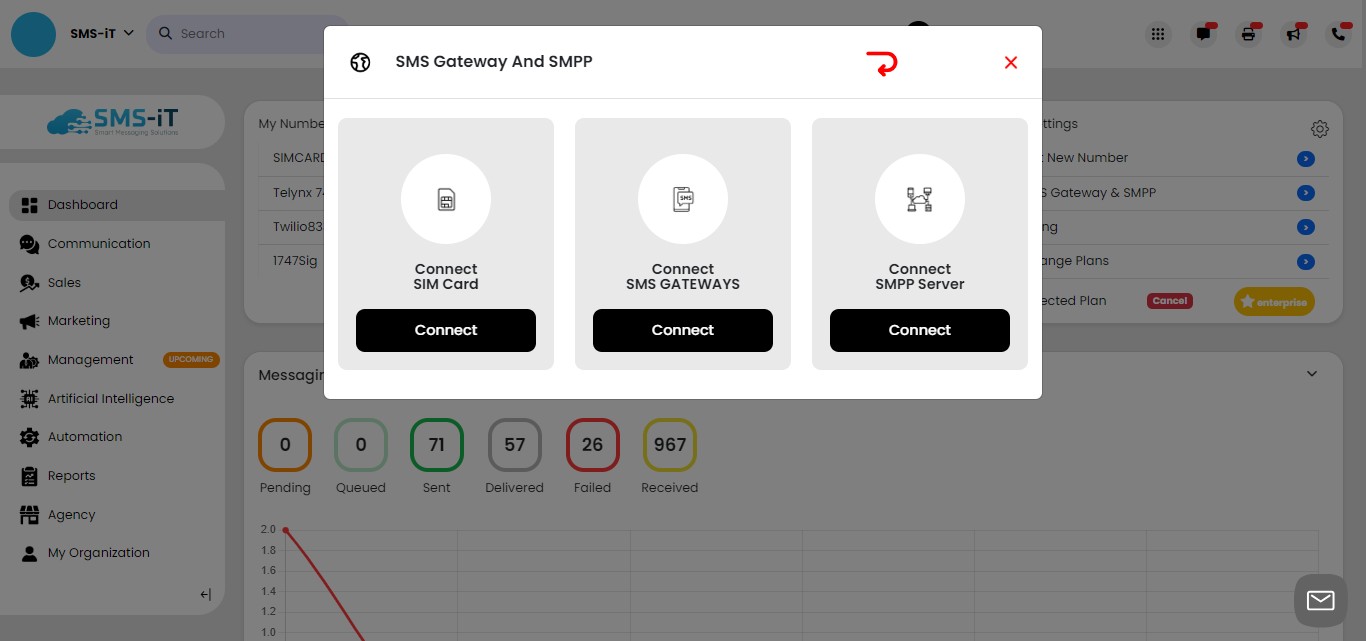
Click on "SMS Gateway & SMPP"
Click on "Connect"
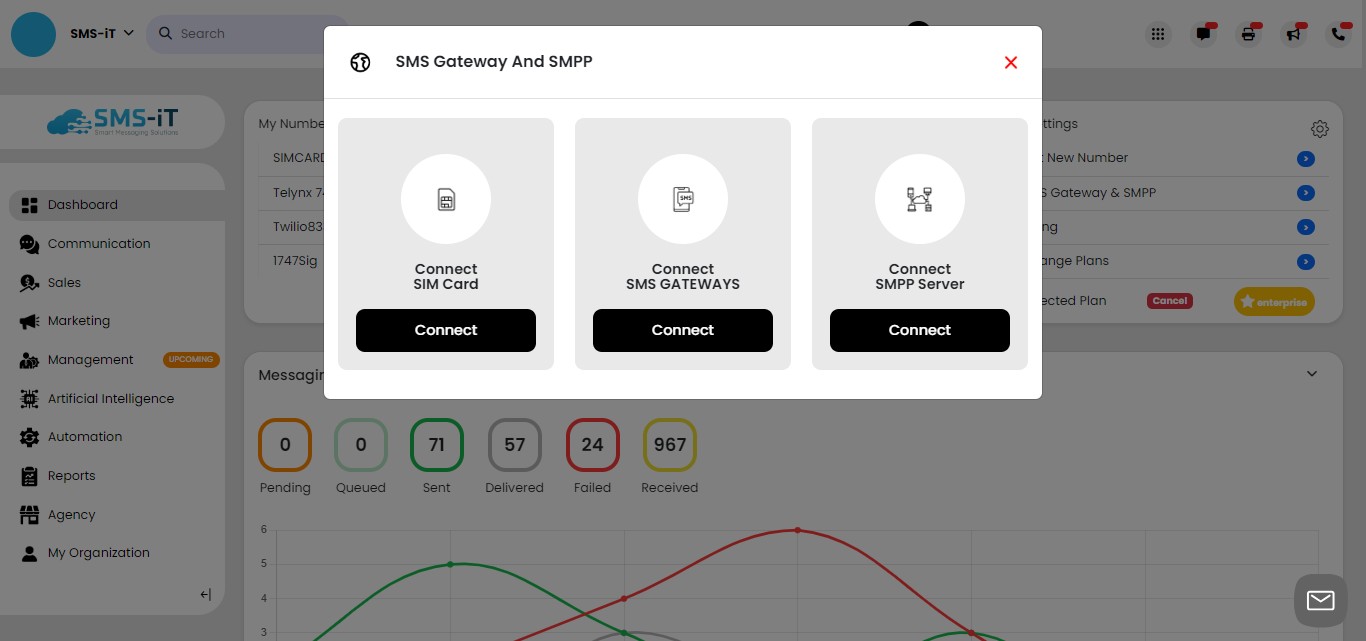
You'll see "Bandwidth"
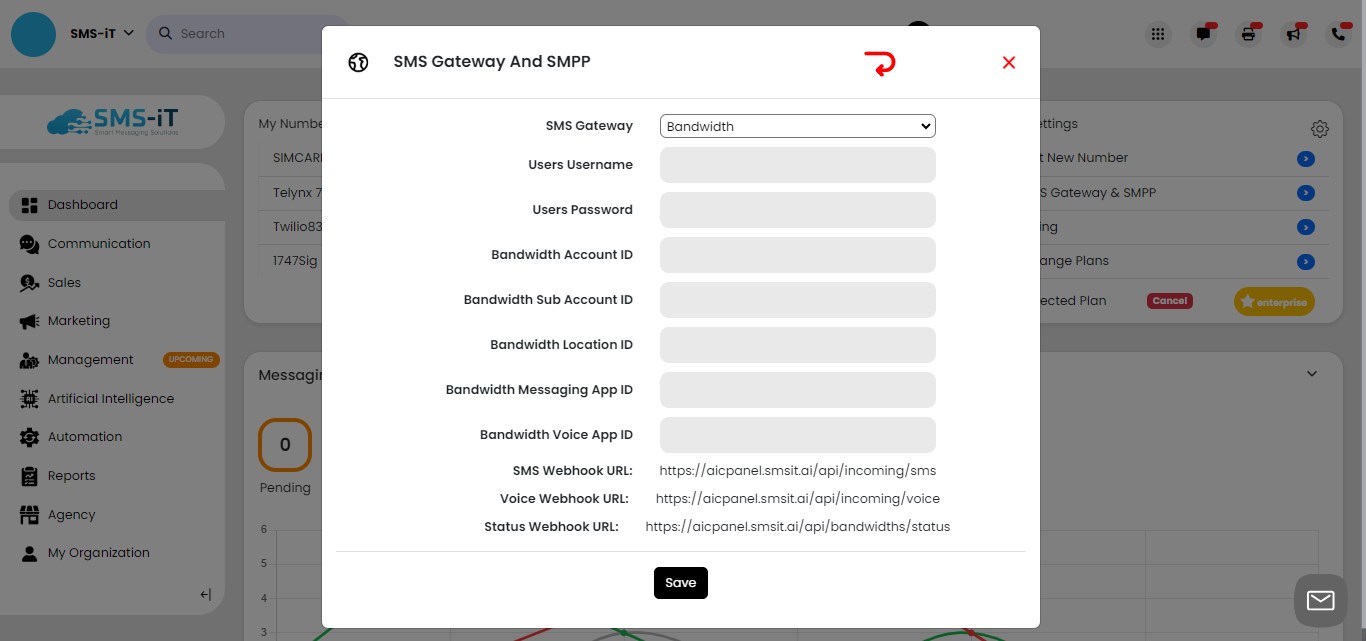
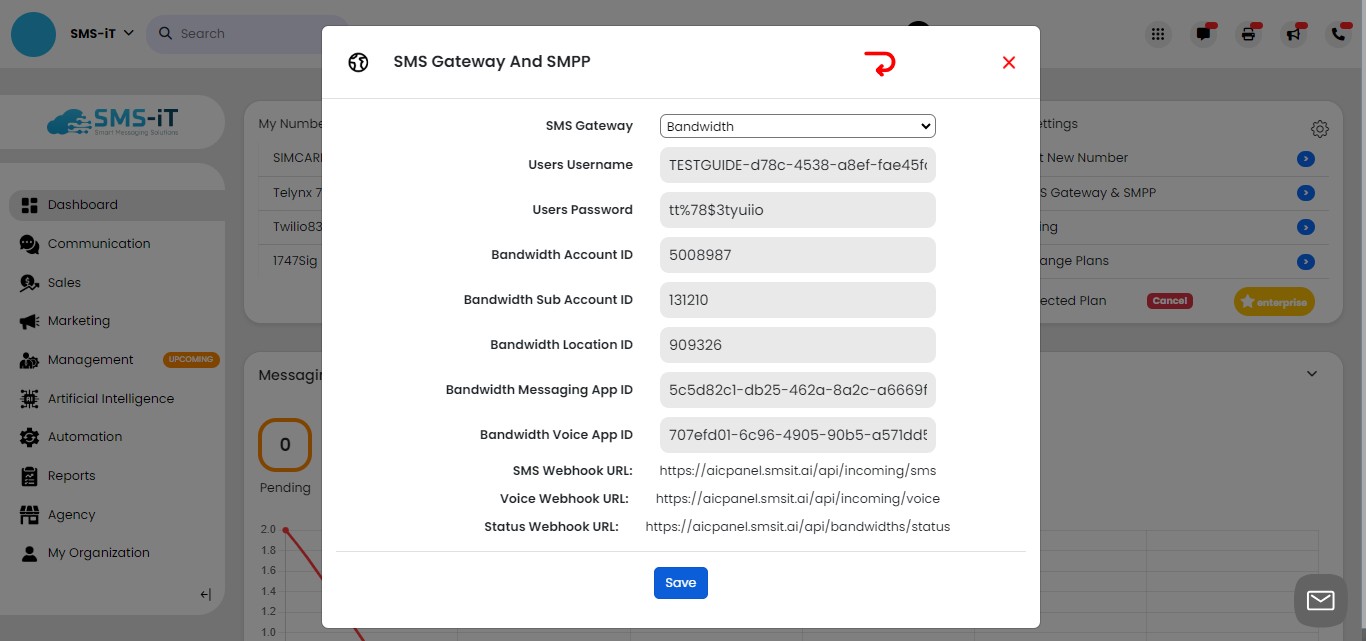
Create Username and Password
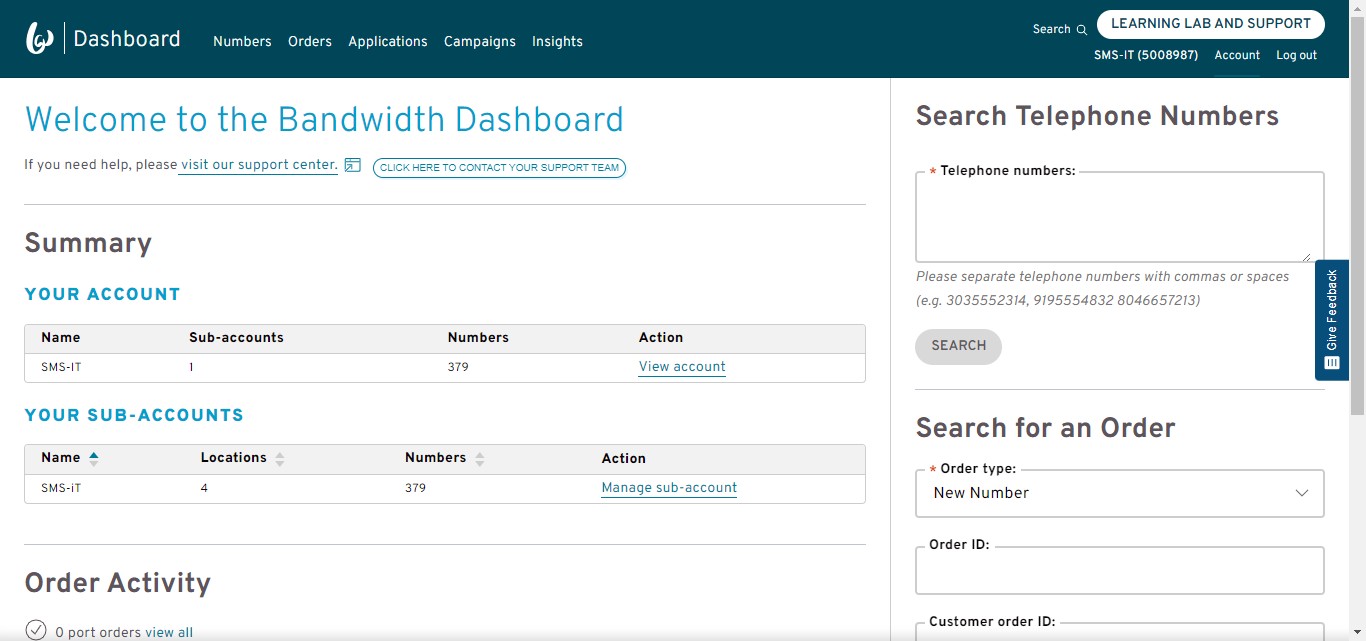
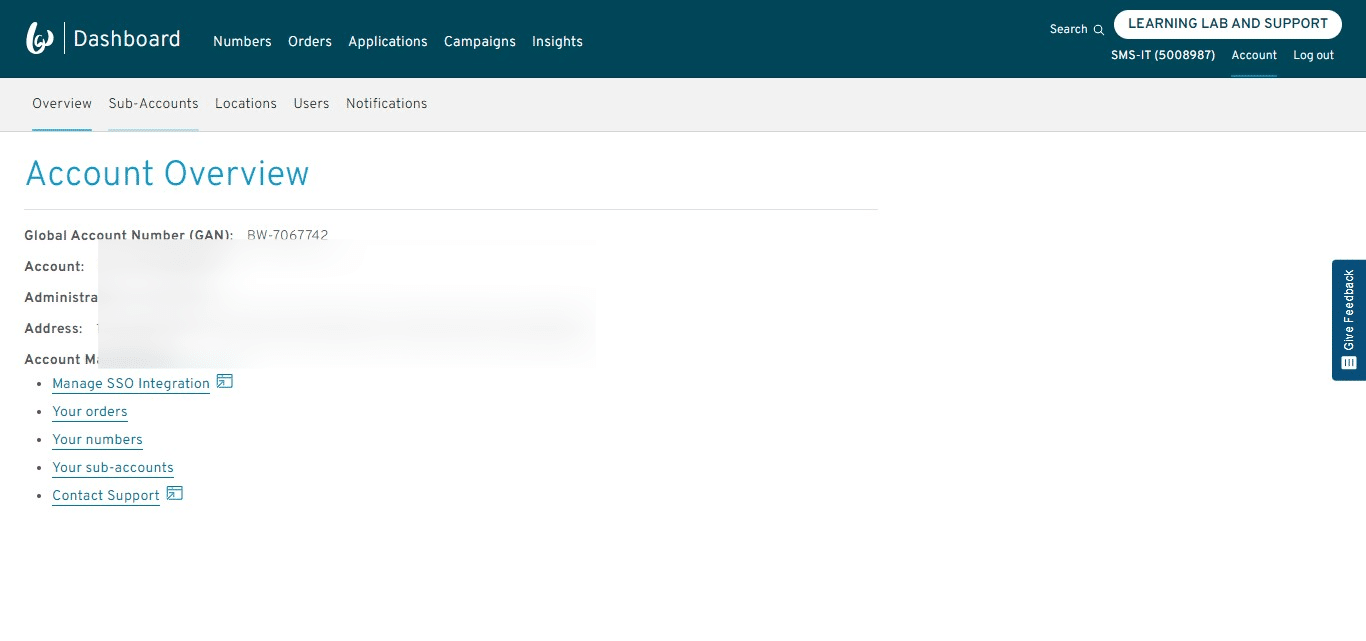
Click on "Account"
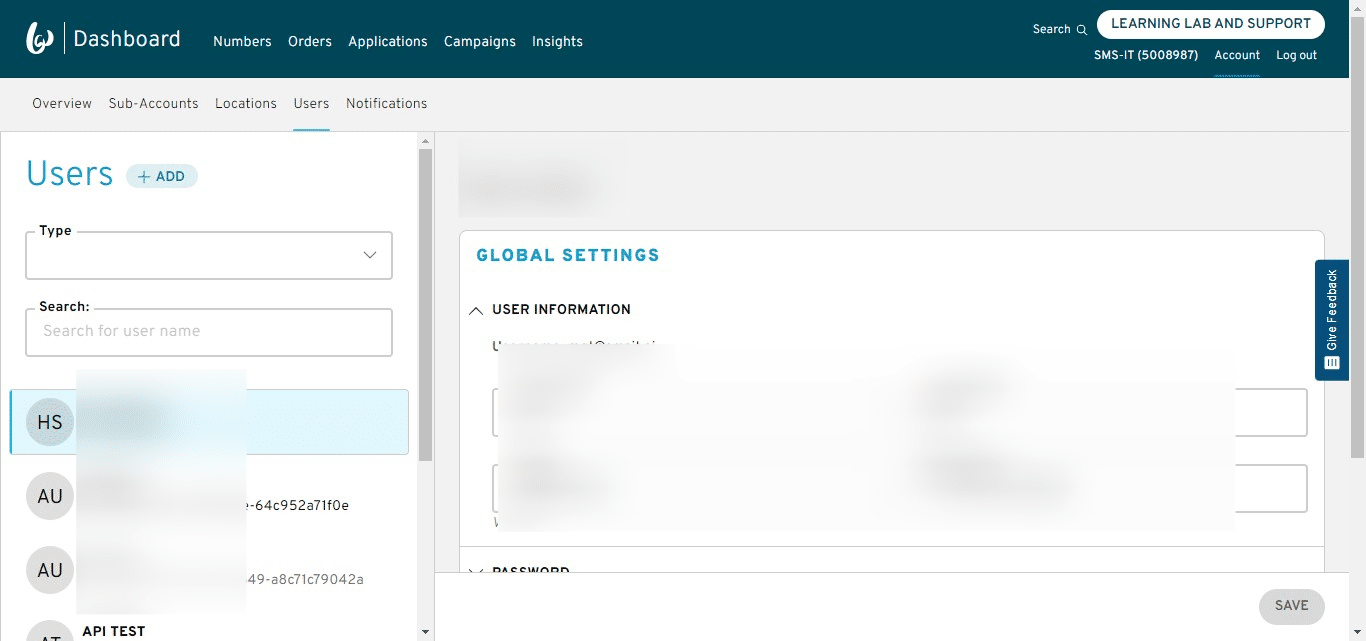
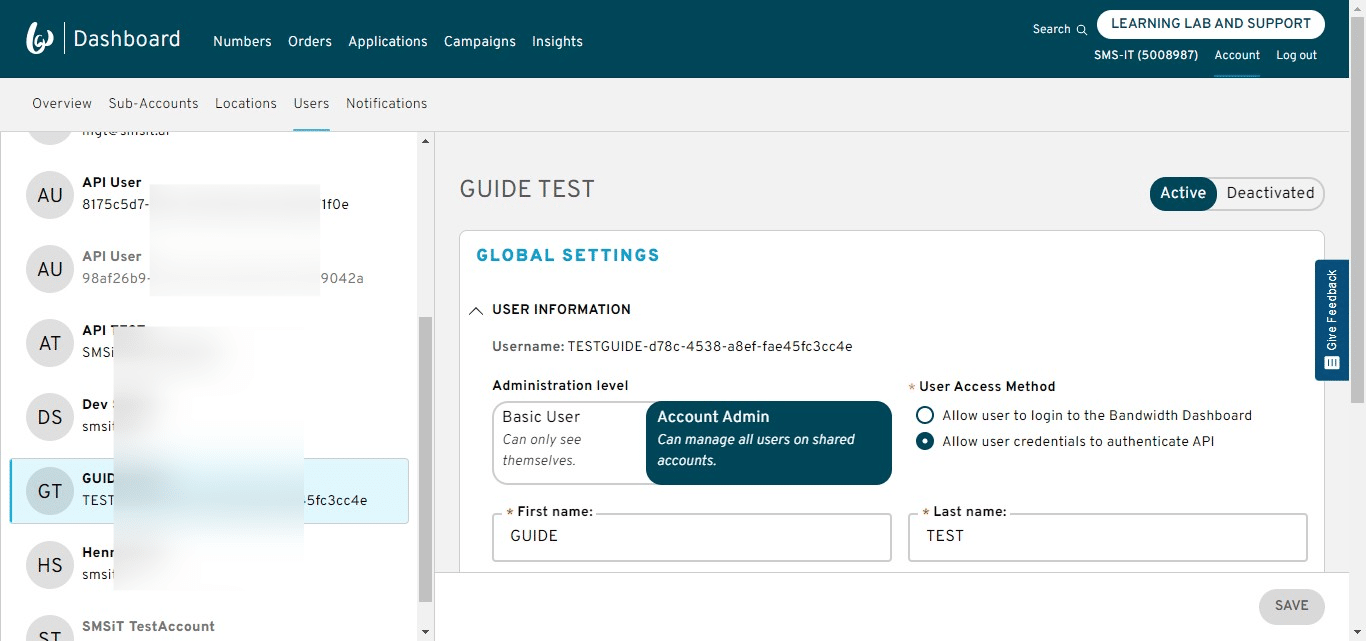
Click on "Users"

Click this icon
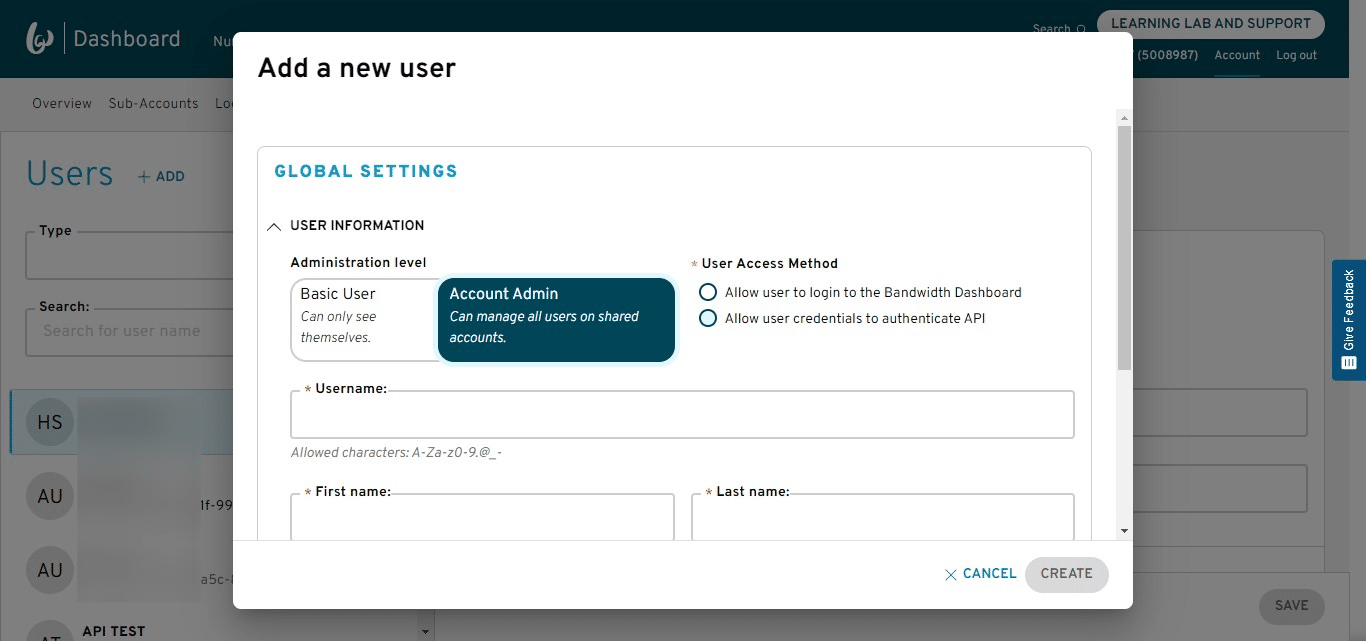
Select "Account Admin"
Select "Allow user credentials to authenticate API"
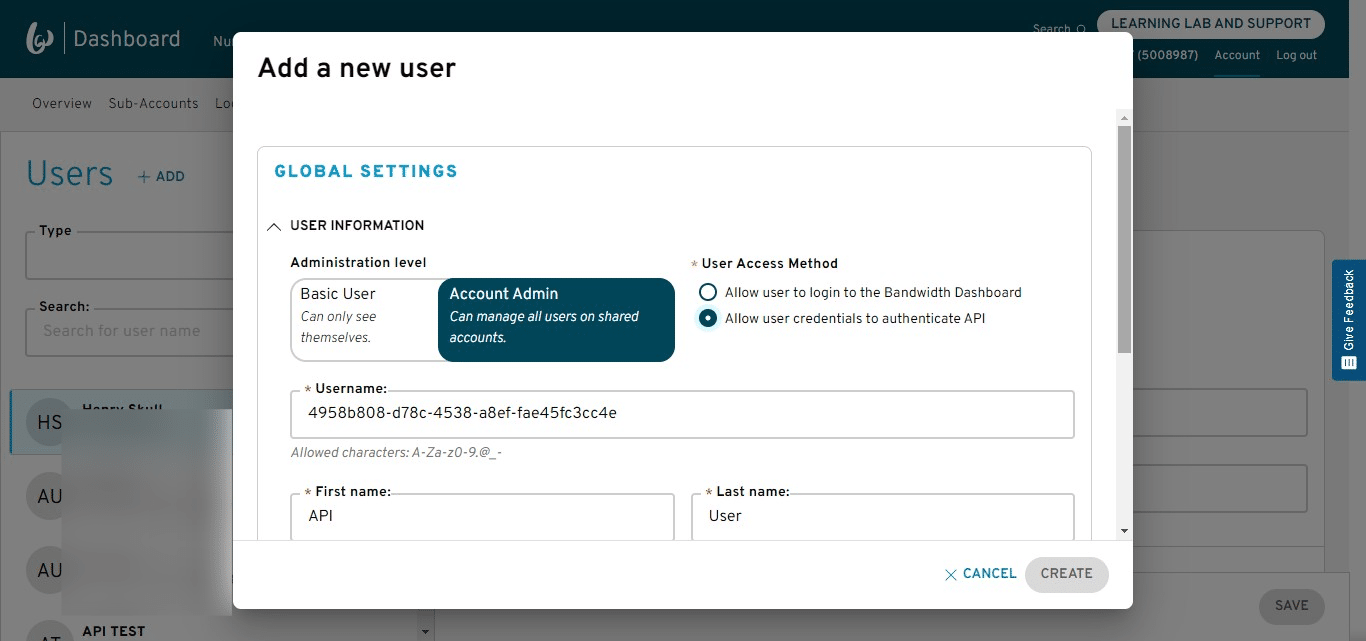
Create a Username and Copy
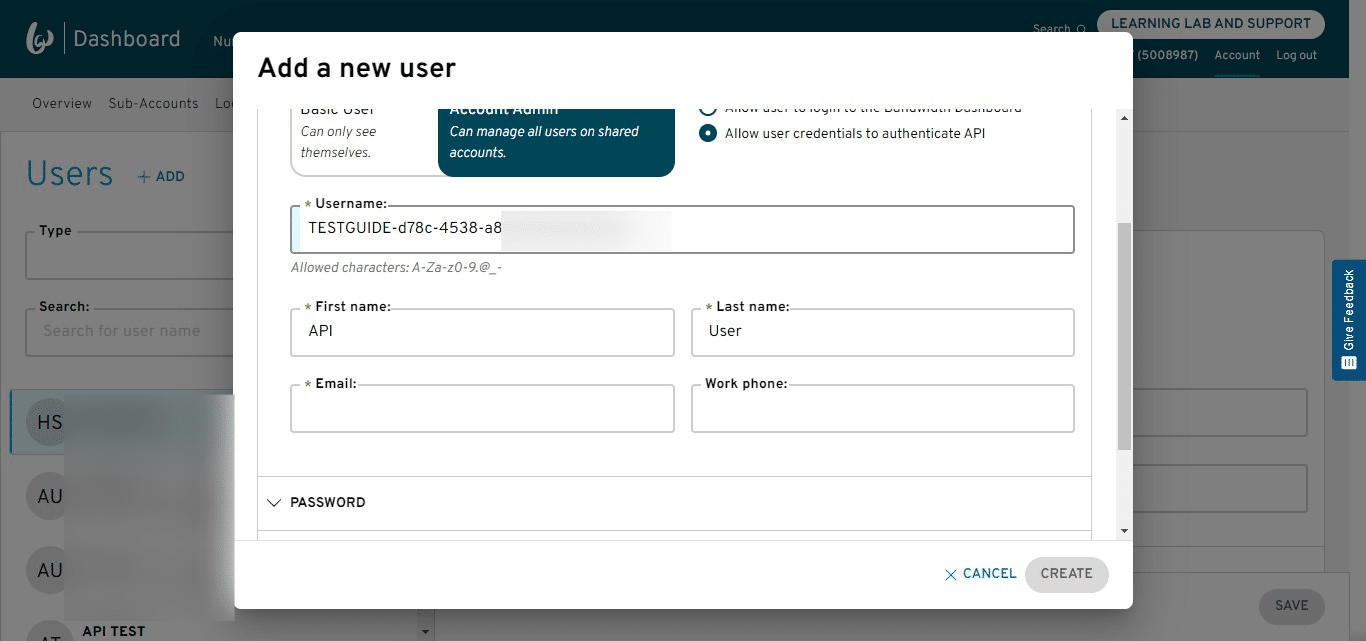
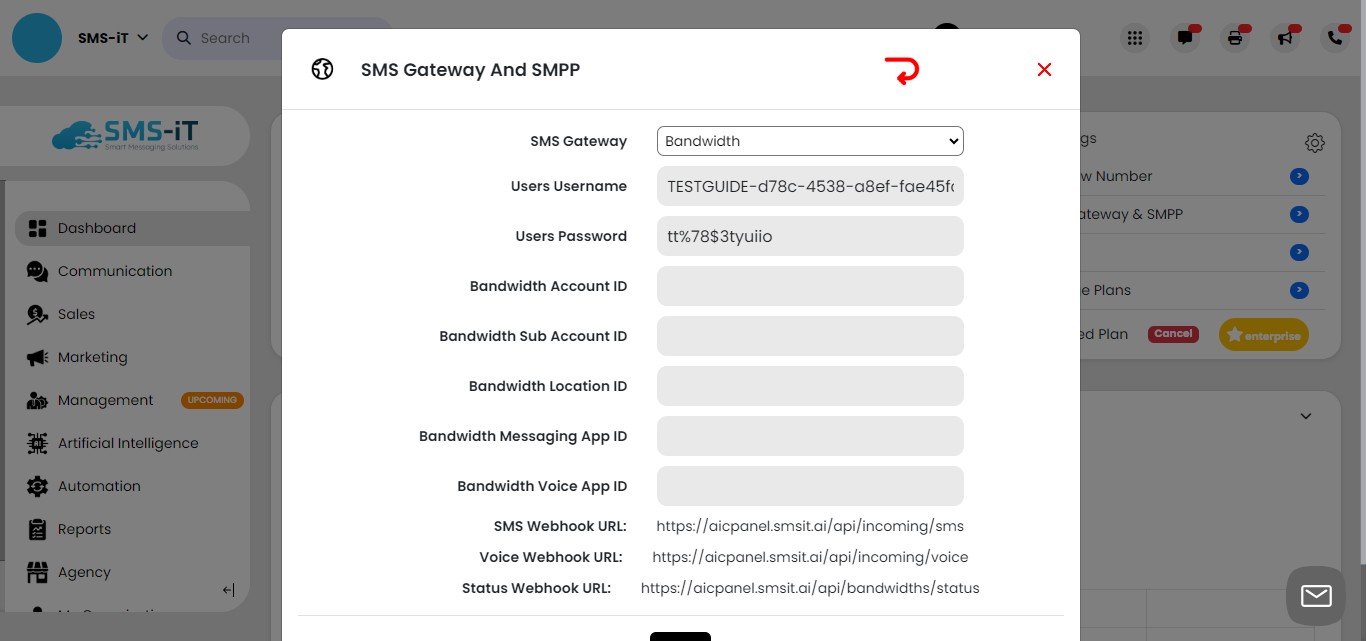
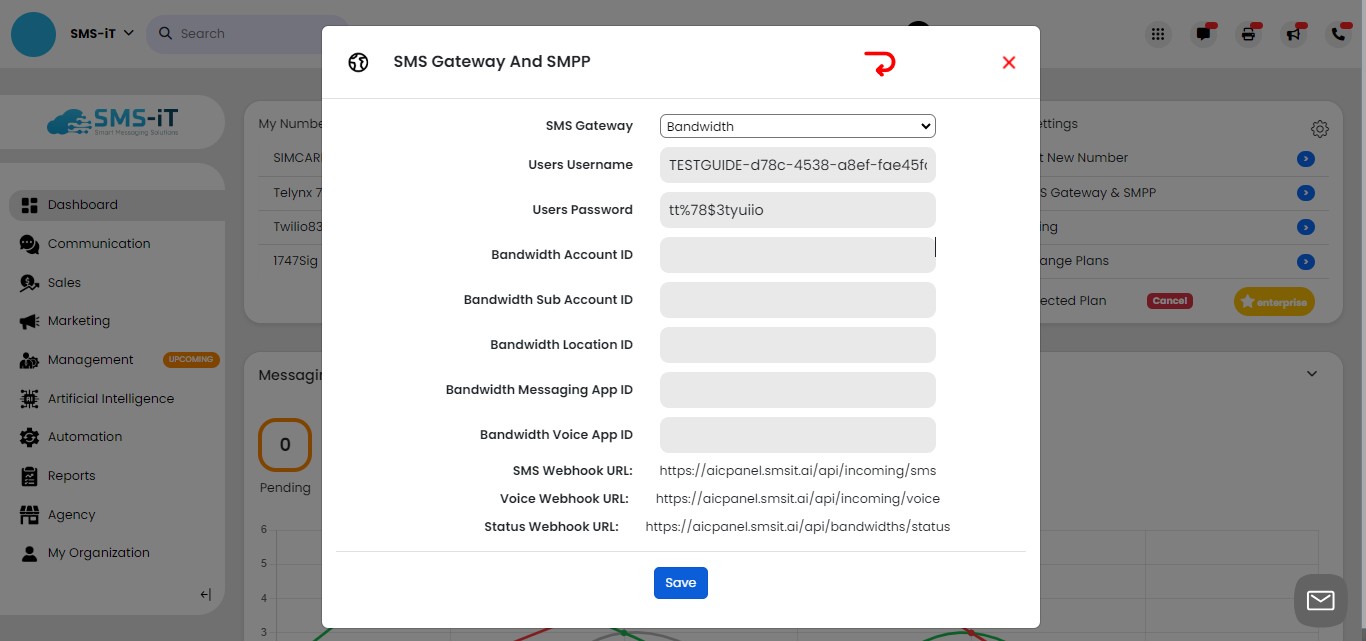
Paste into "Users Username"
Create a First/Last Name
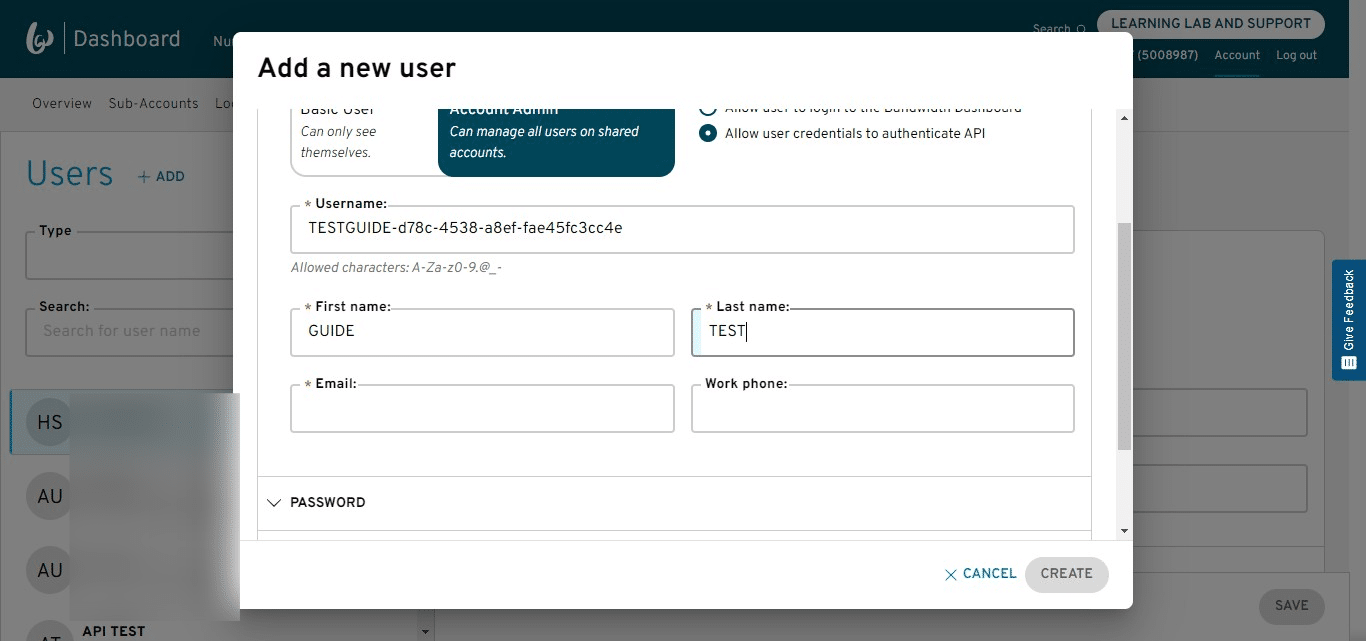
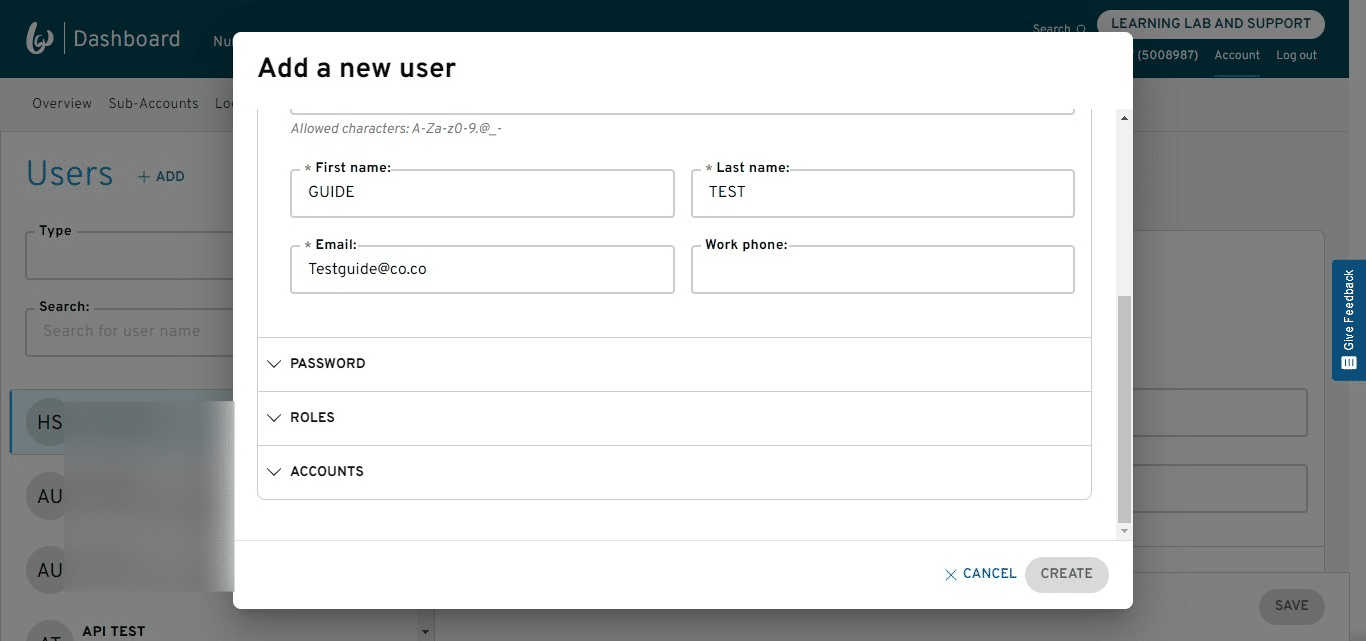
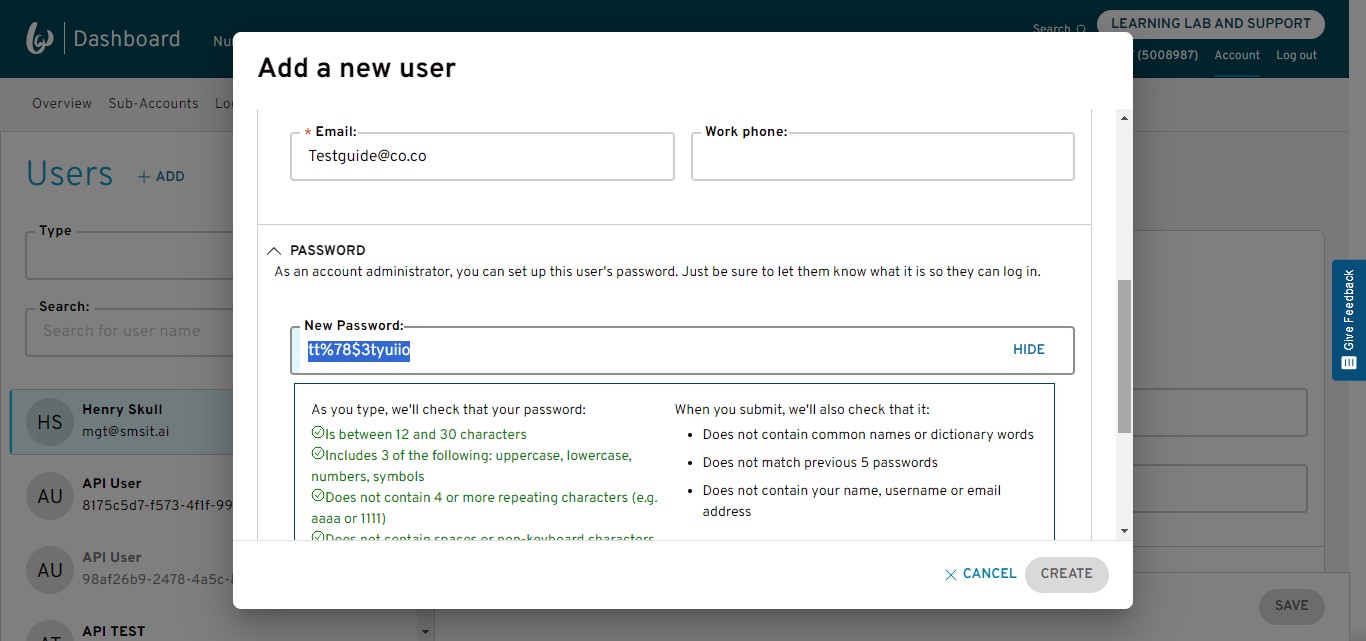
Enter an "Email" (It does not have to be an email that will be verified, so you can make one up).

Click on "Password"
Create a "New Password"
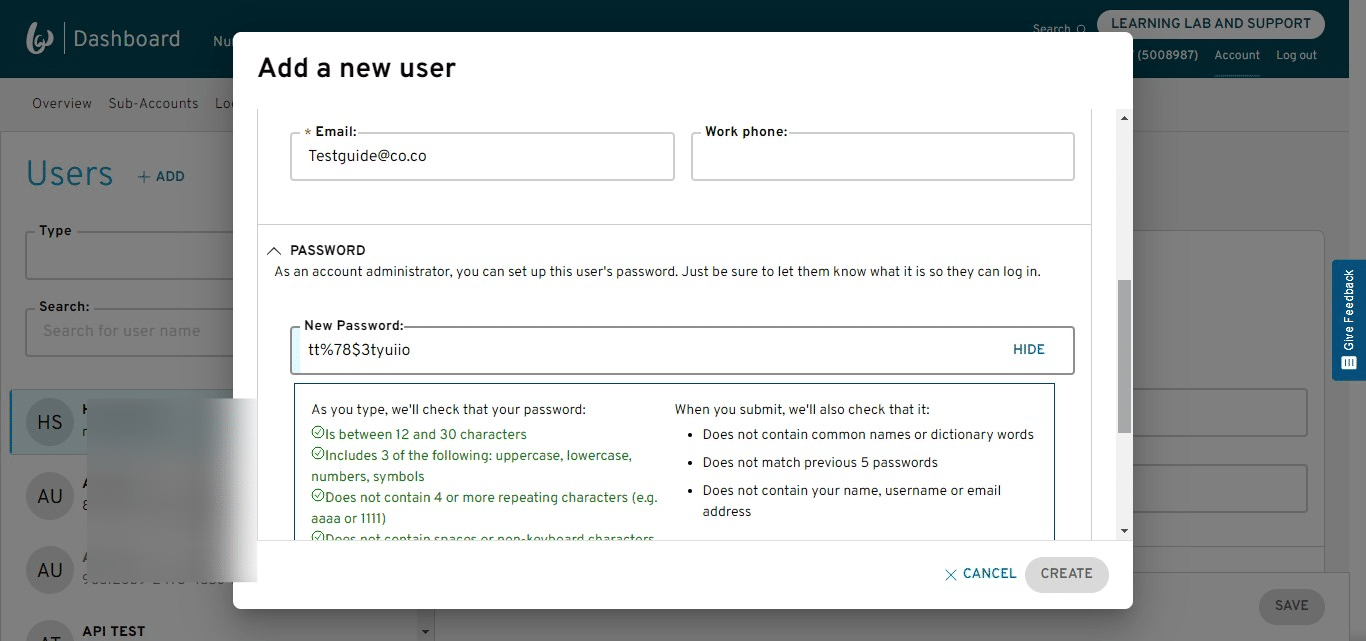
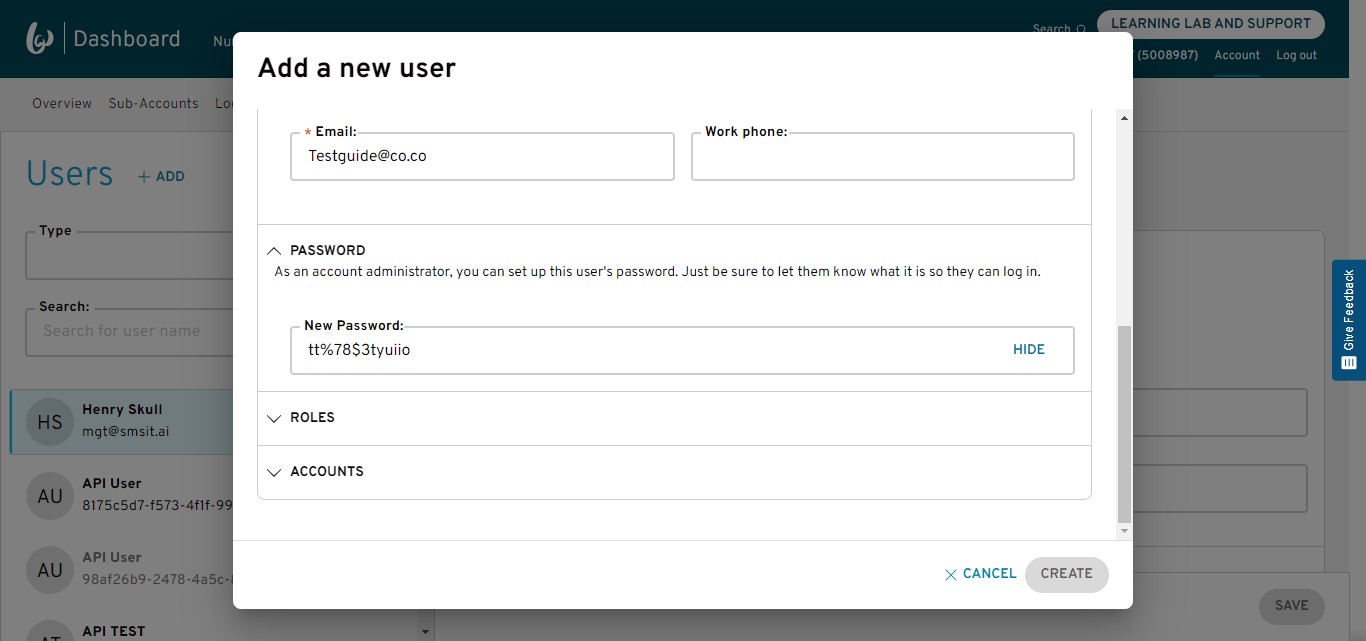
Copy your "New "Password"
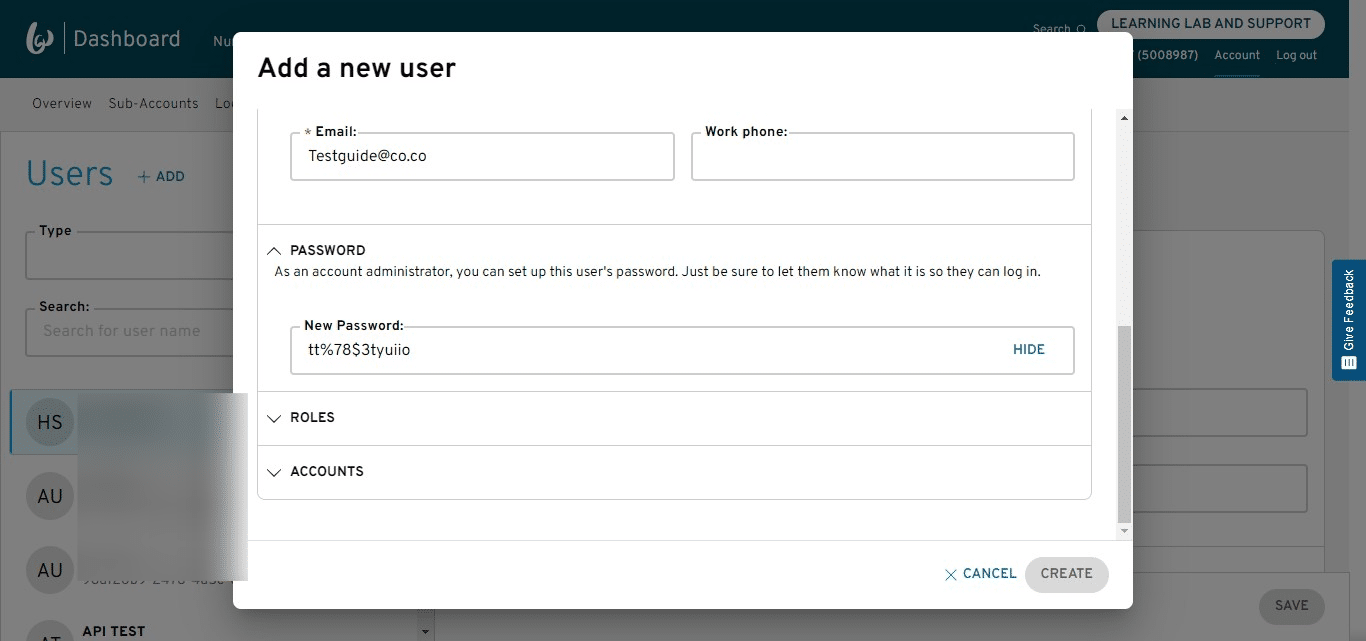
Paste into "User Password"
Click on "Save"
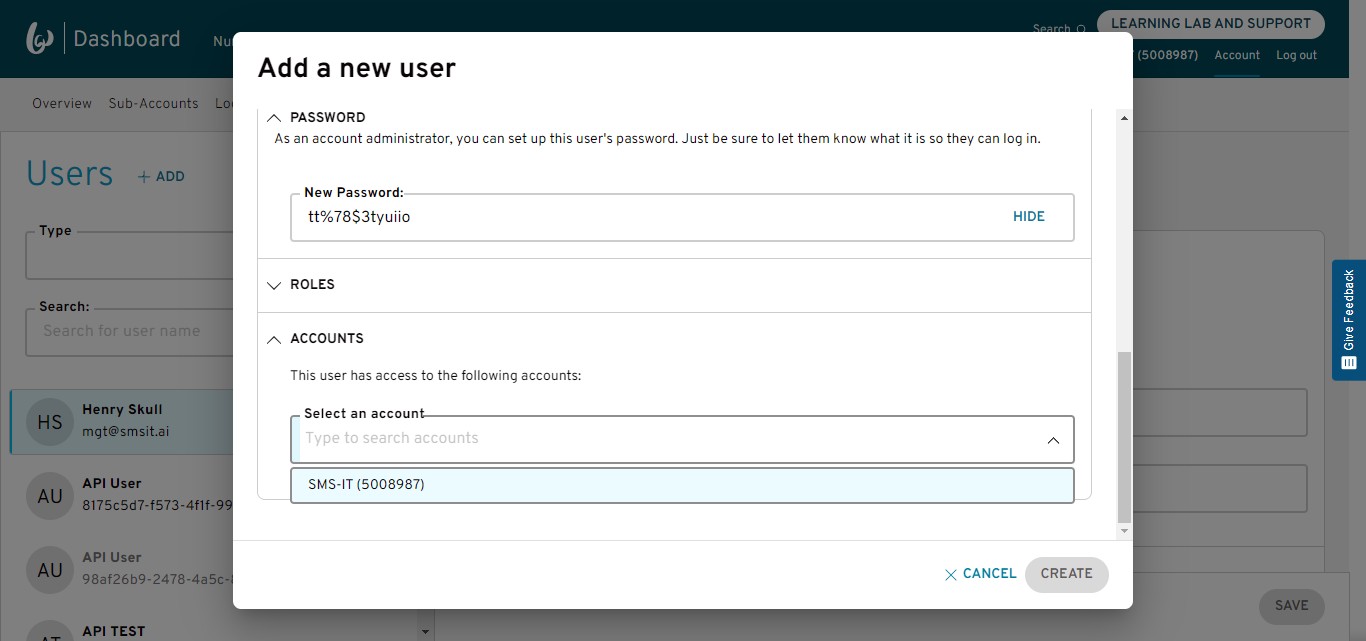
Scroll down.
Click on "Accounts"
Select your main account.
Click on "Create"
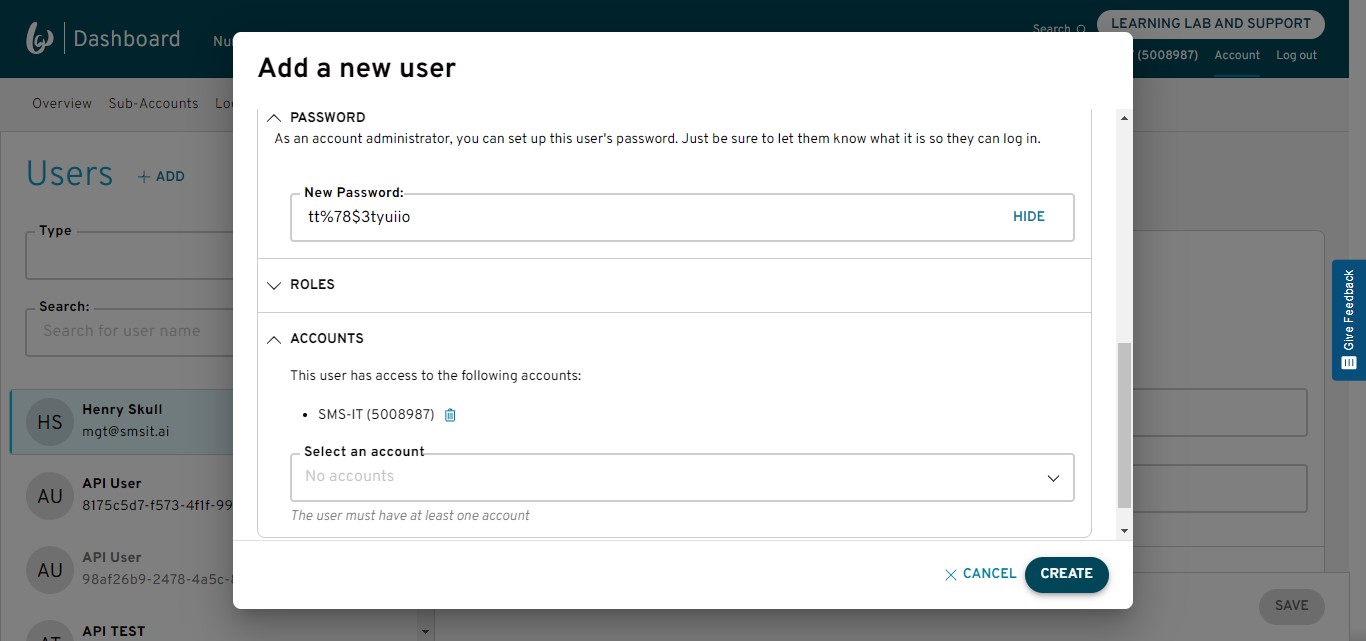
The user has been created in this example "Guide Test"

Add Bandwidth Account ID
Click on "Account"
Copy account
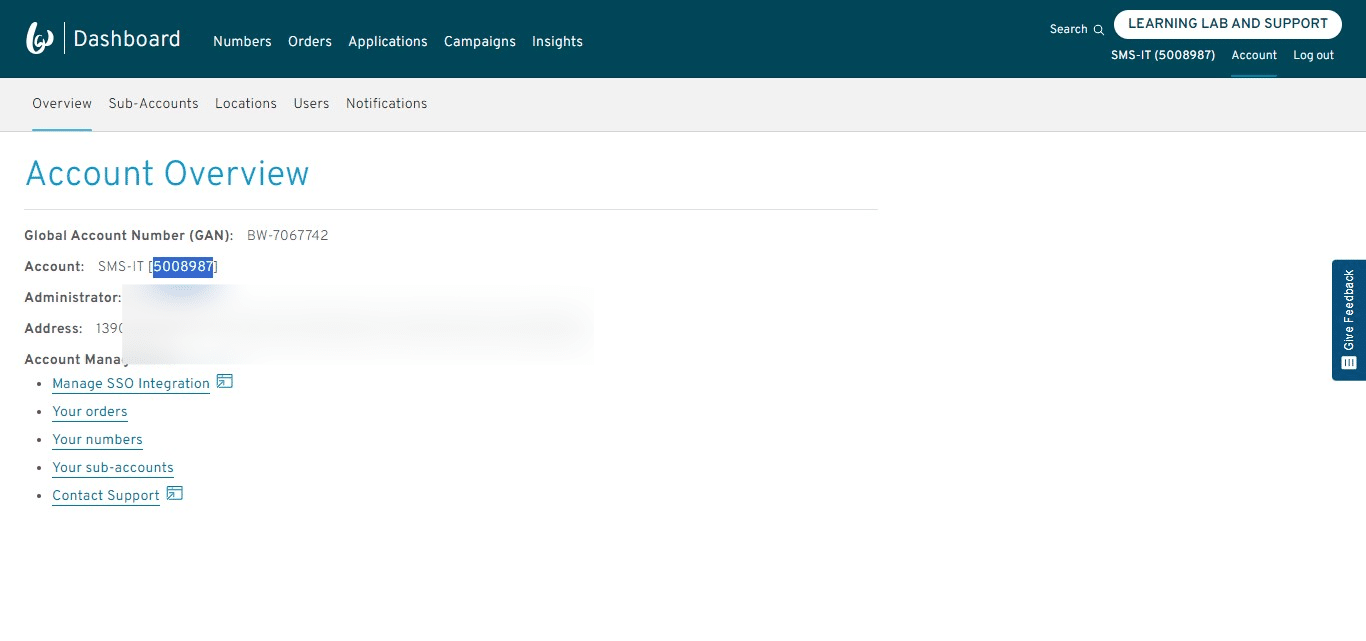
Paste into "Bandwidth Account ID"
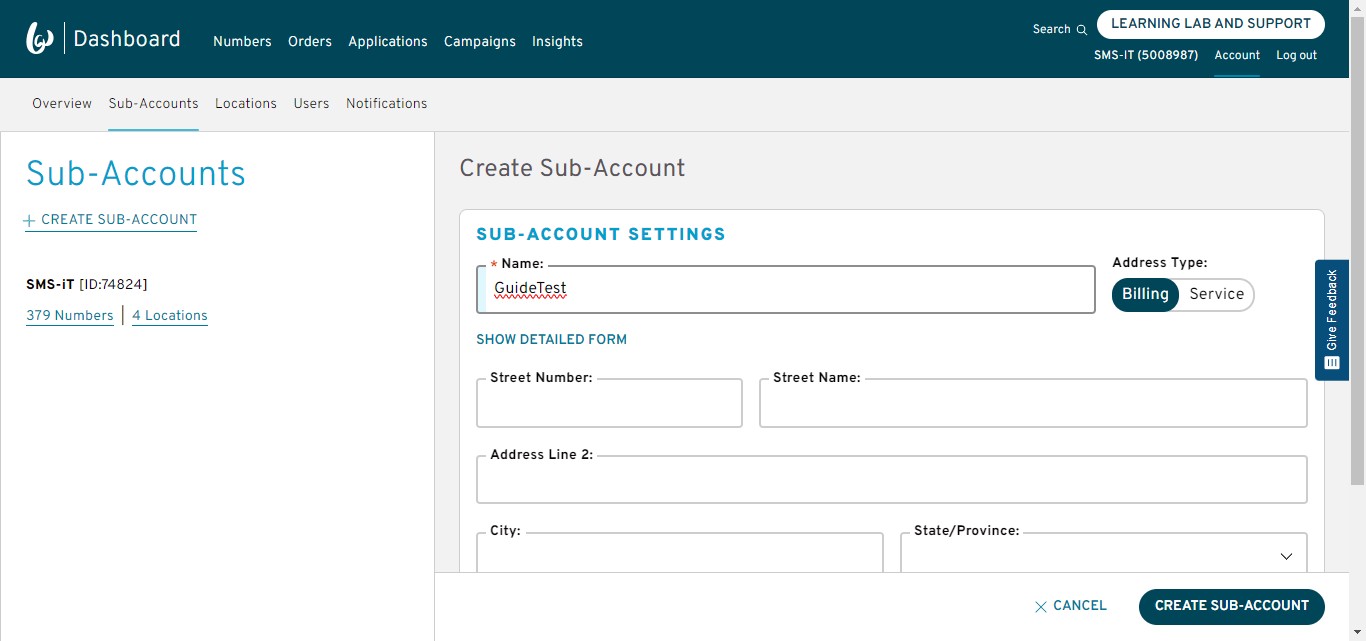
Create Sub Account
Click on "Sub-Accounts"
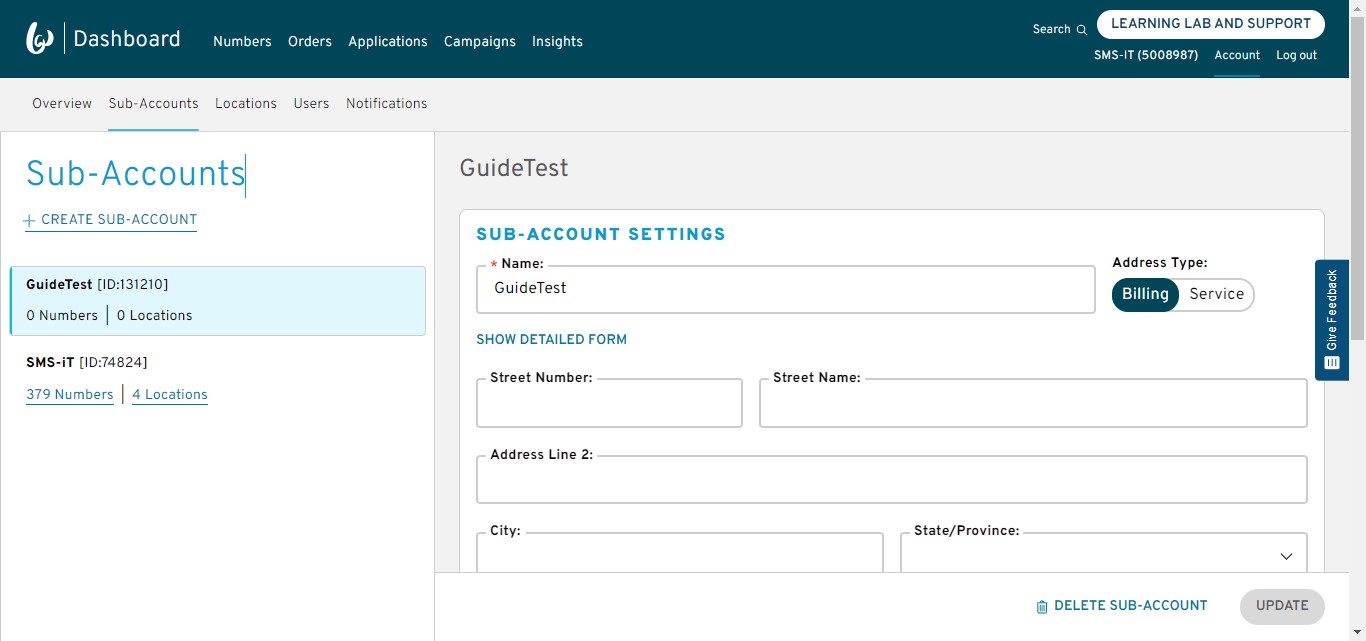
Name your sub-account and click on "Create Sub-Account"
Manually copy your new sub-account ID numbers to a notepad. Note: You won't be able to drag and copy them.
Paste into "Bandwidth Sub Account ID"

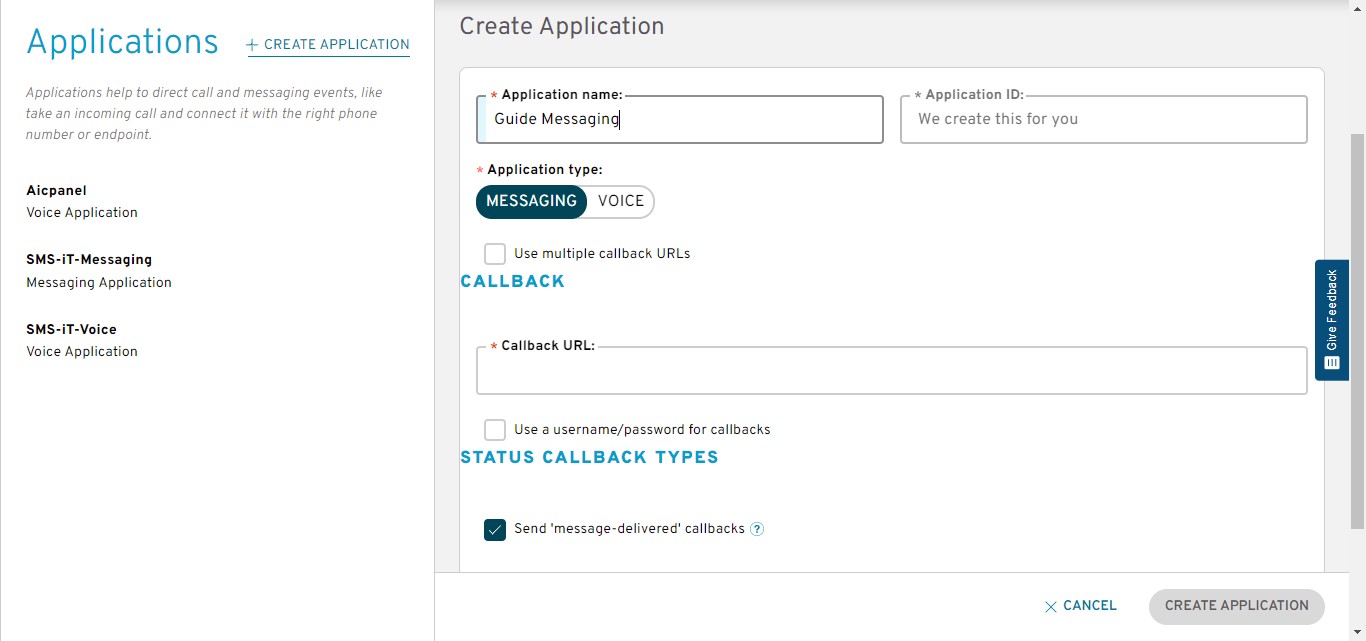
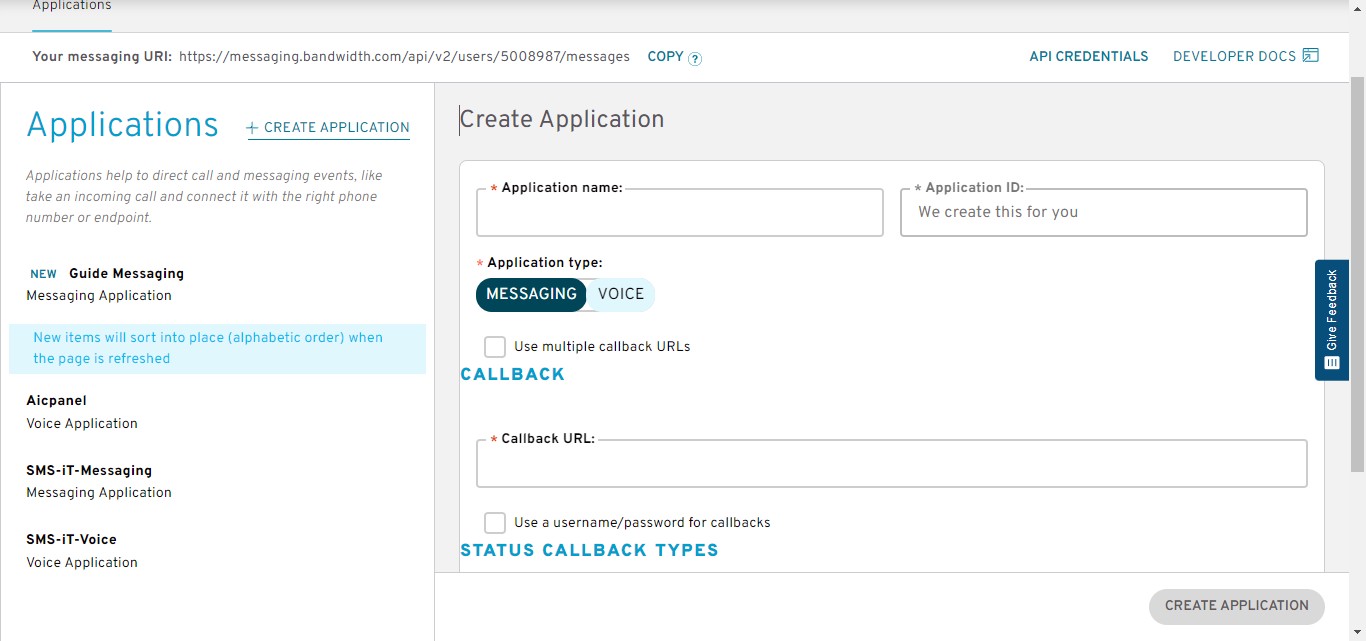
Create Messaging Application
Click on "Applications"
Choose Messaging and name your application. (Default is Messaging so you should be on Messaging)

Check "Use multiple callback URLs"
Copy the "SMS Webhook URL:"
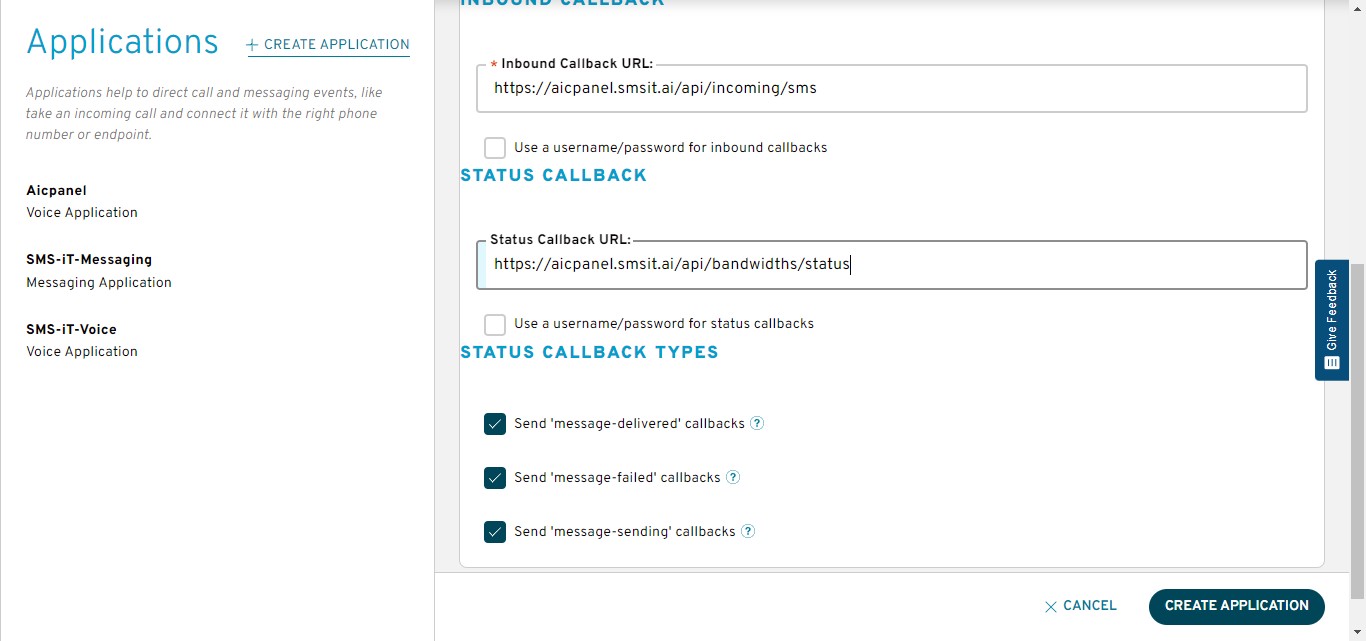
Paste into "Inbound Callback URL"
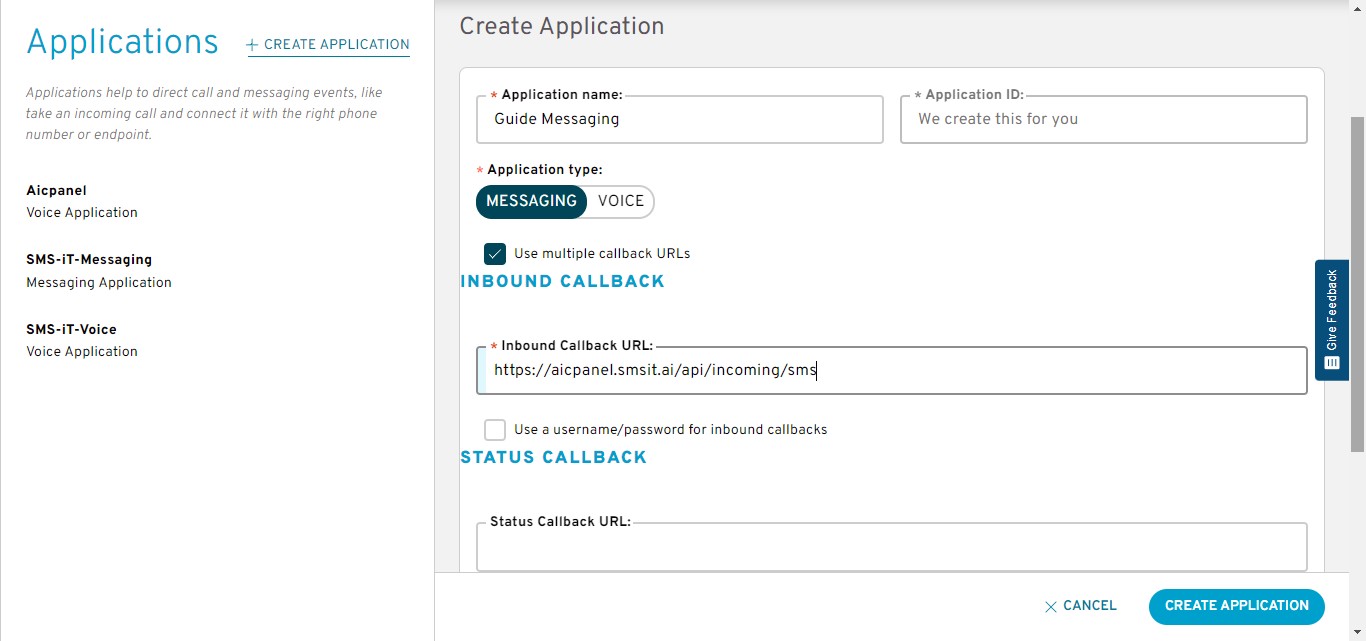
Copy "Status Webhook URL"
Paste into "Status Callback URL"
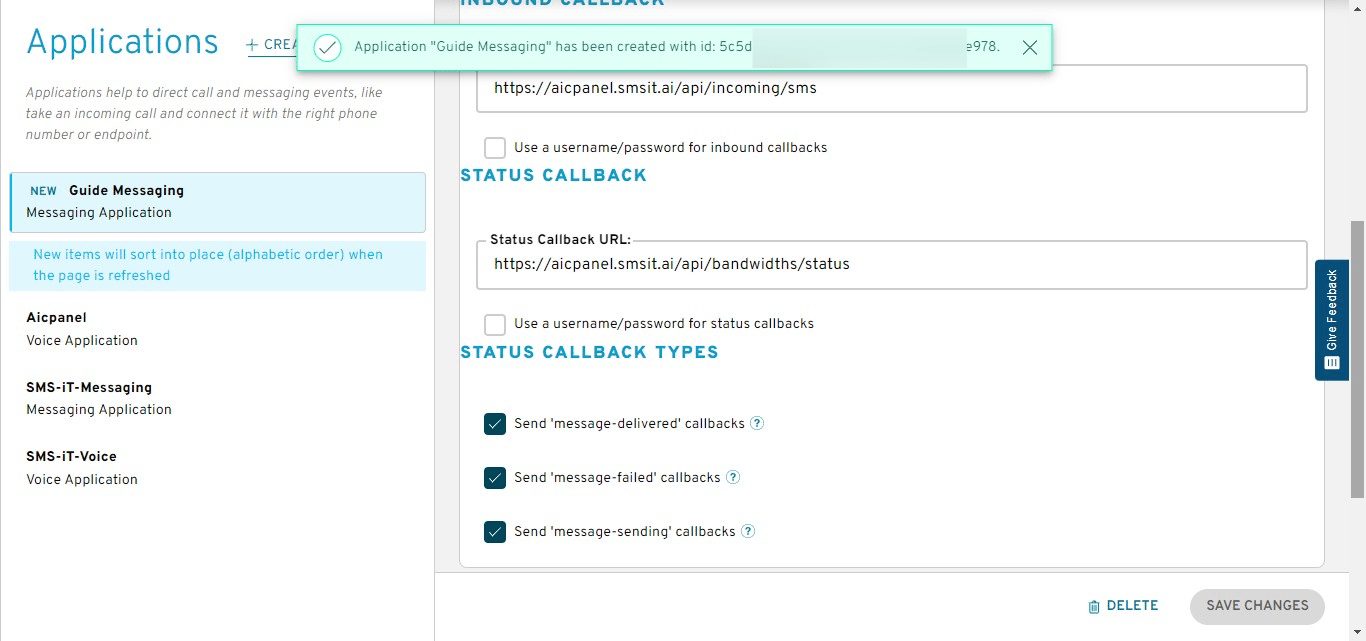
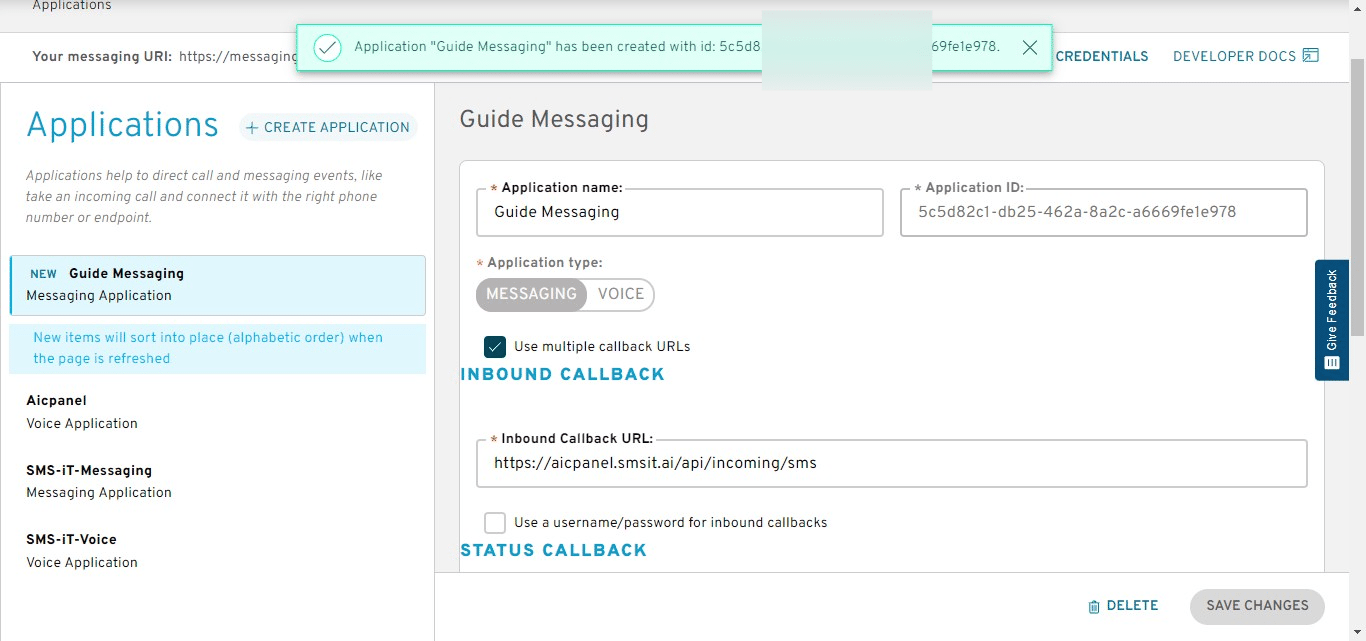
Click on "Create Application"
Click on your new messaging application, in this example it's "Guide Messaging"
Copy "Application ID"
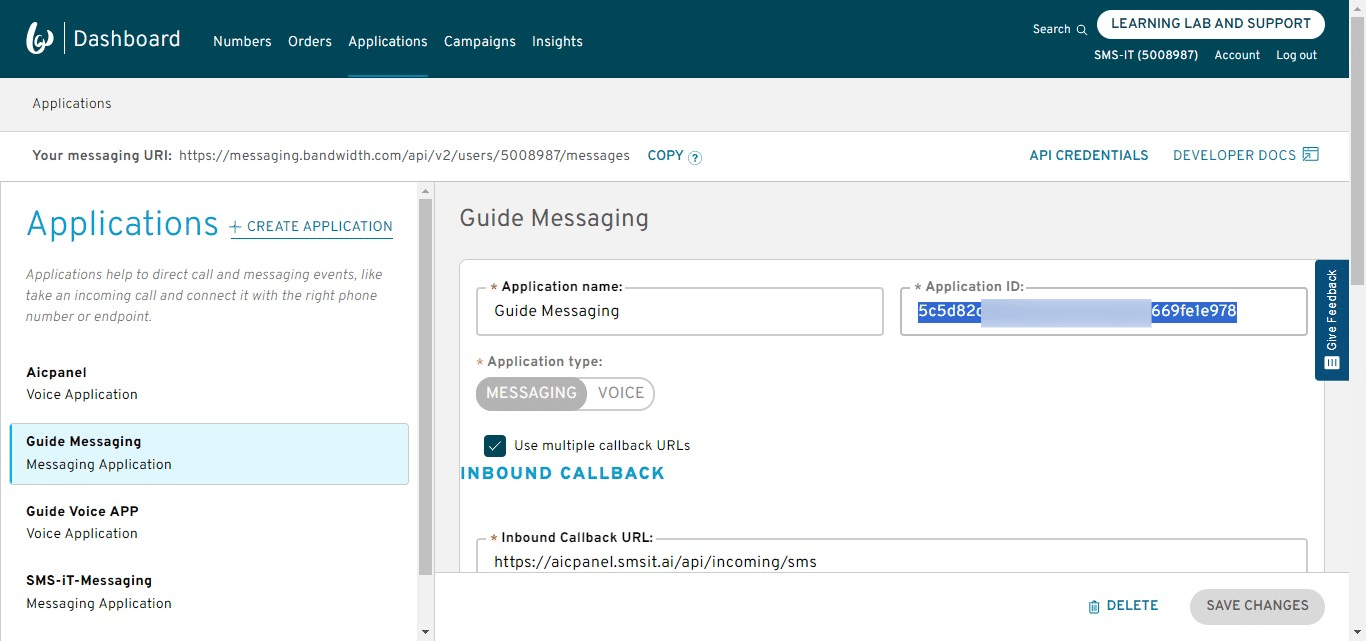
Paste into Bandwidth Messaging App ID
Create Voice Application
Click on "Create Application"
Click on "Voice"
Voice
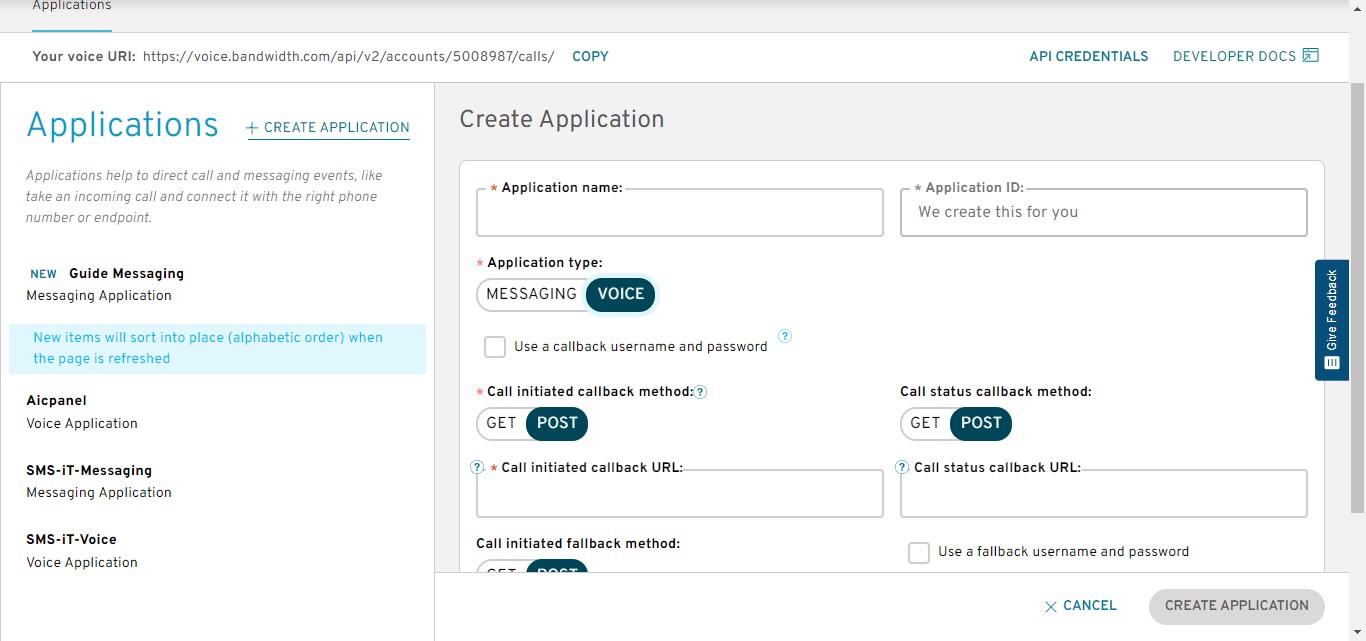
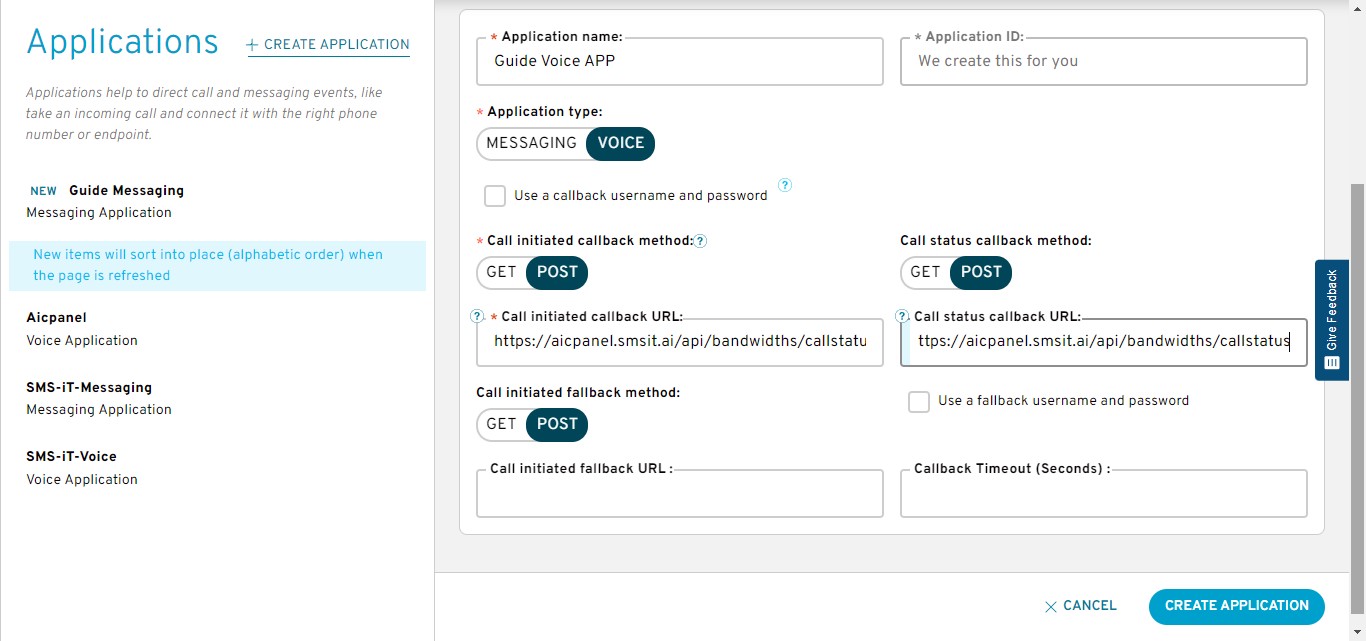
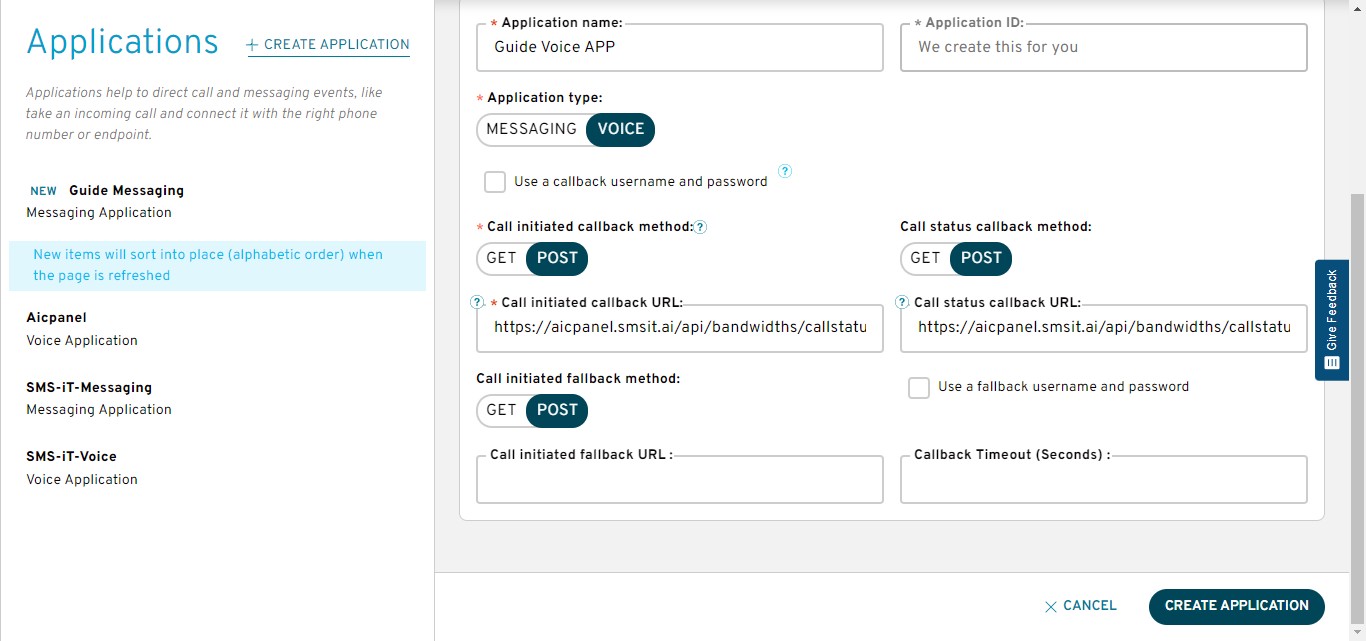
Name your voice application.

Paste: https://aicpanel.smsit.ai/api/bandwidths/callstatus into "Call initiated callback URL

Paste: https://aicpanel.smsit.ai/api/bandwidths/callstatus into "Call status callback URL (Call initiated and status use the same URL)
Click on "Create Application"
Click on your new Voice Application
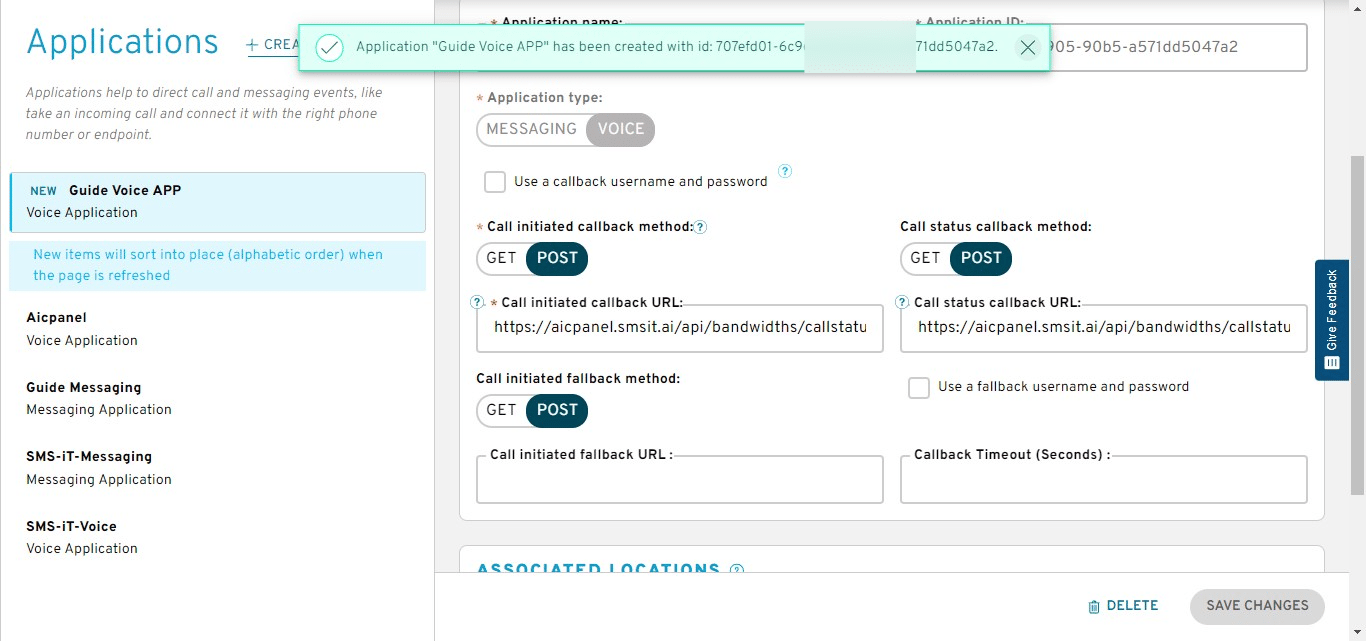
Copy "Application ID"
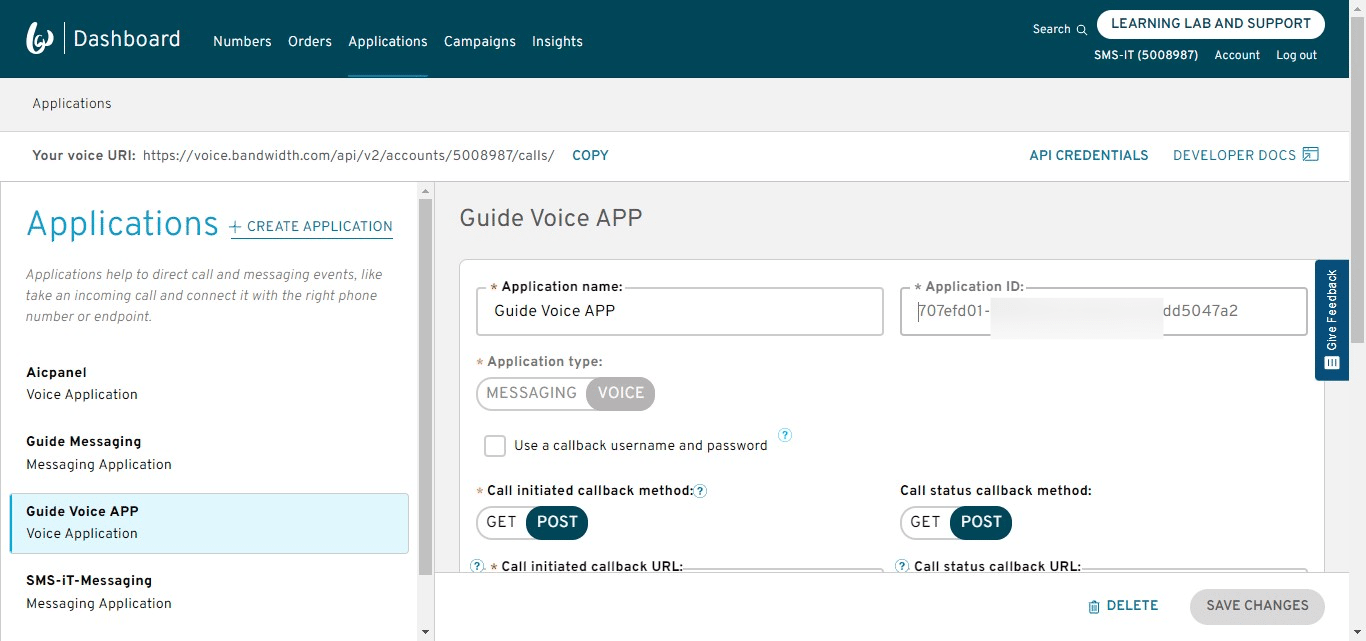
Paste into "Bandwidth Voice App ID"

Click on "Save"
Saved.

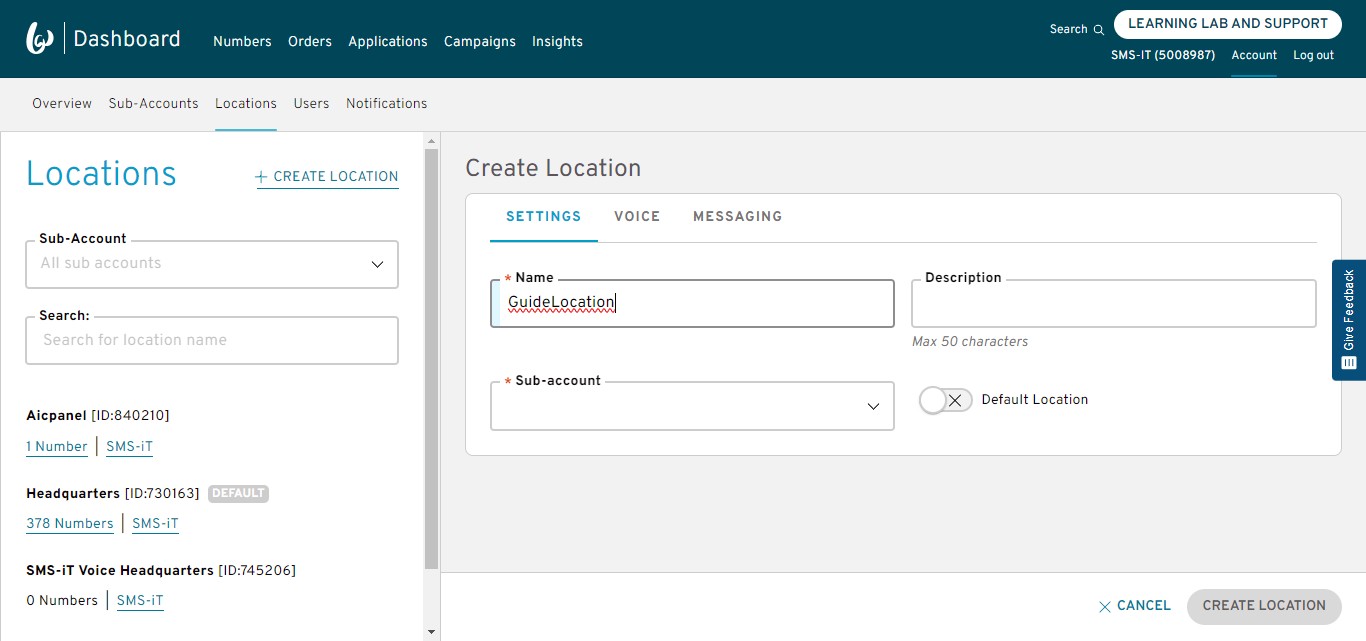
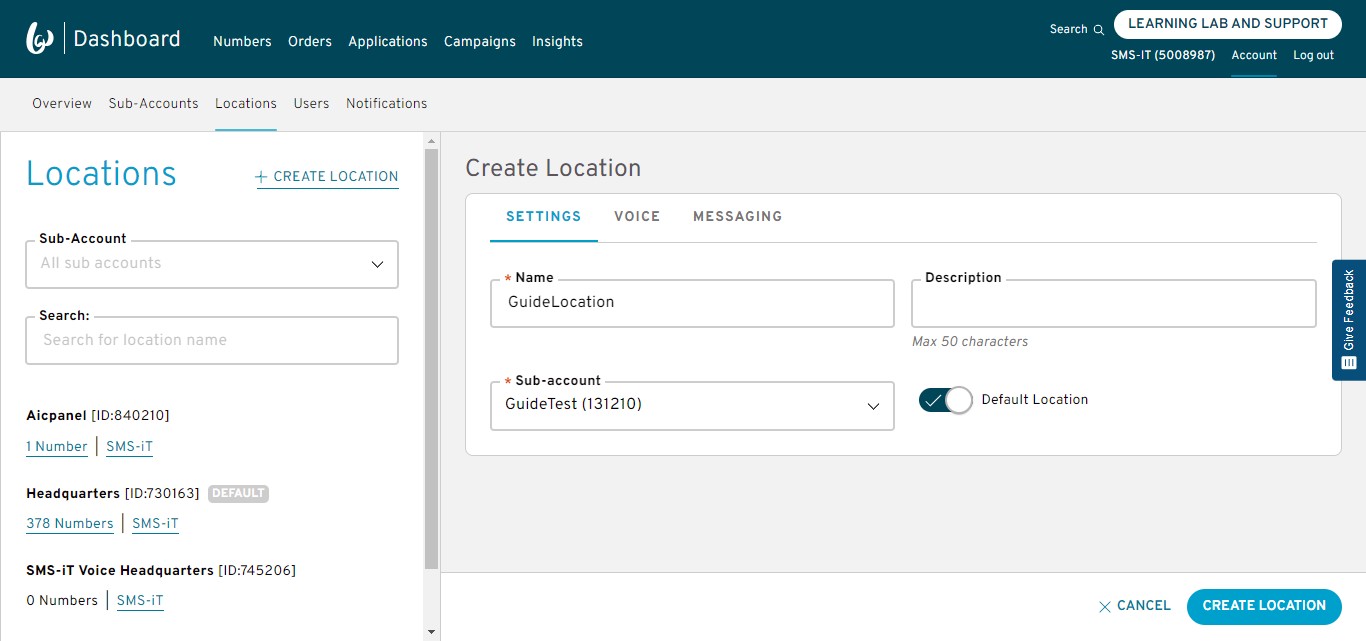
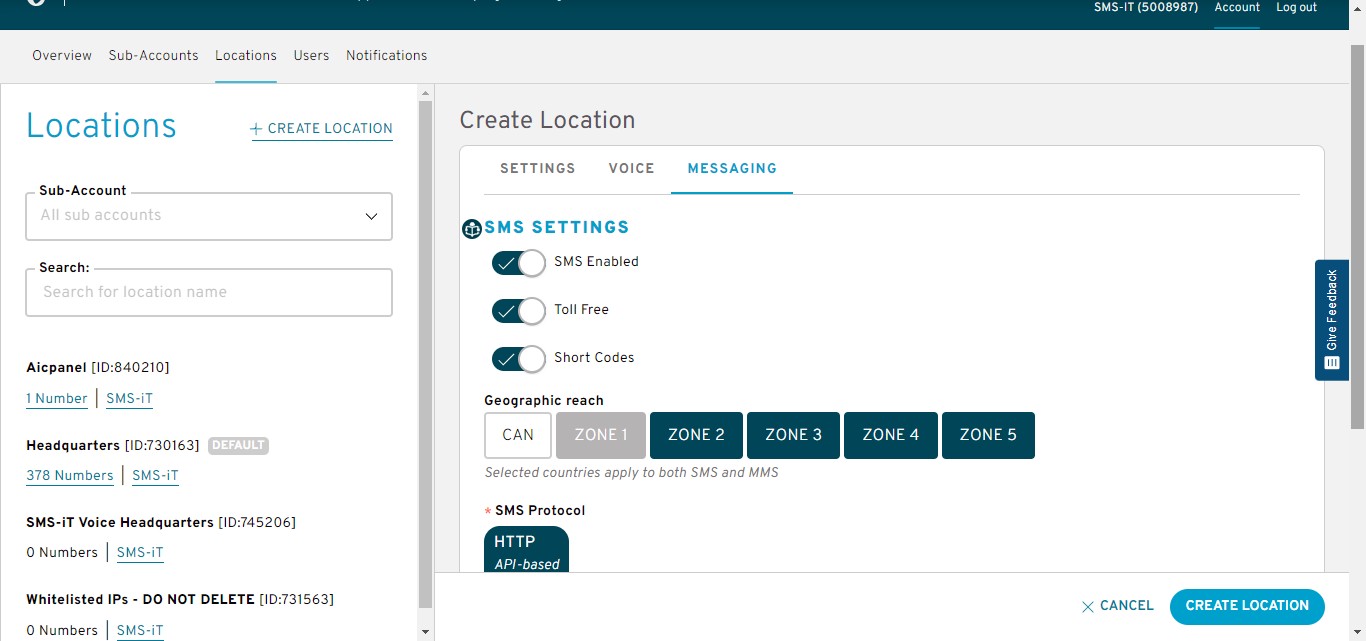
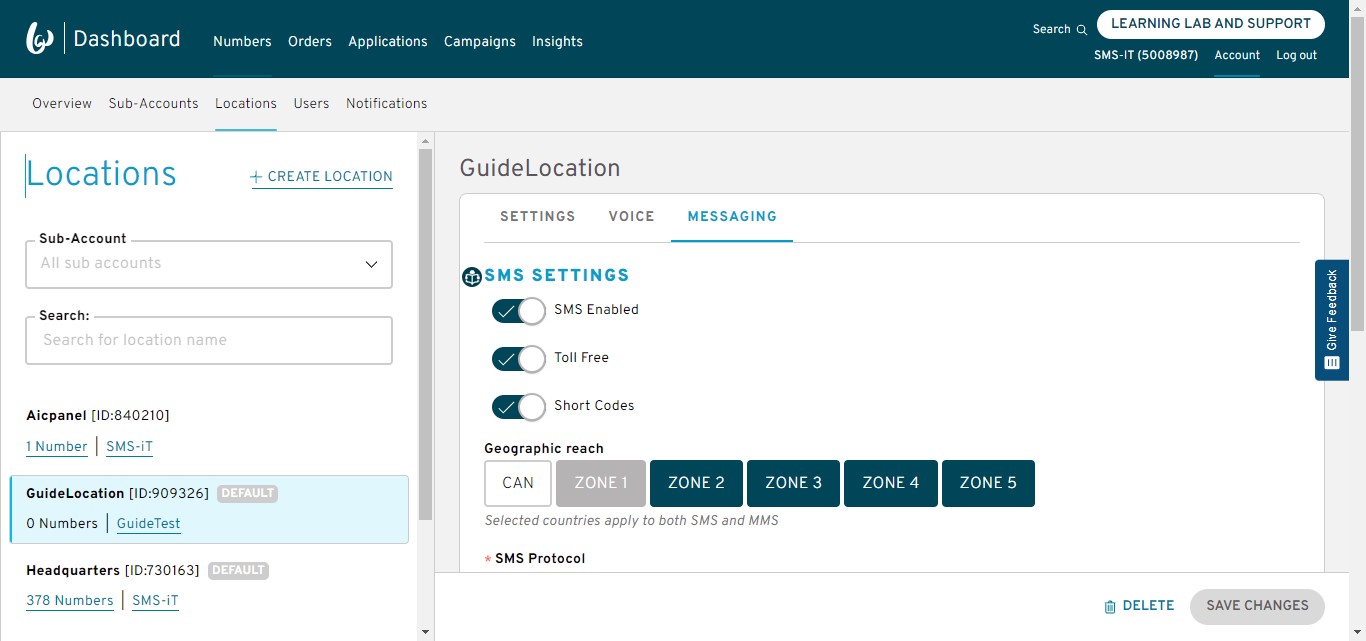
Add Location
Click on "Account"

Click on "Locations"

Name Location
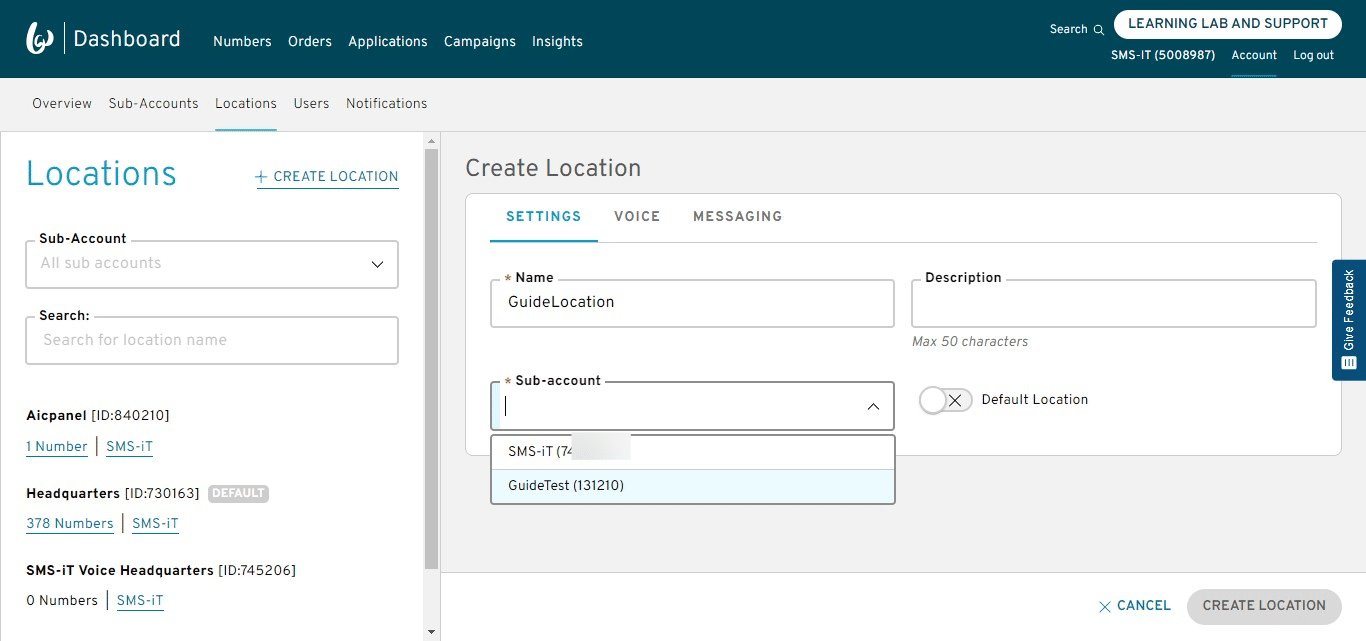
For Sub-Account use the sub-account you created. In this example we created GuideTest
Select Default Location to "ON"
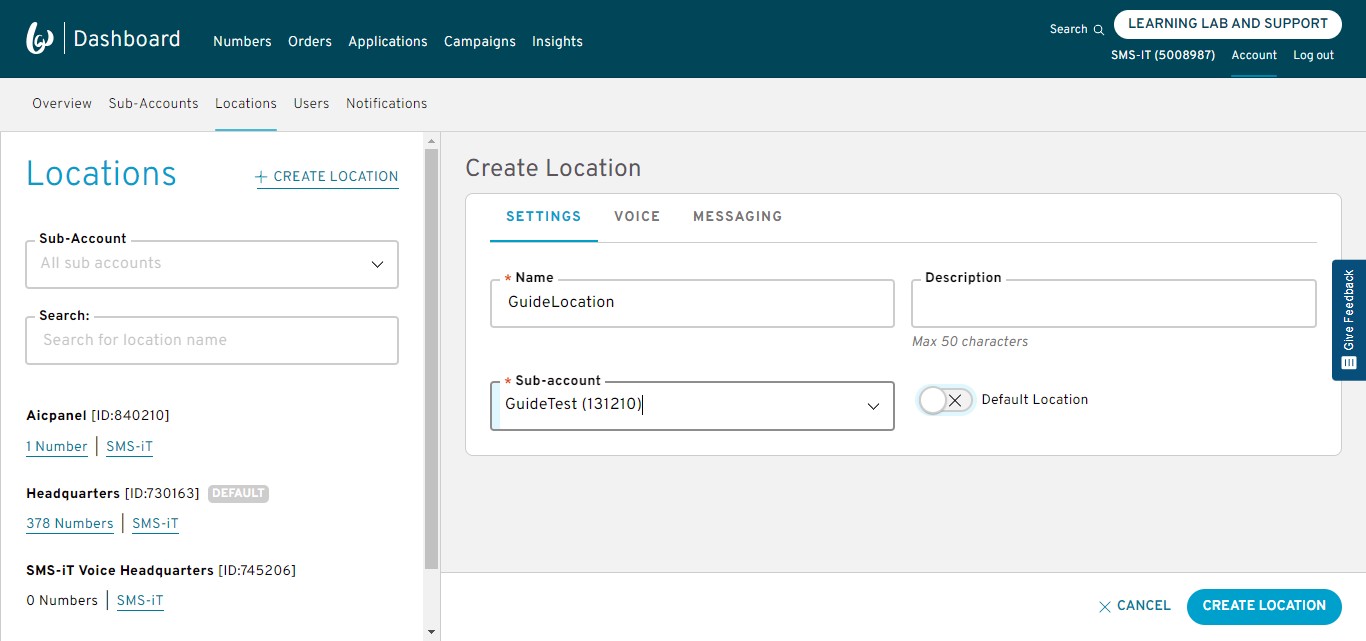
Default "ON"
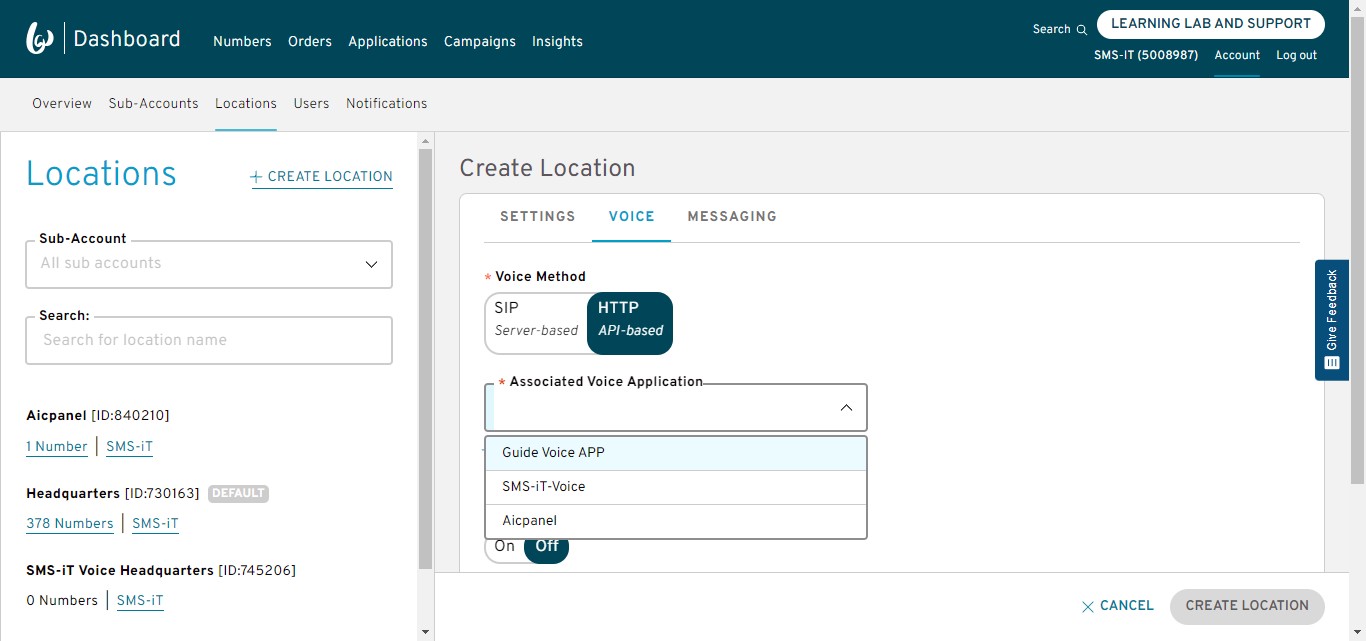
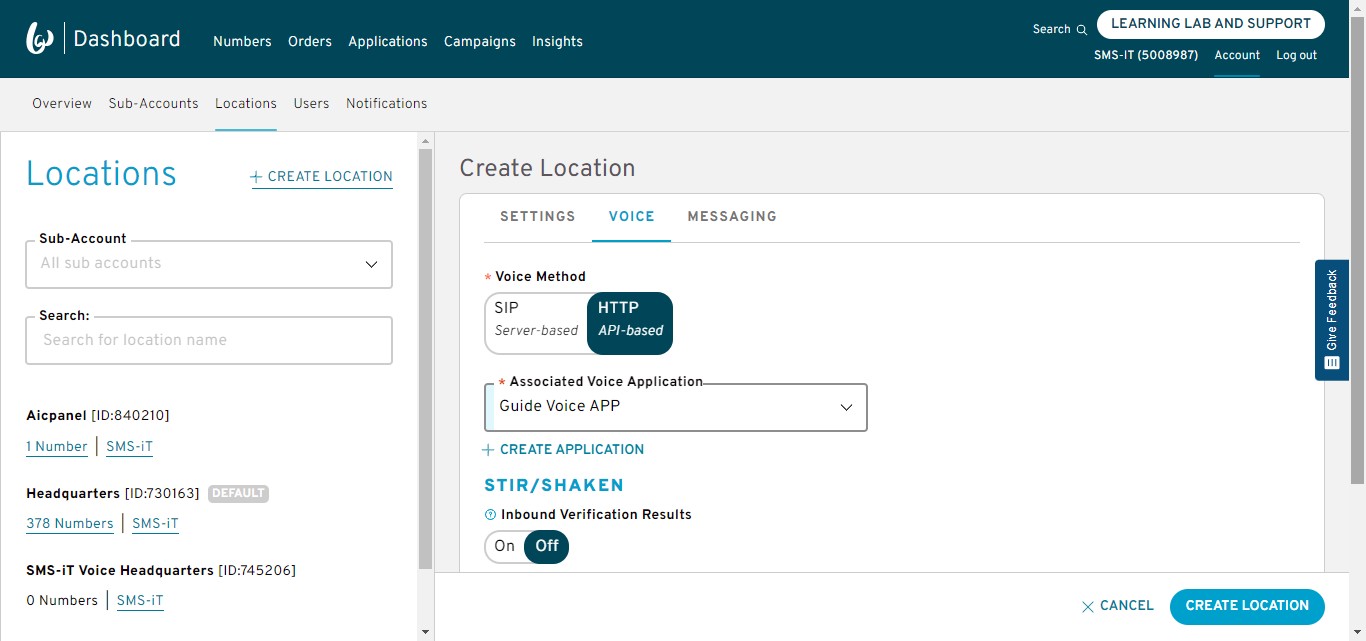
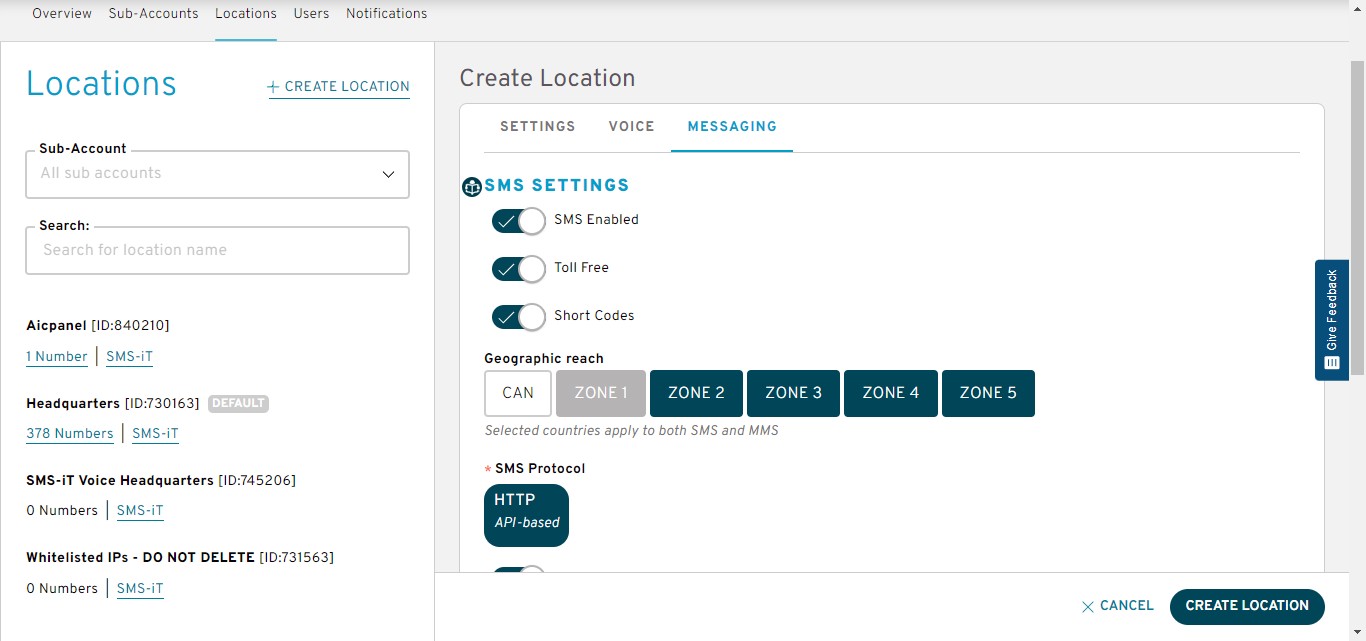
Click on "Voice"
Choose "HTTP API-based"
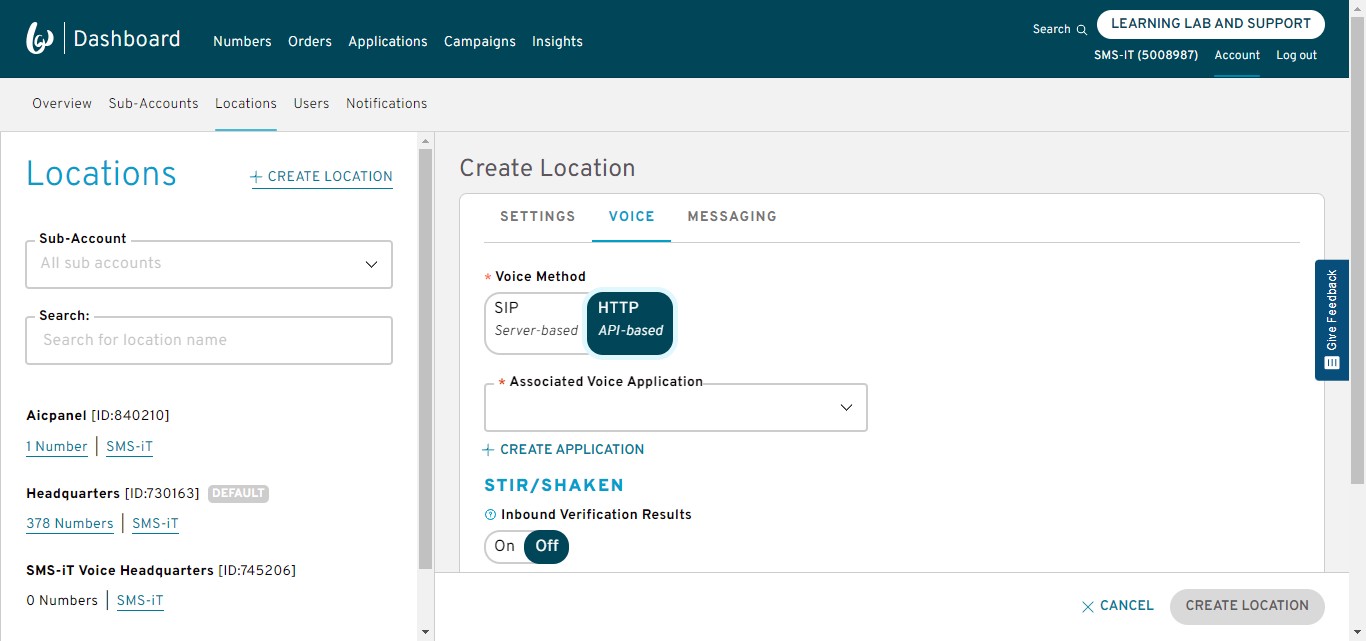
Click on the Voice application you just created in this example it was the "Guide Voice APP"
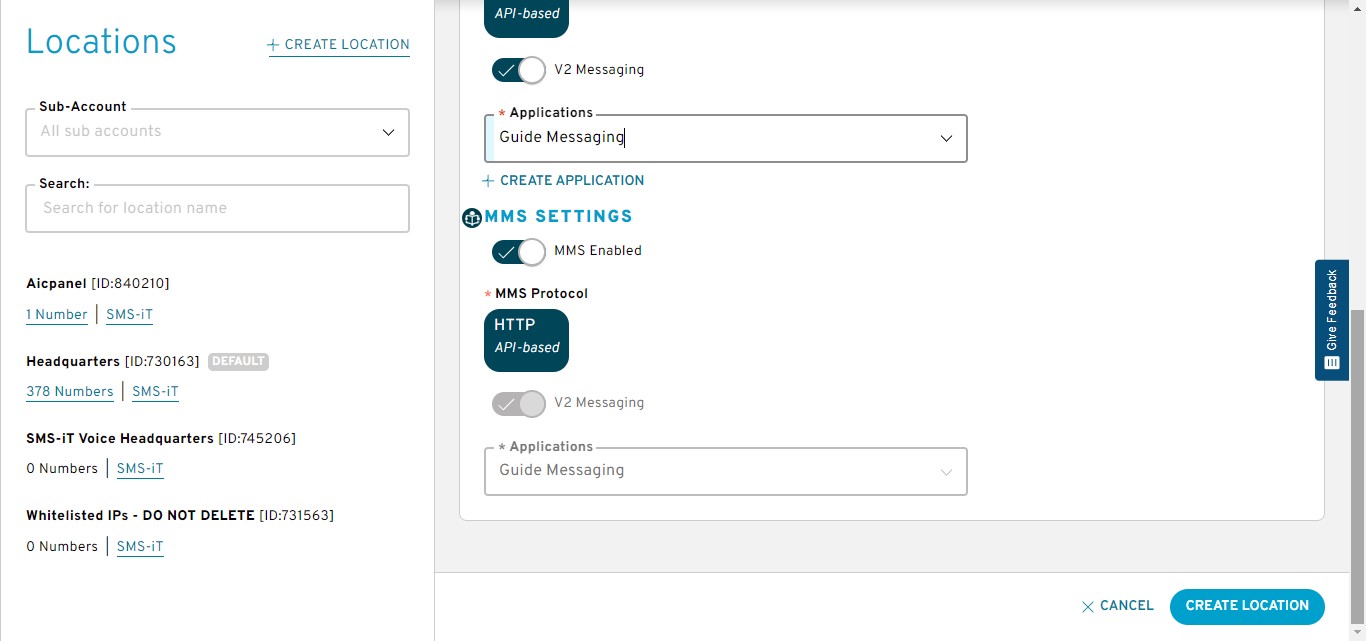
Selected, now click on "Messaging"
Enable all the settings you'll want to use in the SMS-iT platform.

Scroll down for MMS
Click MMS
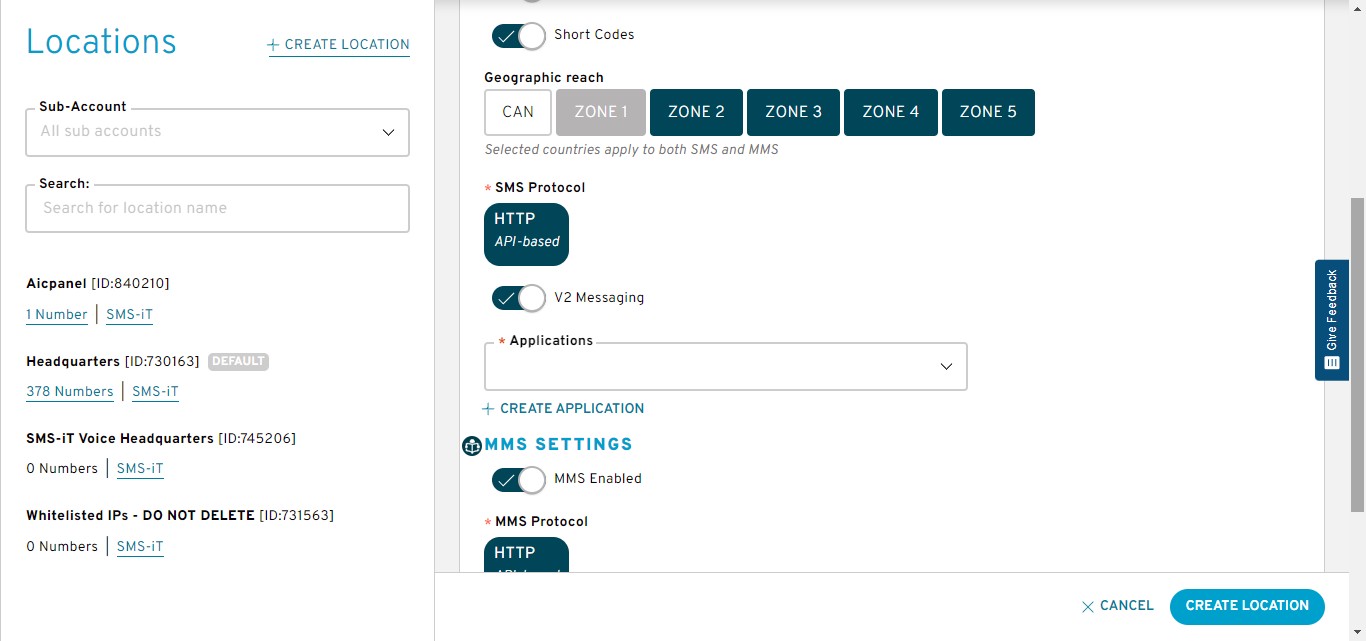
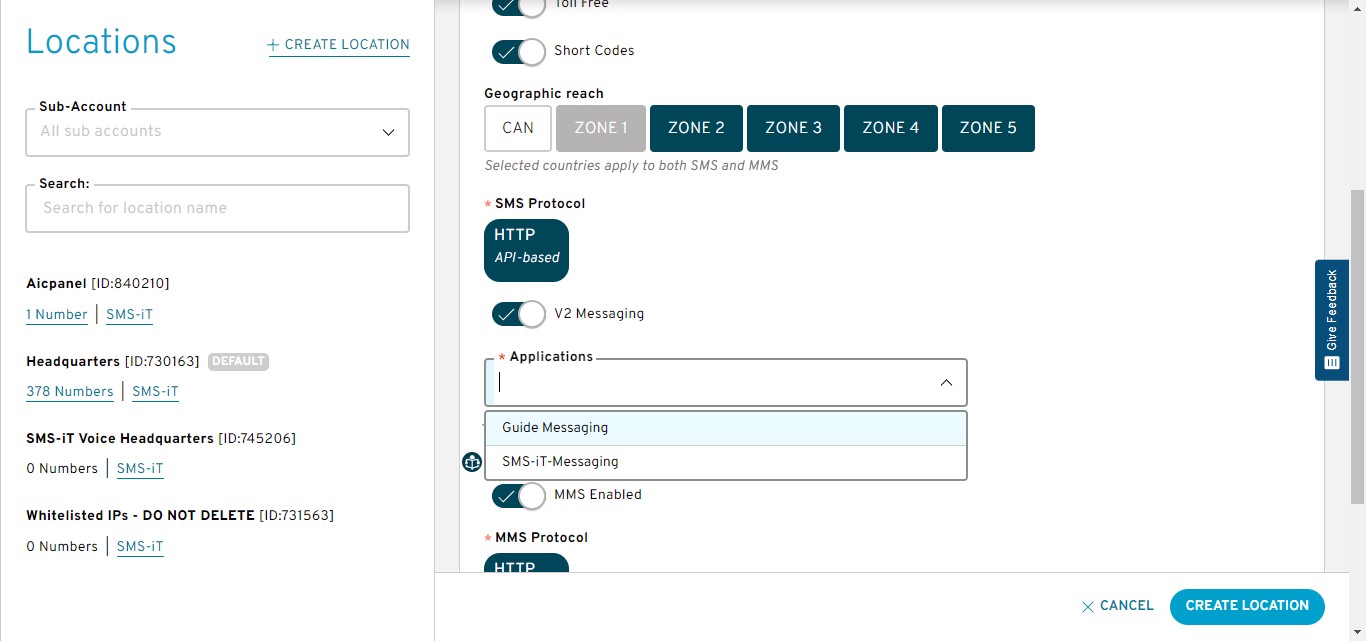
For "Applications" choose the Messaging Application you just created earlier, for this example, we used "Guide Messaging"
Selected and scroll down
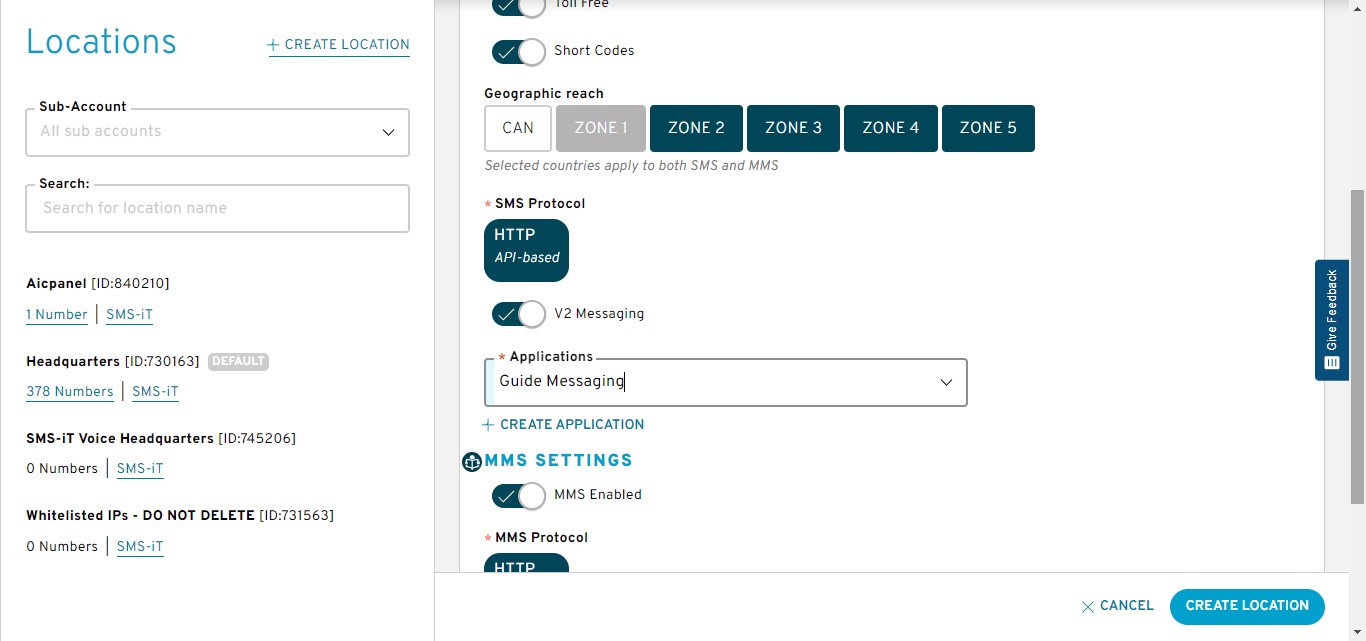
The MMS settings for applications will auto-populate to your newly created messaging application.
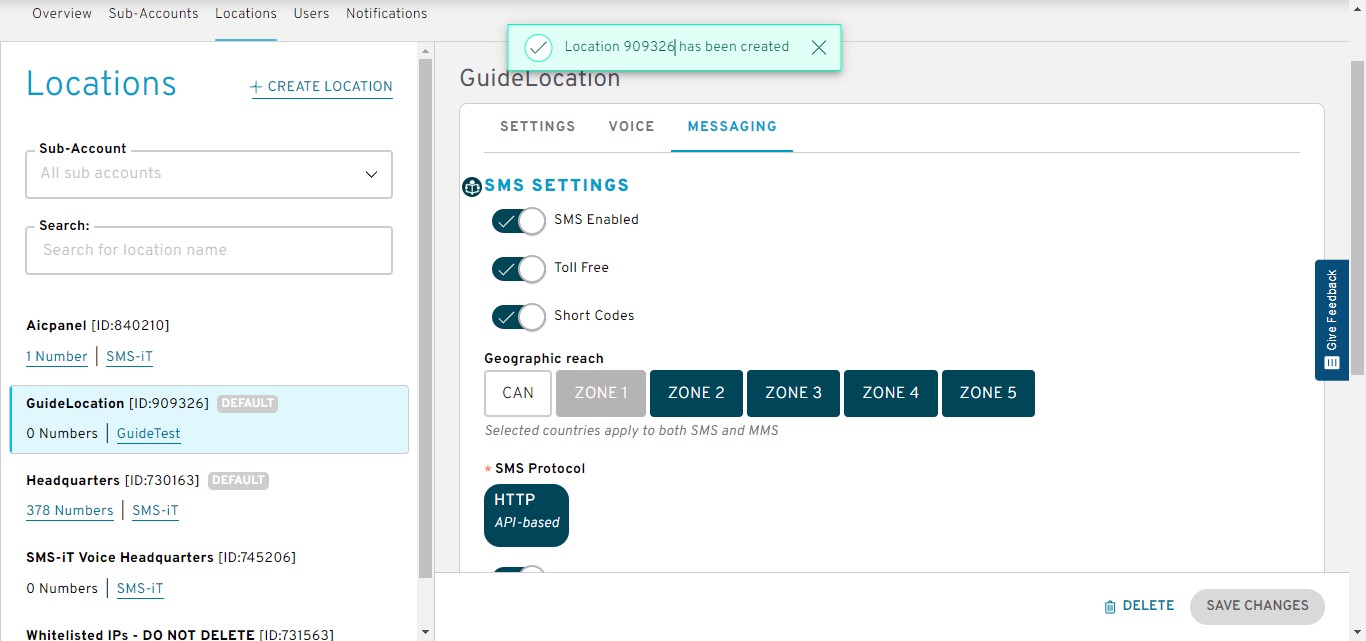
Click on "CREATE LOCATION"
New location has been created. Copy location ID
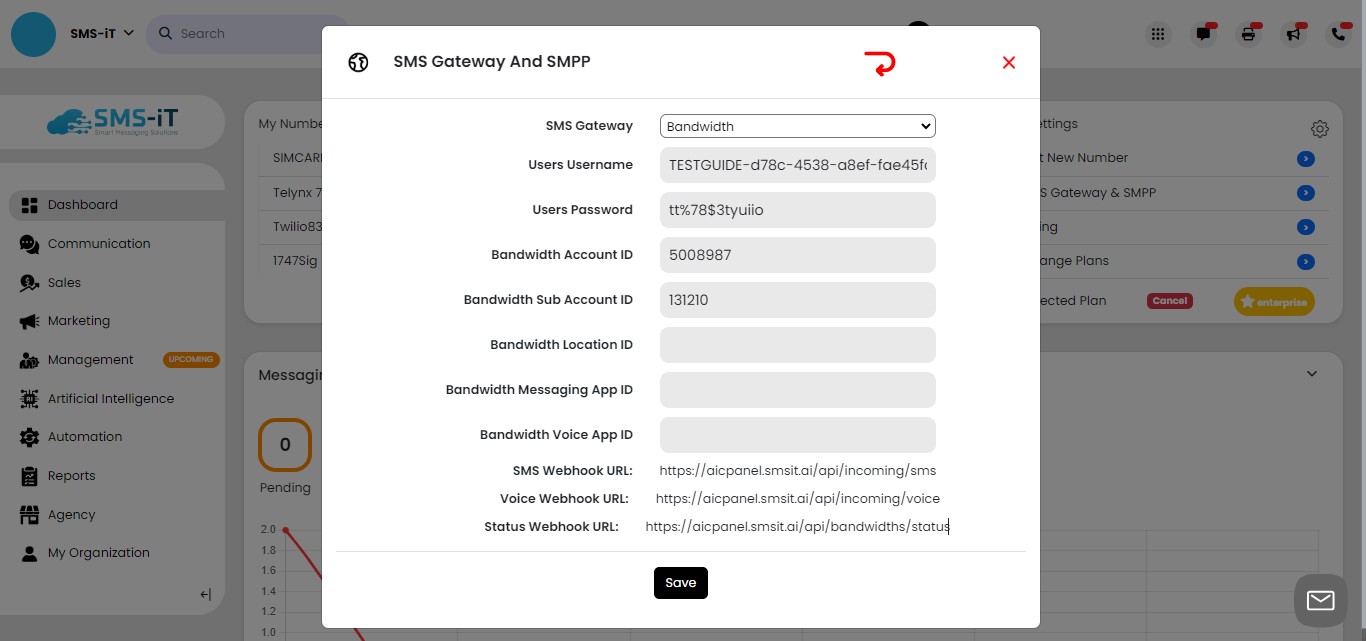
Click on "SMS Gateway""
Click on "Connect"
Paste into "Location ID"
Click on "Save"
Saved
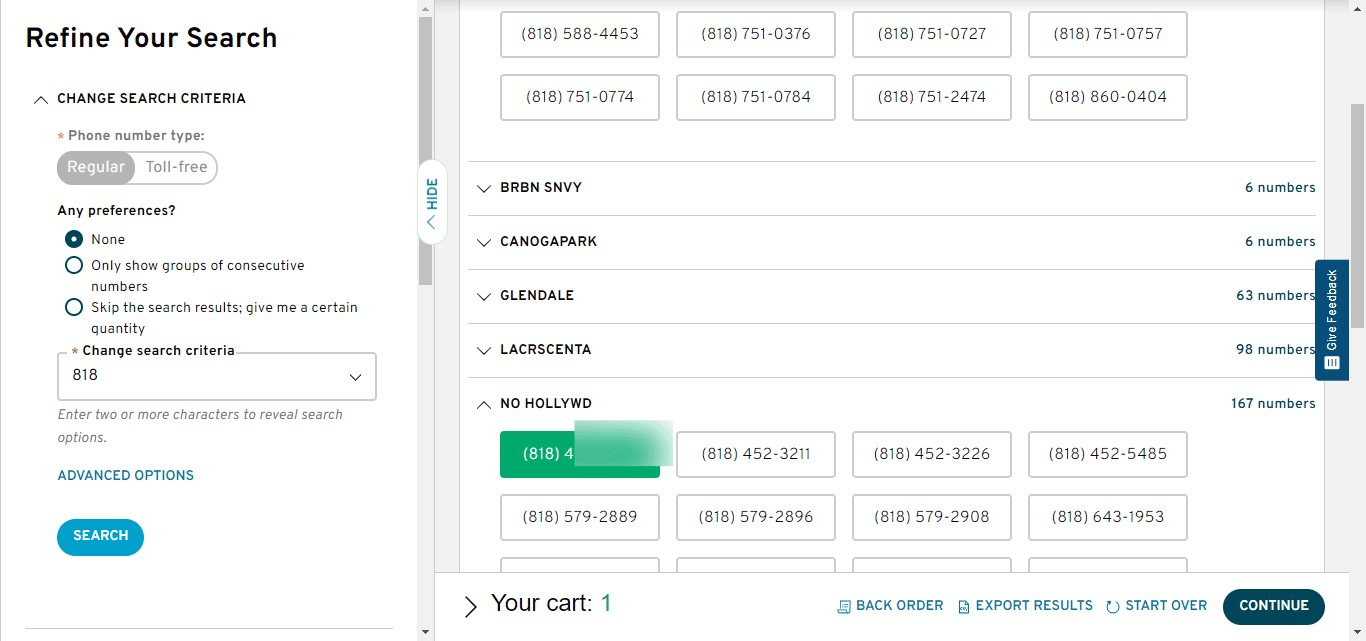
Buy number in Bandwidth
Click on "Numbers"
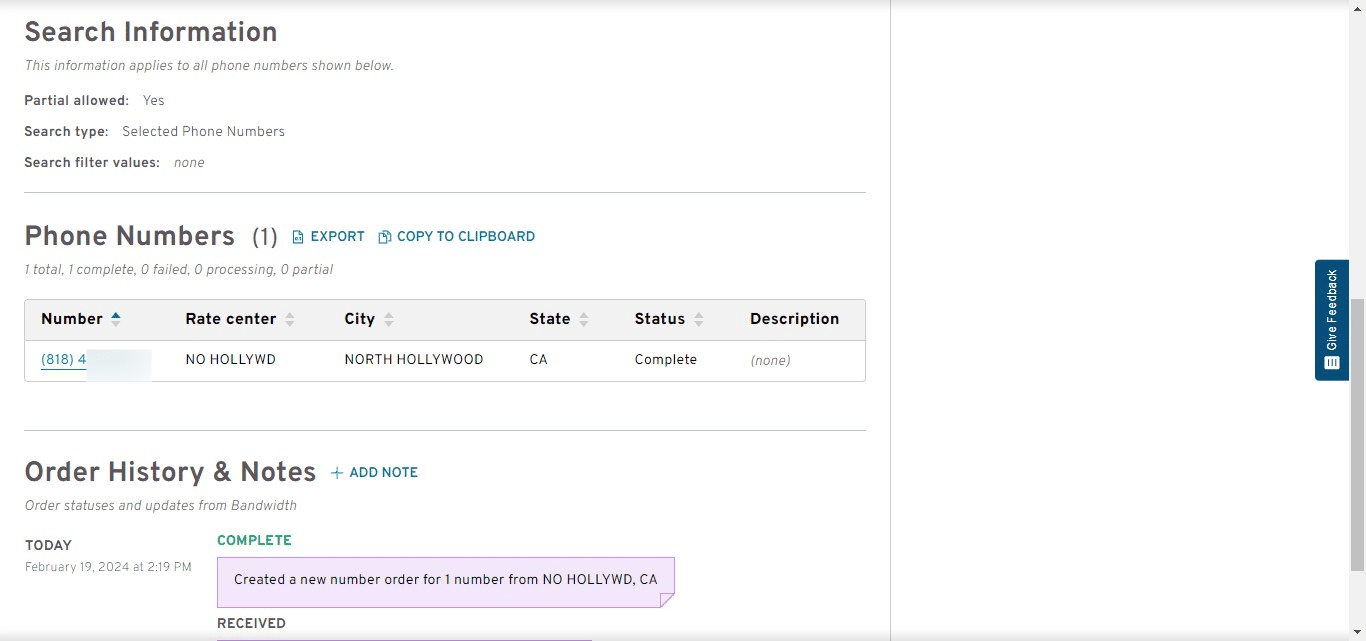
In this example we are buying a local number in the 818 area code.

Choose a number

Click on "Continue"
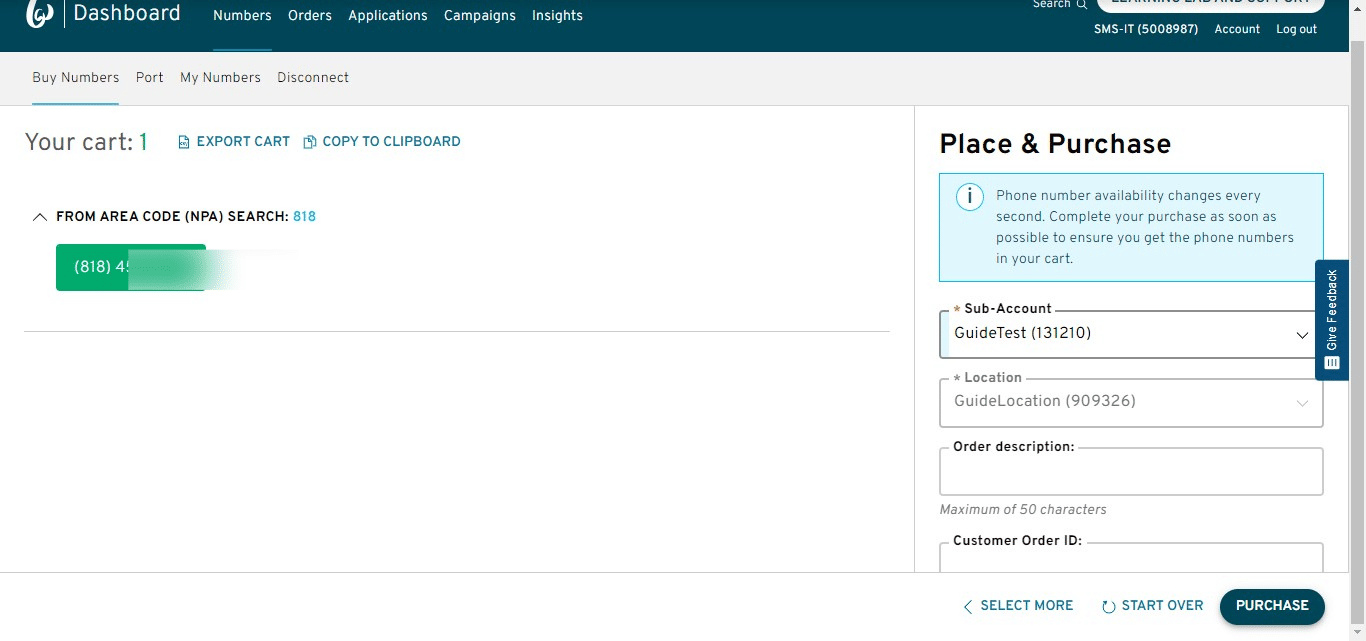
Add it to your new sub-account.
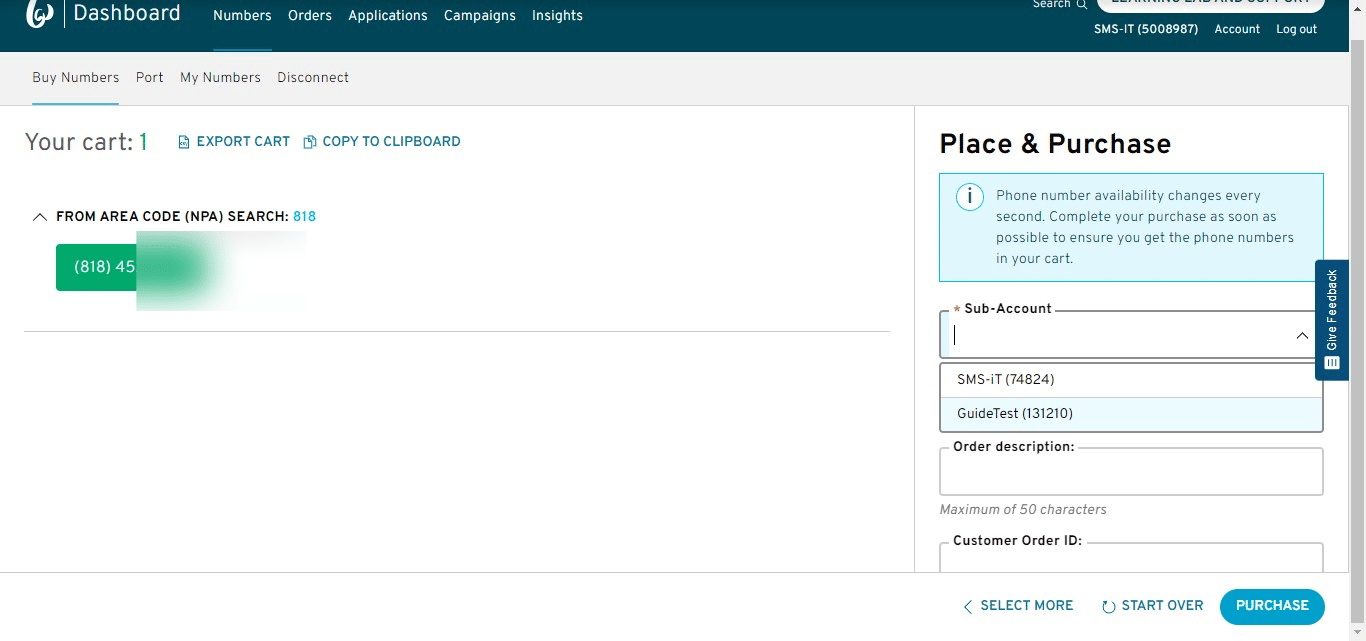
Sub-account and location will be added (location by default).
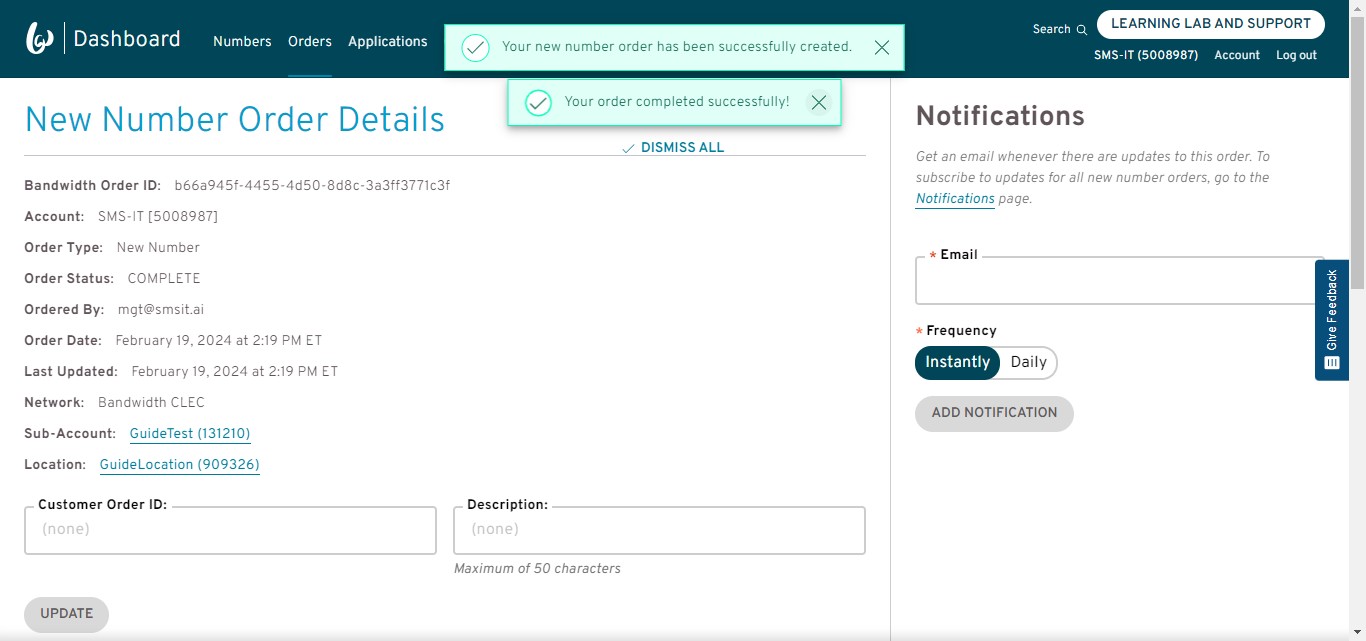
Click on "Confirm Purchase"
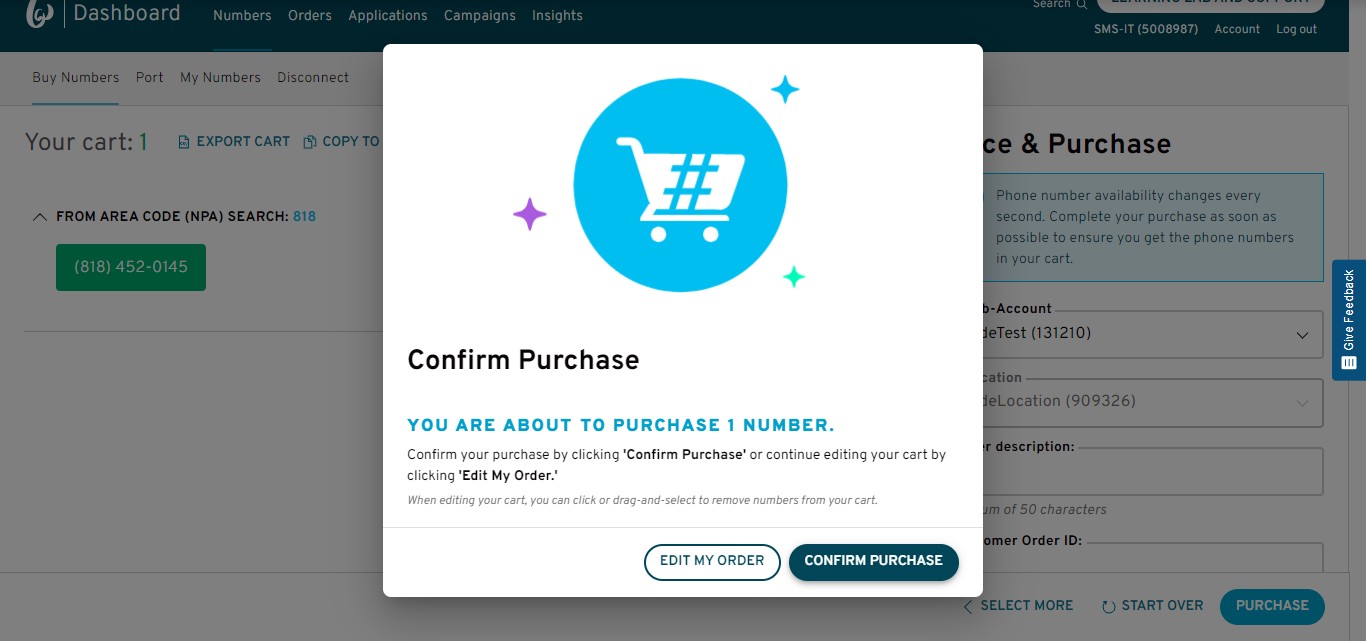
Successfully added
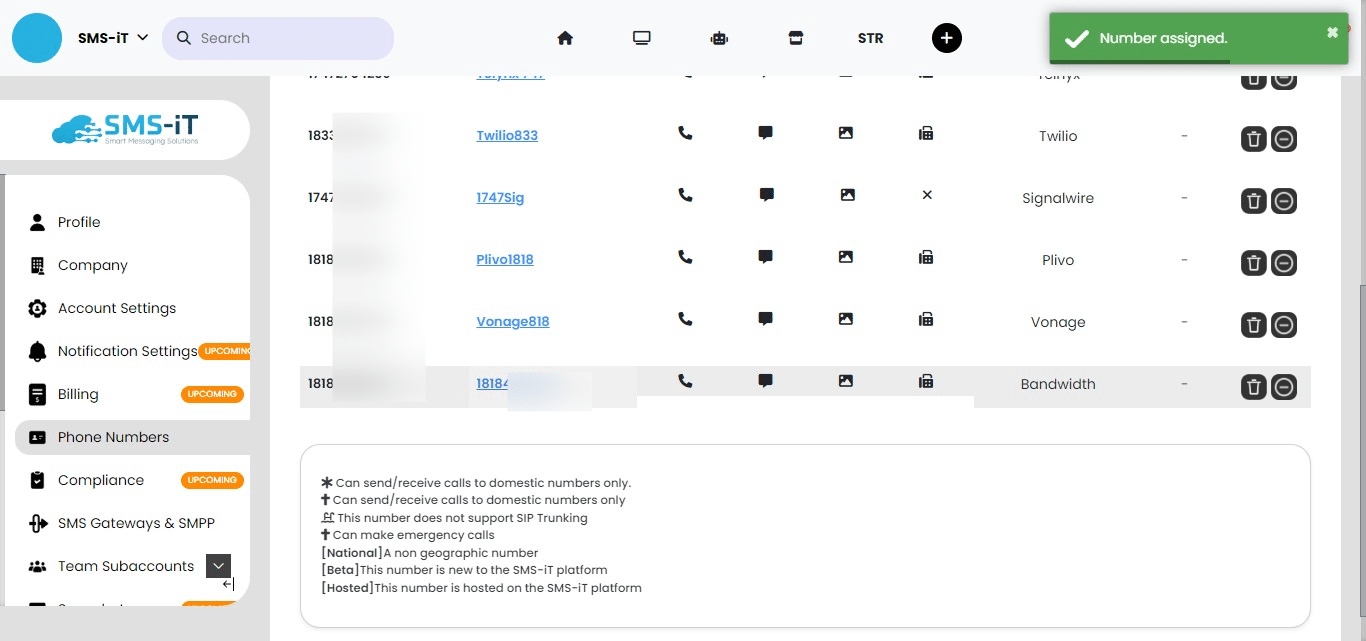
Add new number to SMS-iT Platform and Create Friendly Number
Copy your new number.
Click on "Add Number"
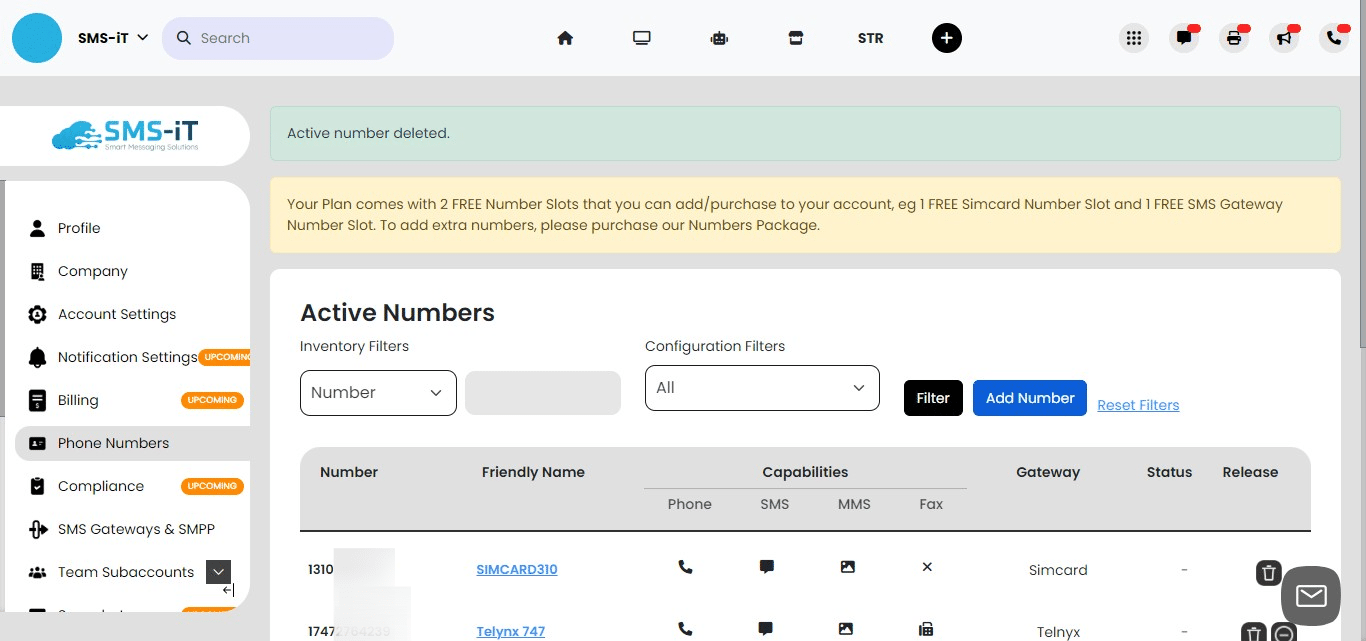
Select Bandwidth
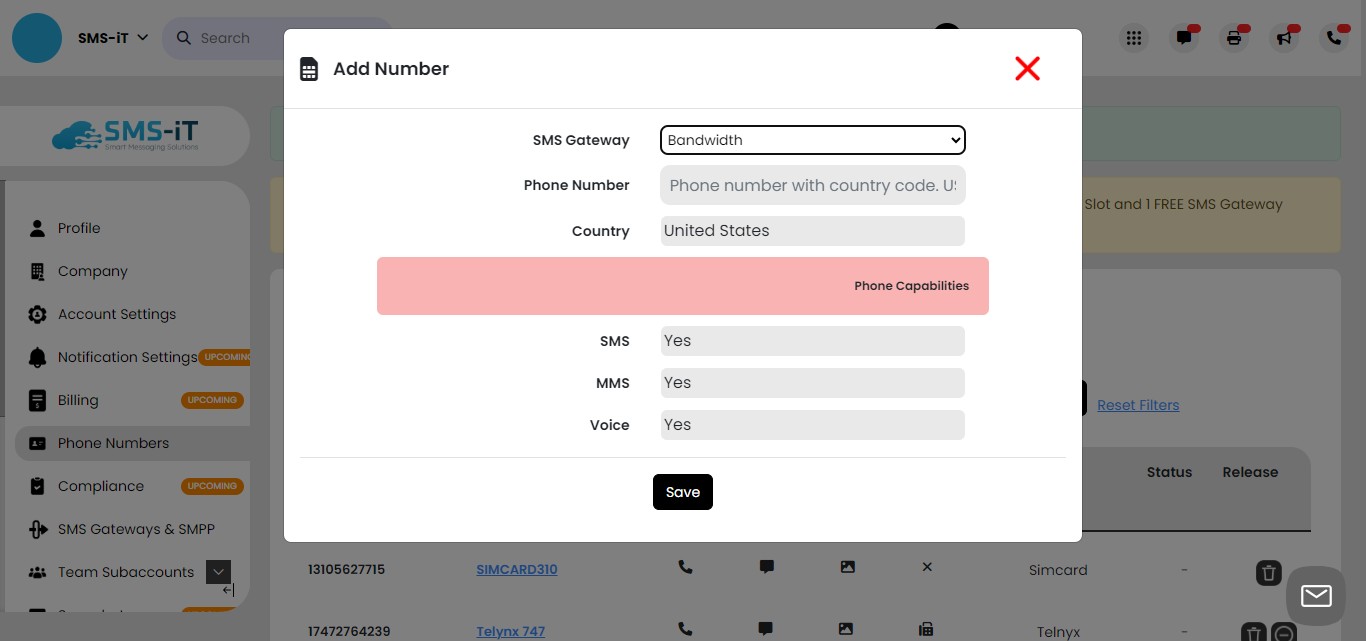
Paste your new number. Note: You must remove hyphens, parentheses, and gaps, and add a 1 (country code) to the front.

Note: You must remove hyphens, parentheses, and gaps, and add a 1 (country code) to the front. Example format: 15554324567
Click on "Save"

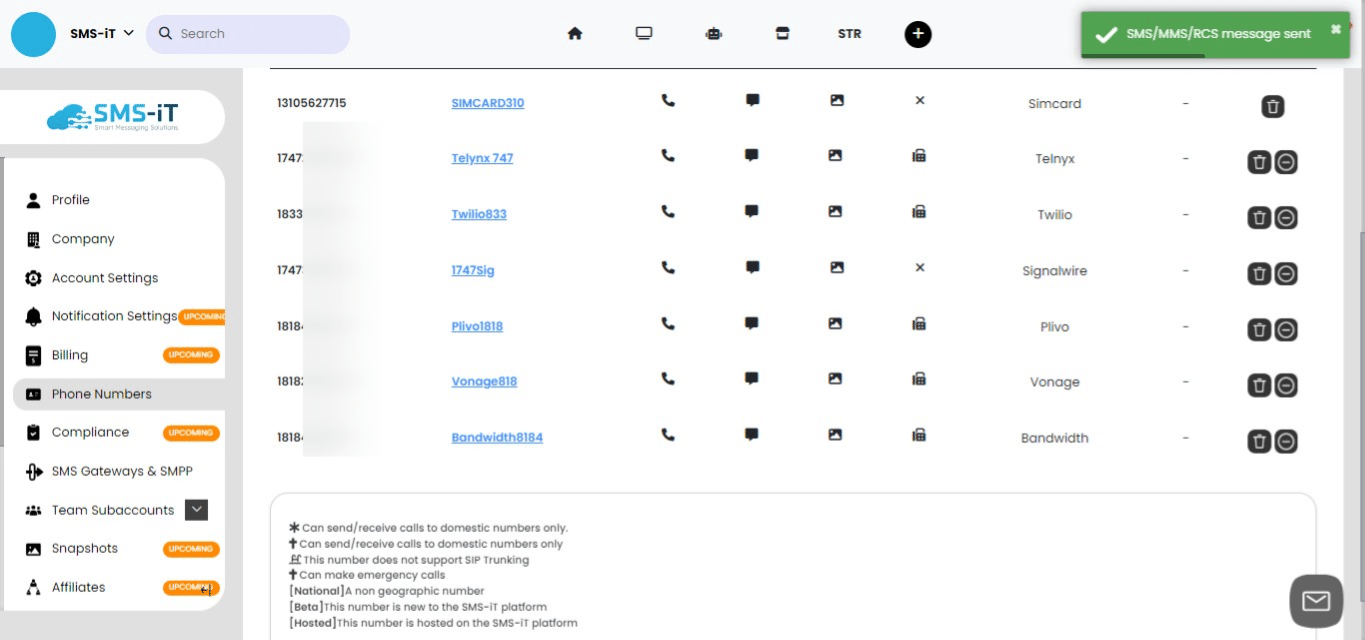
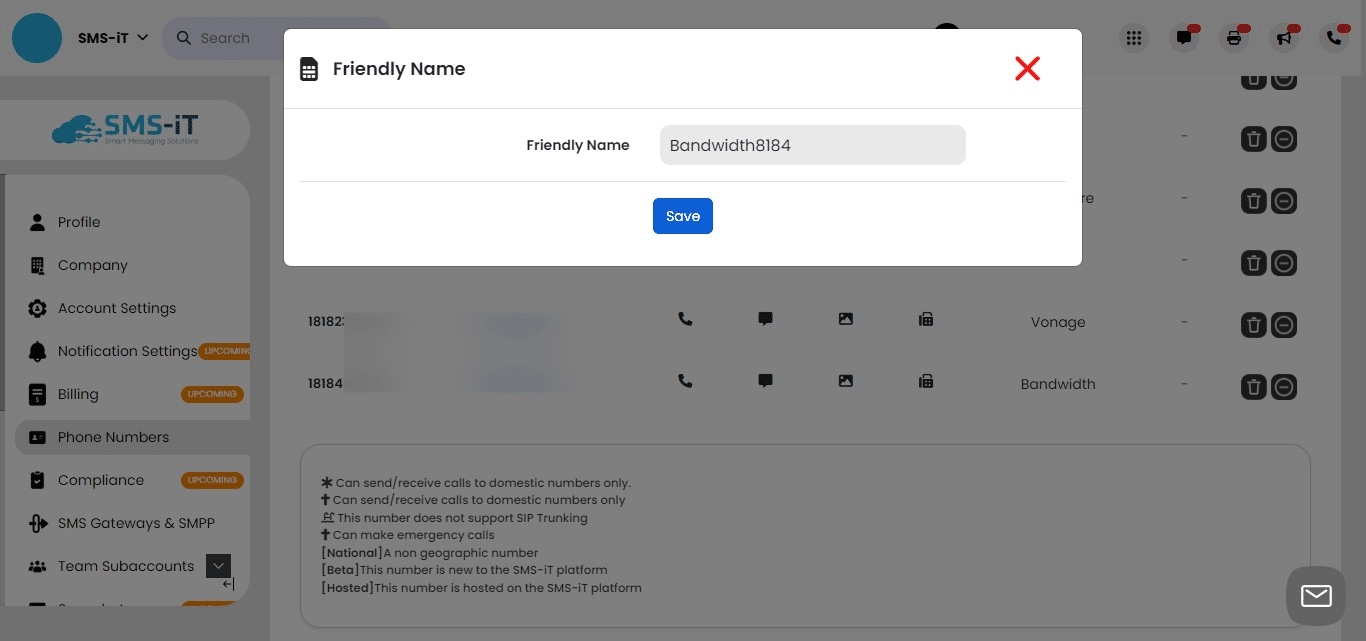
Create a Friendly Name
Click on your number in "blue" under "Friendly Name"
create a "Friendly Name" and click on "Save"
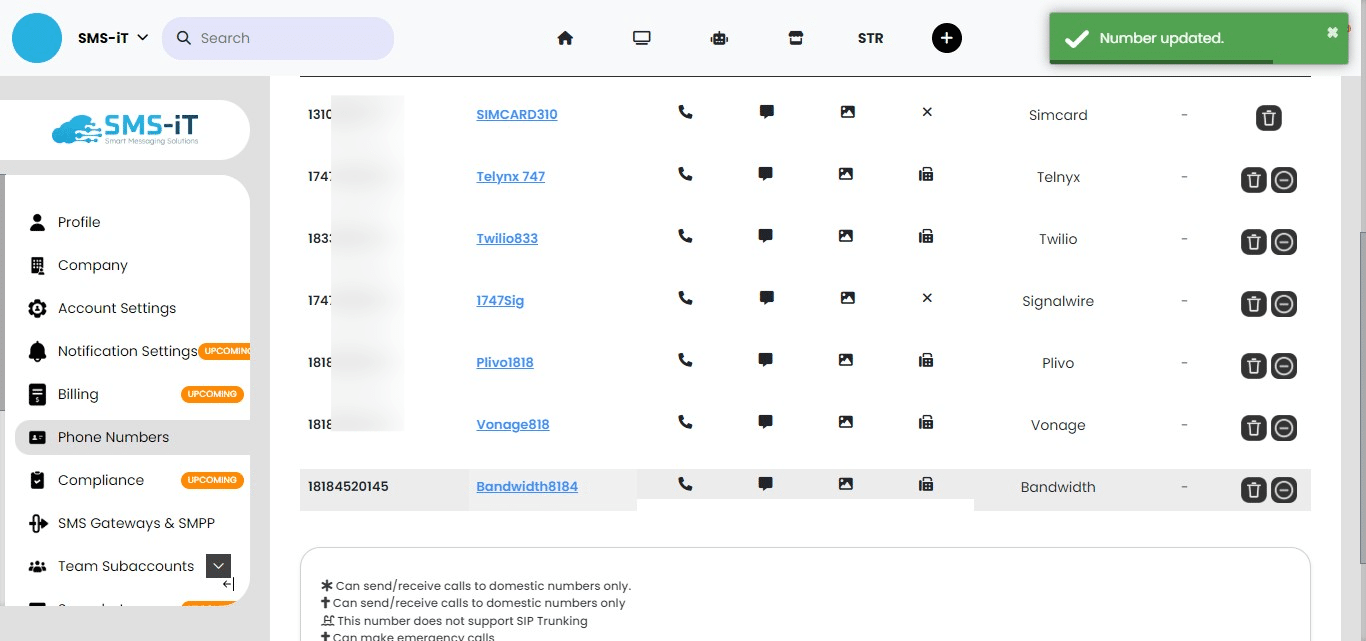
Your friendly name has been created.
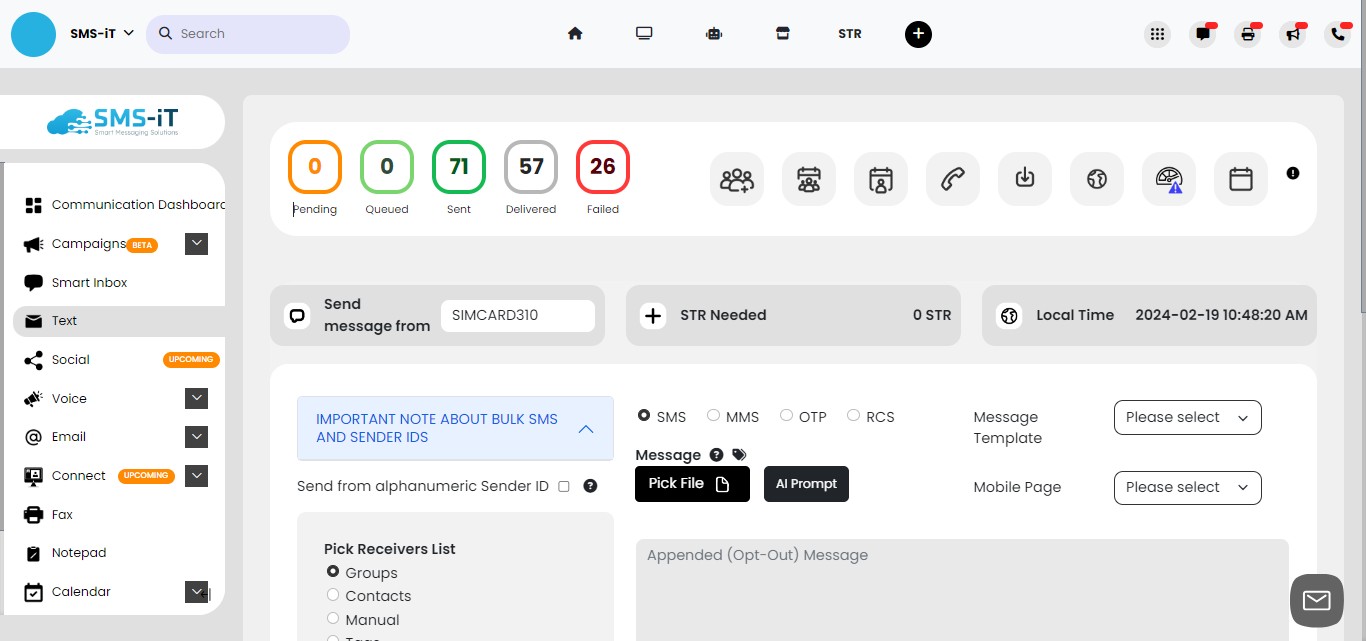
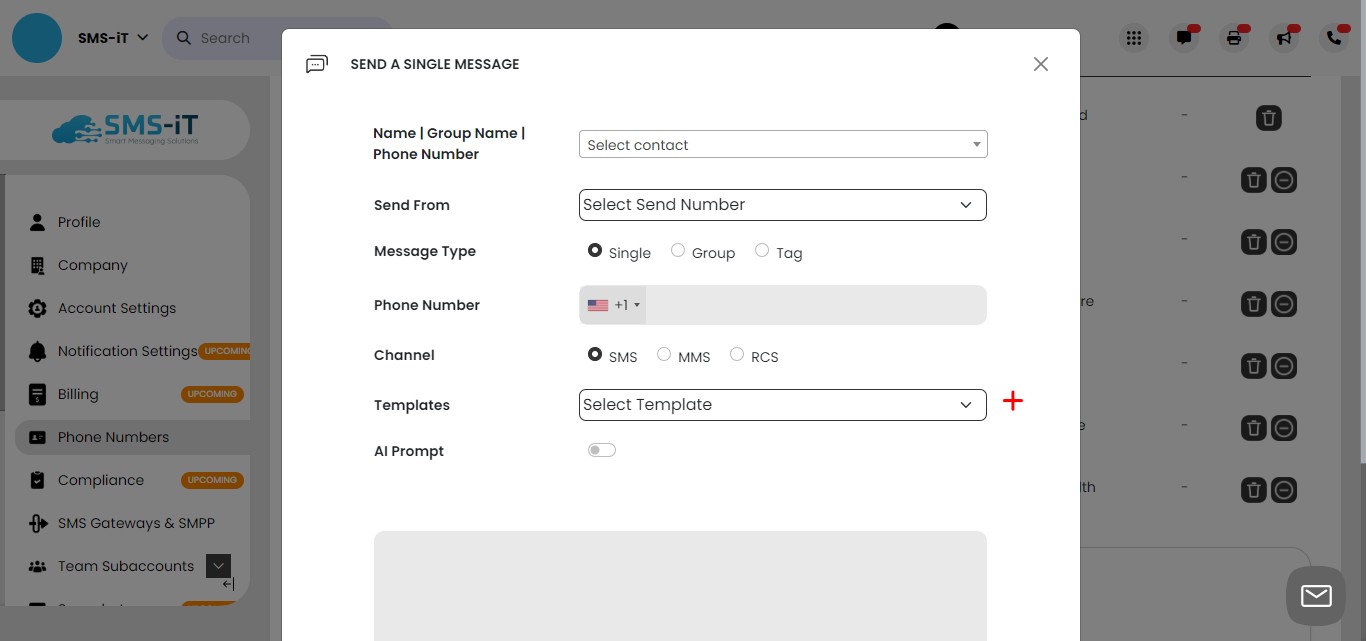
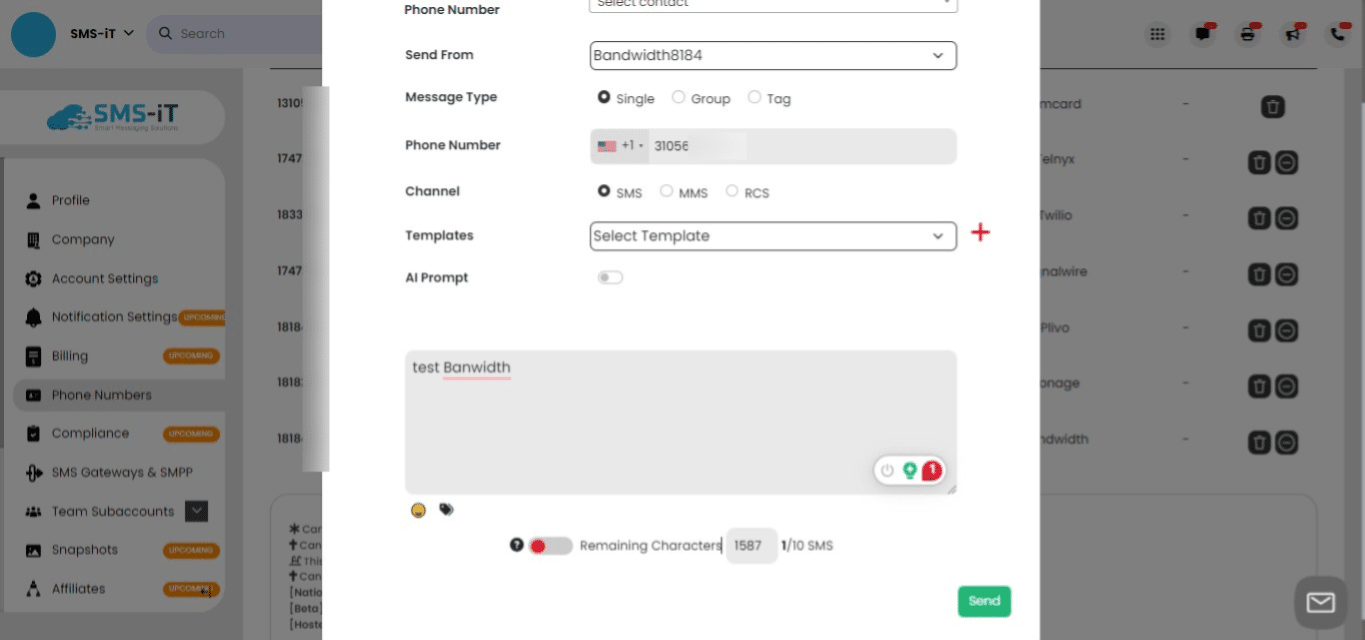
Test your new Bandwidth number in the SMS-iT platform
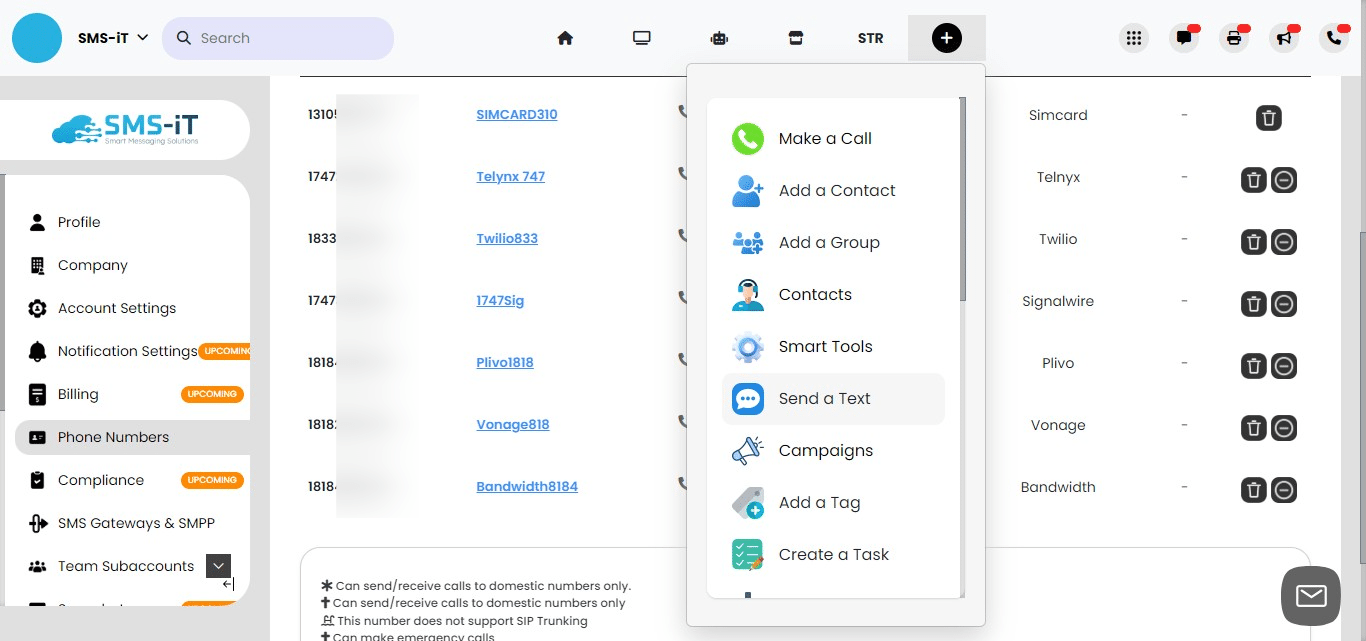
Click on "Quick Links"

Click on "Send a Text"
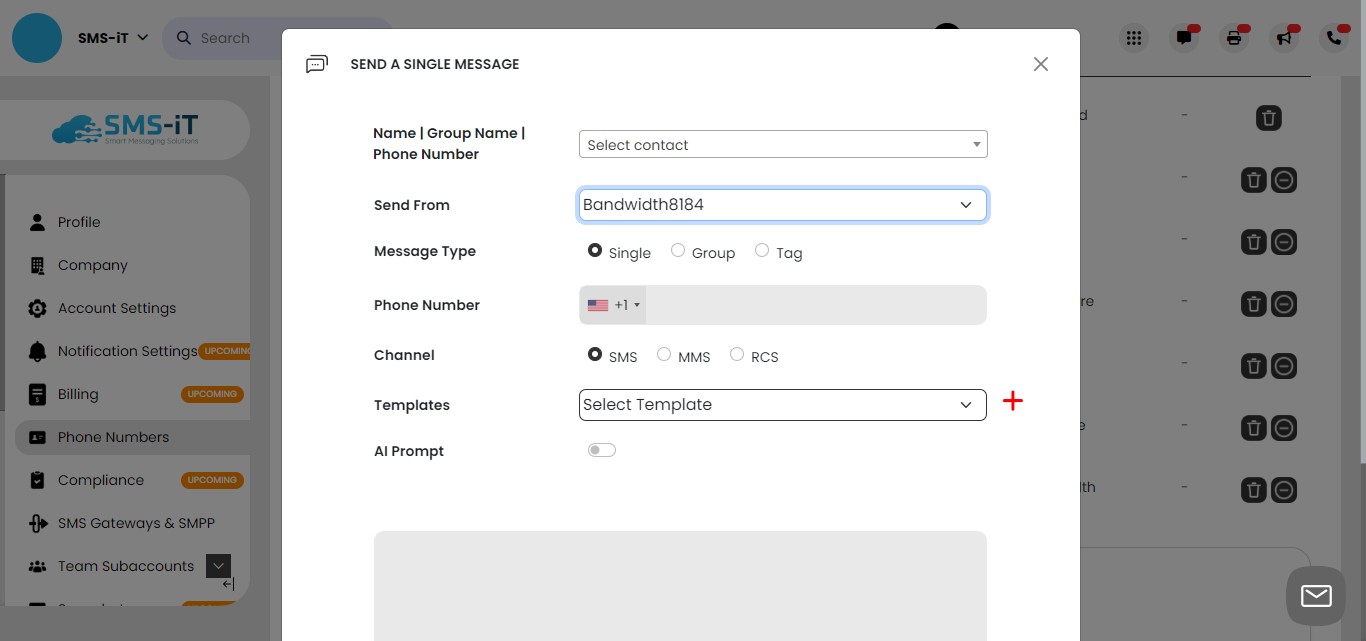
Click on "Select Send Number"
Select your new Bandwidth number.
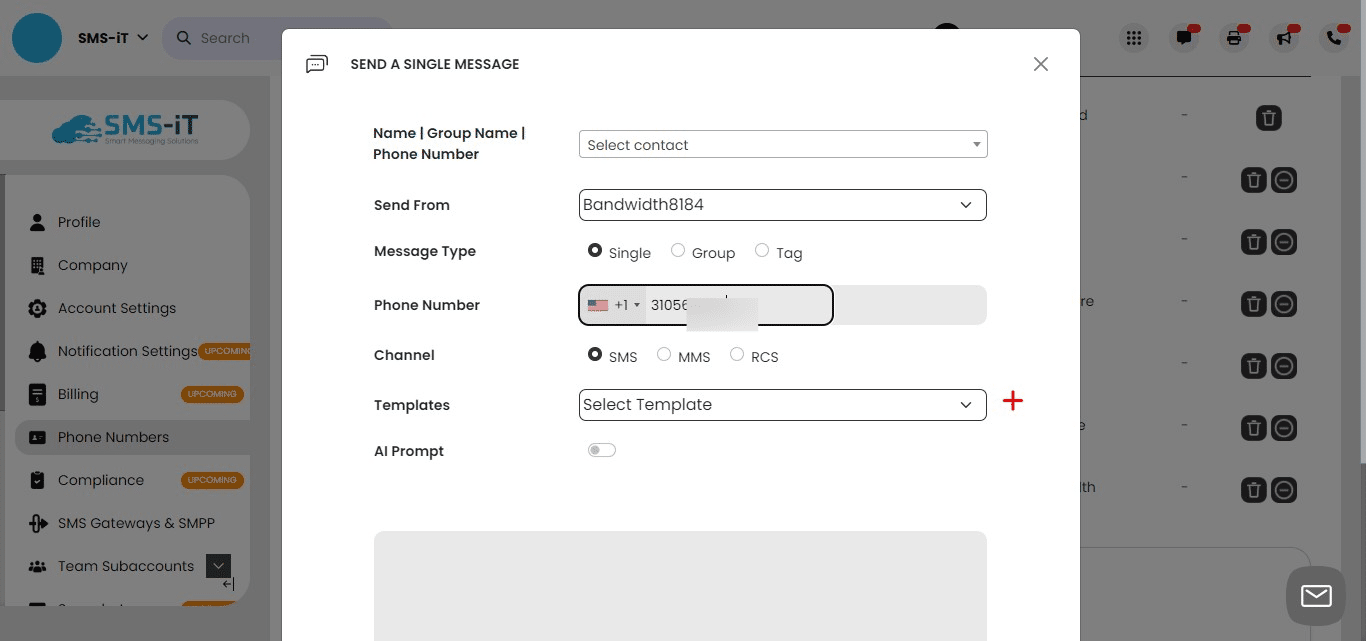
Enter a number to text for testing purposes.
Create a text.
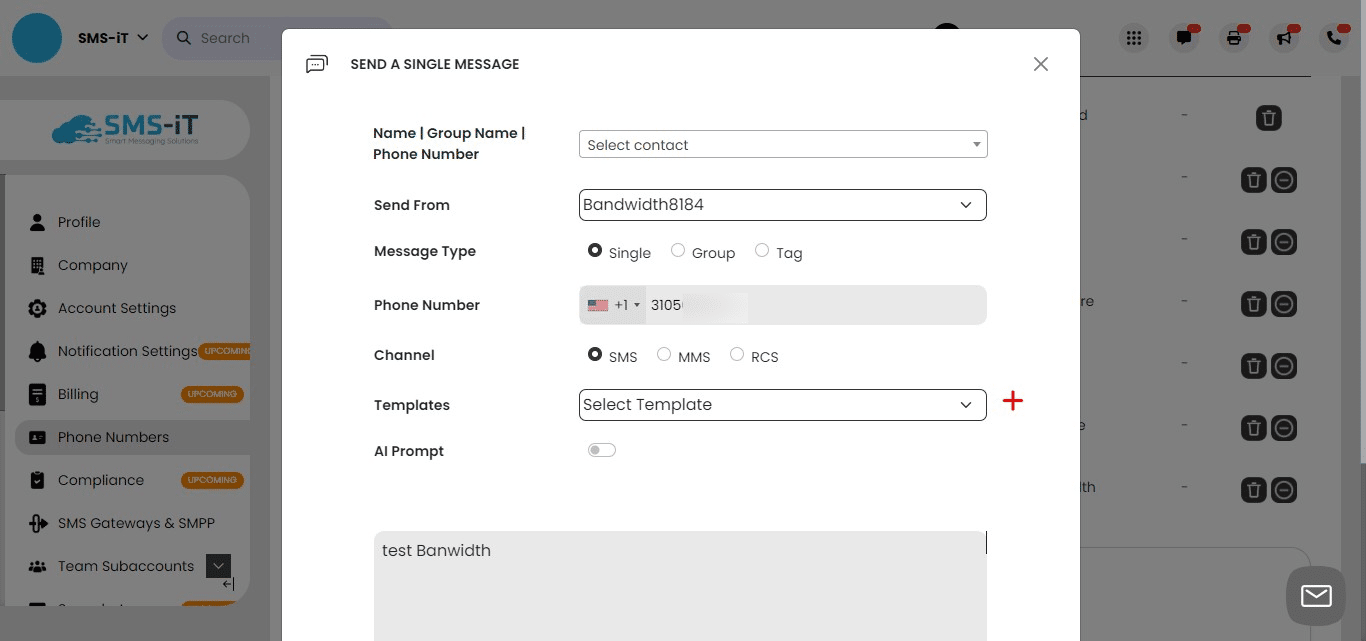
Click on "Send"
The green banner will appear if your number was sent and the API is configured correctly between the SMS-iT platform and Bandwidth.