Remind-iT© (Recurring reminders for customer retention)
Remind-iT© (Recurring reminders for customer retention)
Welcome to the Remind-iT tutorial for the SMS-iT platform! Remind-iT is one of the many "Set-iT n' Forget-iT©" Smart Tools that makes SMS-iT the industry leader and innovator. This powerful tool allows you to easily set up recurring SMS and omni-channel reminders. Whether you need to send reminders on a specific date each month, multiple dates, or on a pattern like the second and fourth Tuesday, Remind-iT provides the flexibility to automate messages to keep your audience engaged and informed. - In this tutorial, we'll walk through how to: 1. Select your reminder type (single date, multiple dates, weekday pattern) 2. Choose the day(s) for your reminders to be sent 3. Craft your reminder message 4. Schedule your recurring series 5. Manage and modify your Remind-iT campaigns
Recurring reminders are a great way to keep your audience engaged, drive desired actions, and ensure important messages don't get missed in today's busy world. - Remind-iT exemplifies SMS-iT's commitment to providing cutting-edge solutions that simplify recurring communications. It makes it effortless to Set-iT n' Forget-iT© so your reminders go out to the right people at the right cadence, while still providing full control to adjust your campaigns as needed. Let's get started and see how Remind-iT can save you time and streamline your recurring communications!
Global Settings
Before creating a reminder in the SMS-iT system, it's crucial to configure the timing settings in the Global Settings area. The Global Settings allow you to set the desired send times for your SMS Gateway and all other channels you plan to use for your reminders. We'll check to see if the administrative settings are set before proceeding.
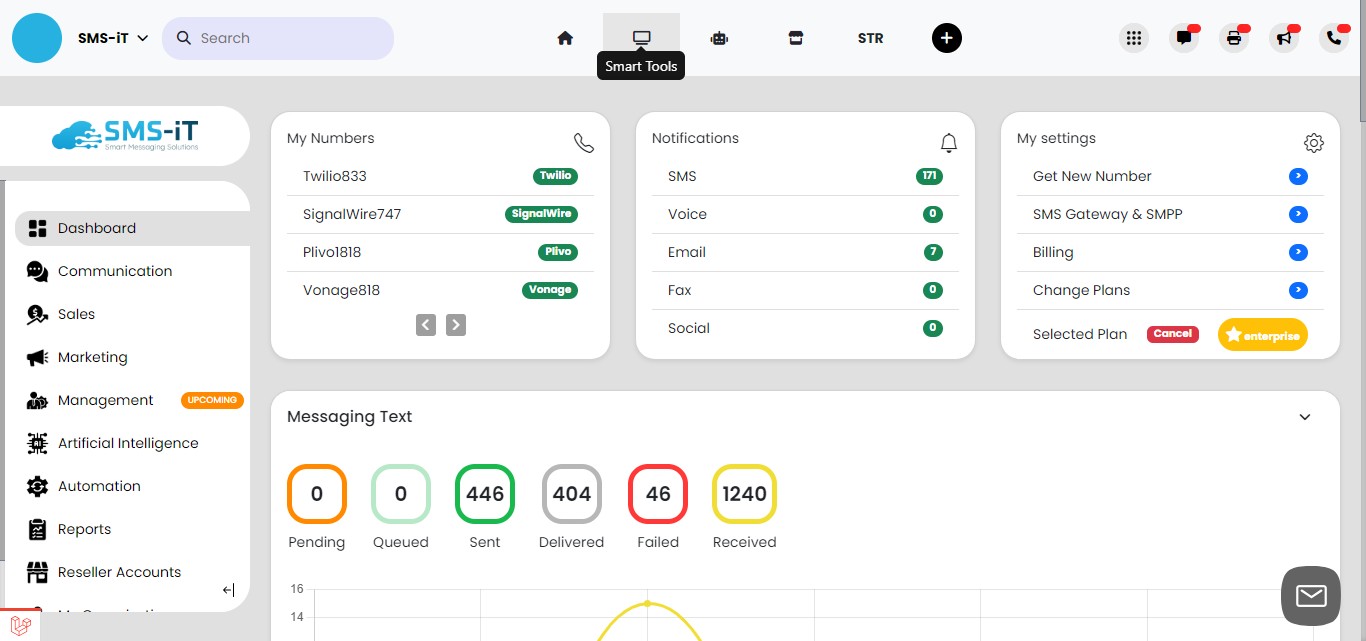
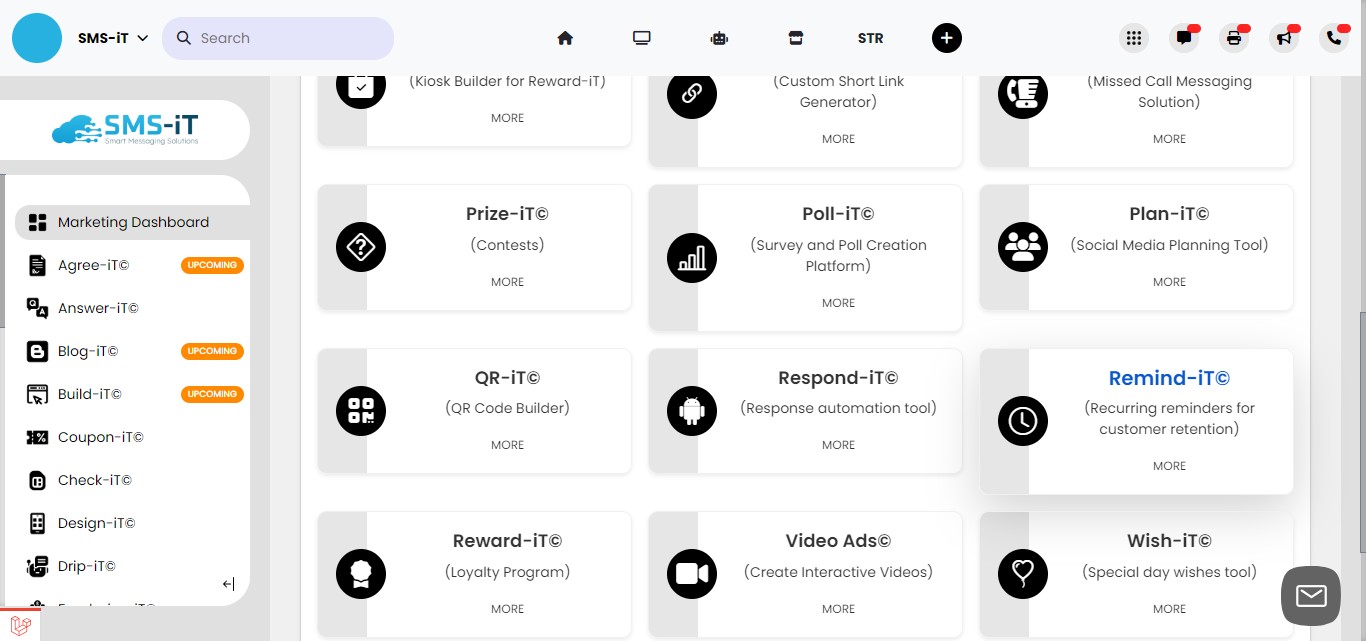
Click on "Smart Tools"
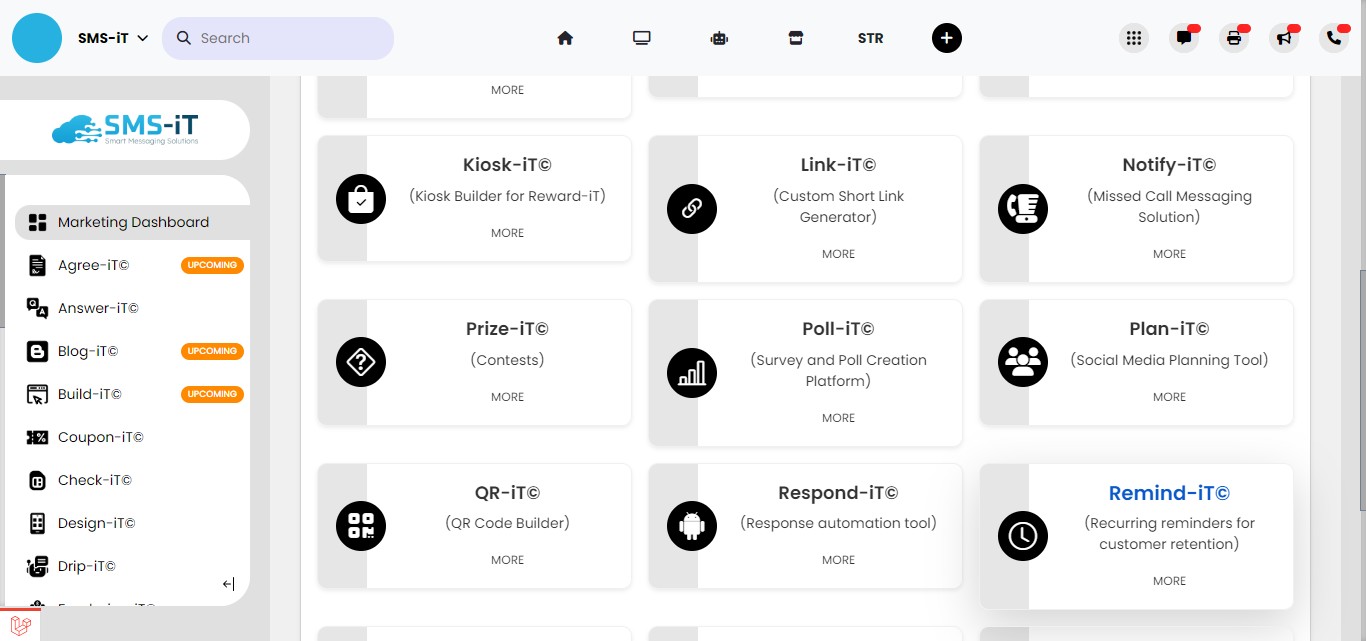
Click on "Remind-iT©"
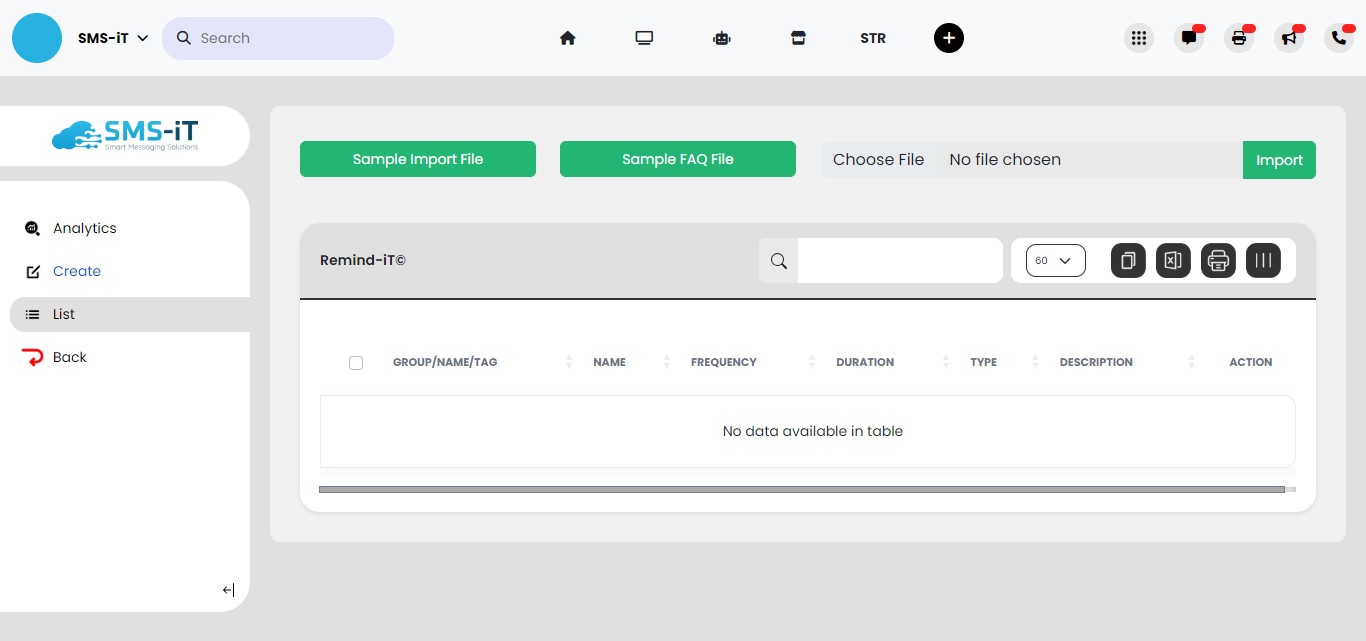
Click on "Create"
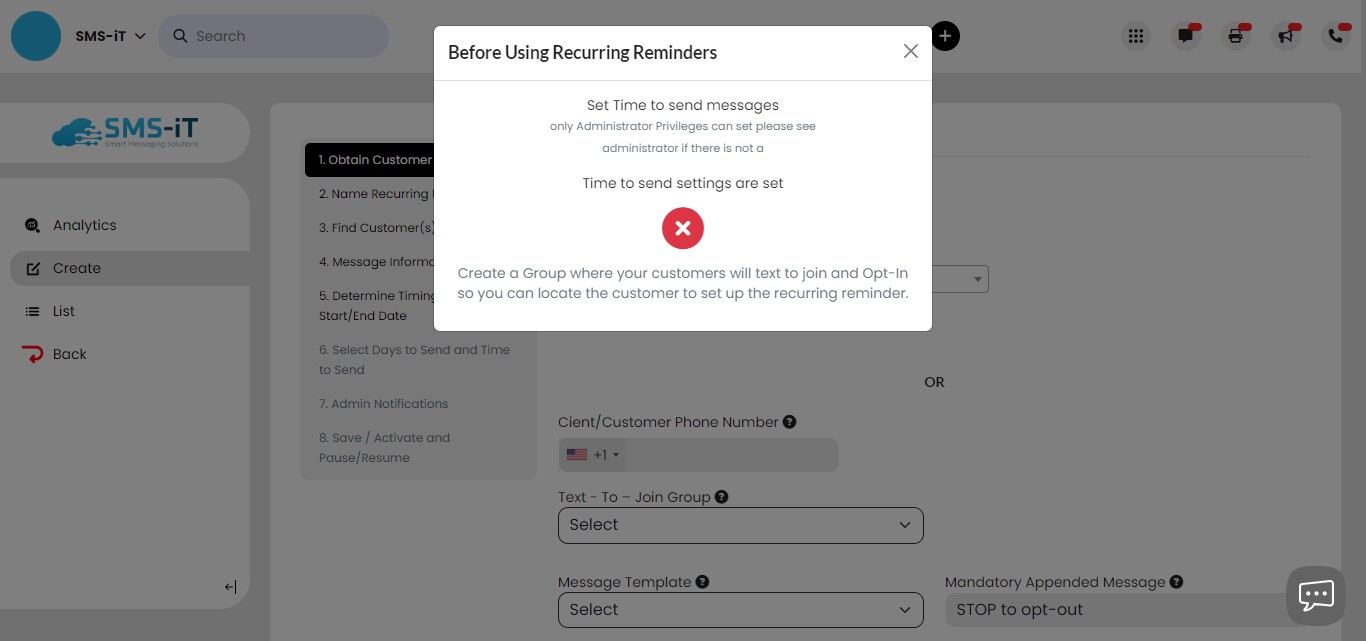
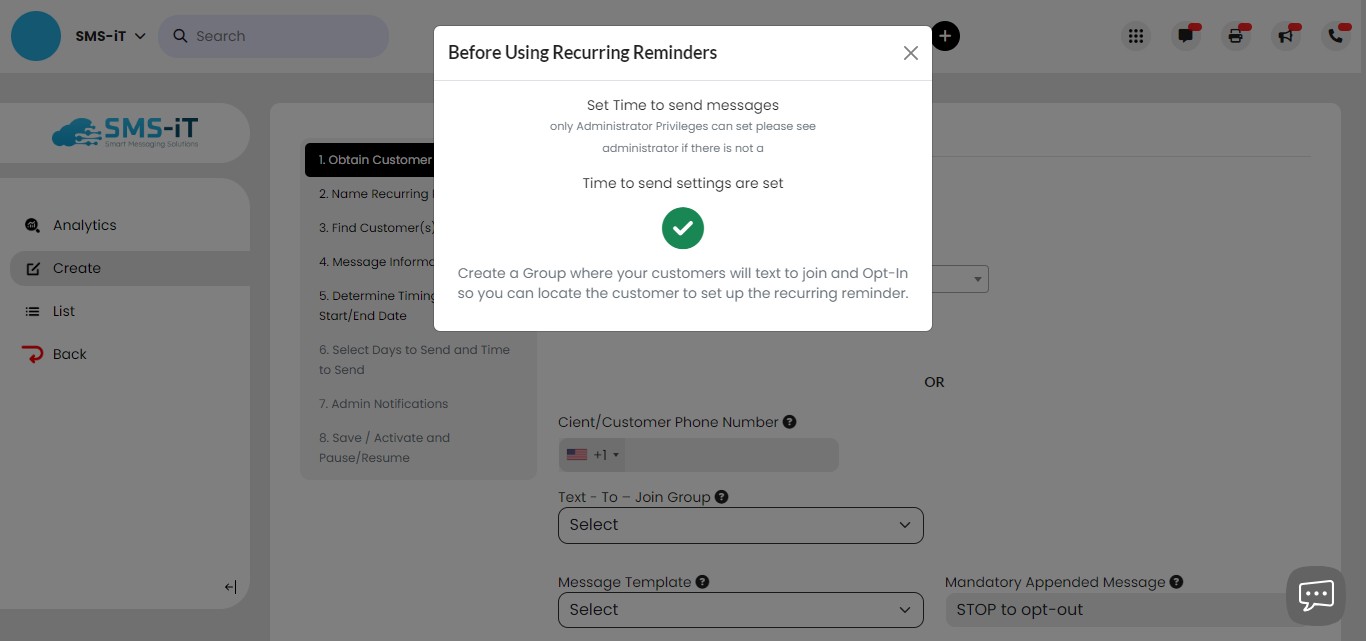
If you see a red checkmark instead of a green one next to "Time to send messages," the send time hasn't been set. Contact your administrator or, if you have admin privileges, follow the next steps in the guide to set it up. A green checkmark will appear once the timing is properly configured.

Click out of the pop-up.
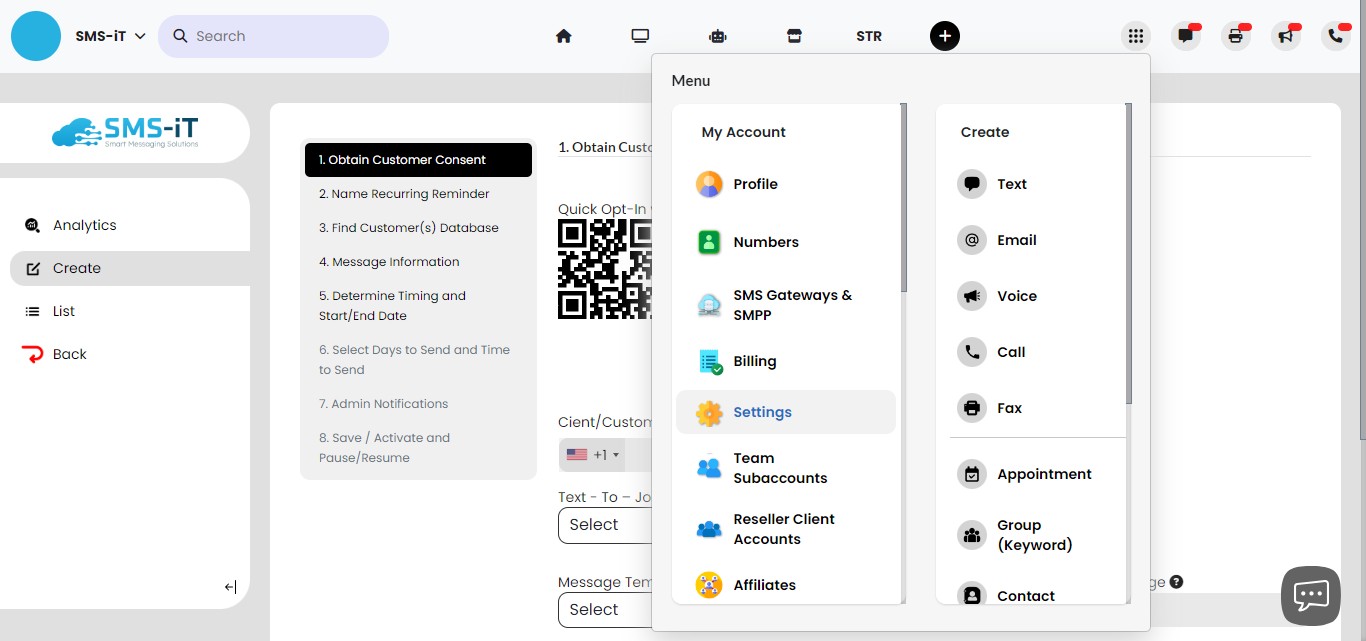
Click the "Menu" option.
Click on "Settings"
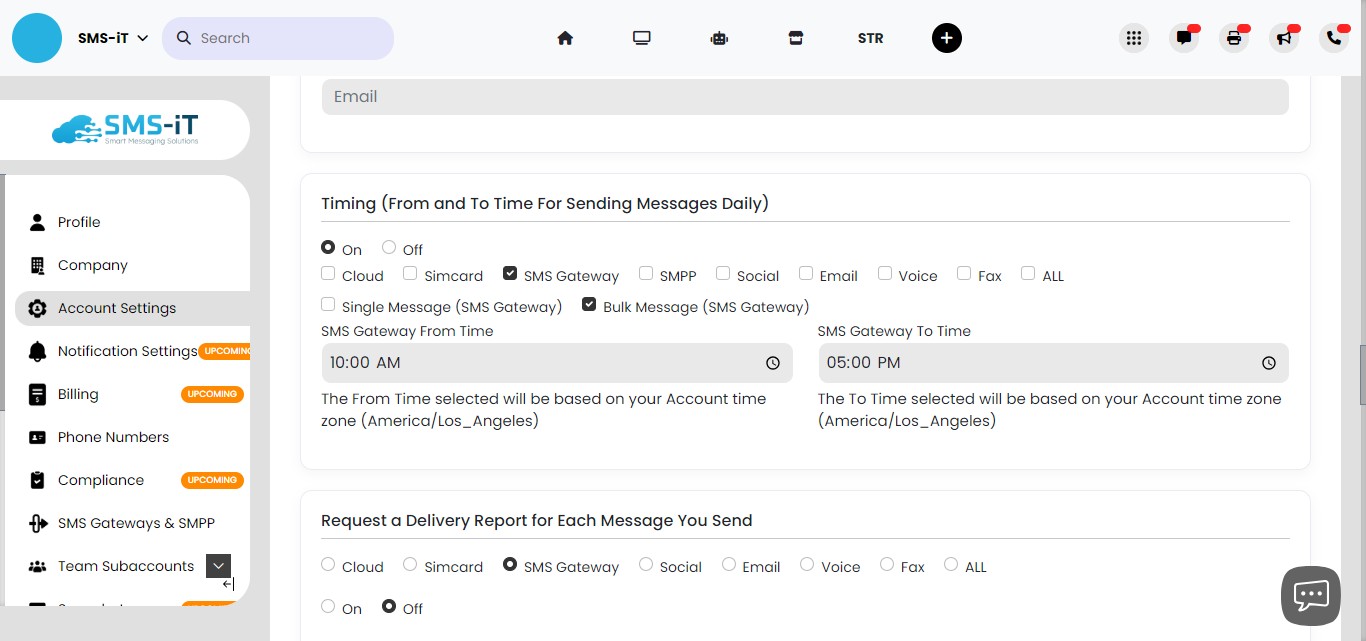
Scroll down to Timing and click On
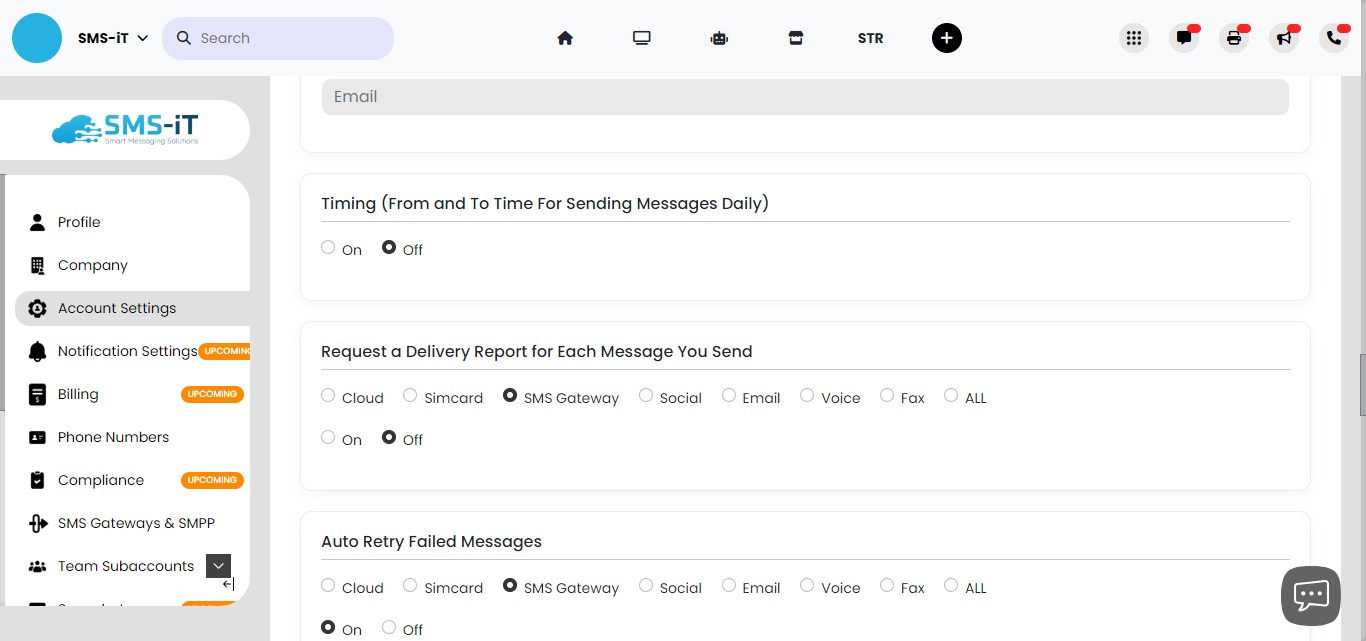
Set the timing for your SMS Gateway and reminder channels. Bulk Message settings are for Smart Tools and Bulk Sends; Single Message settings are for two-way conversations started by clients via keywords in Smart Tools or the Smart Inbox.
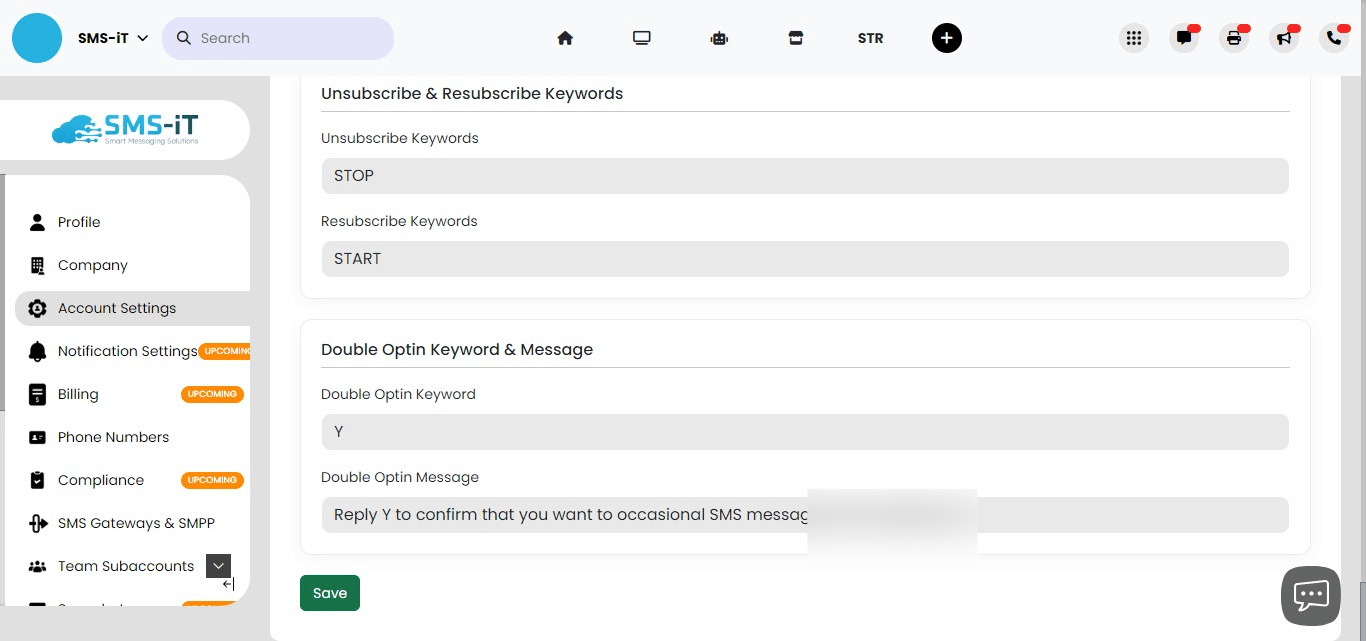
Scroll down and "Save" your settings.
Return to Remind-iT and click on "Create"
You'll now see the "Green checkmark" letting you continue.
Create a Generic Template
To set up a Remind-iT campaign, we will configure these 6 mandatory fields in a generic template:
1. Recurring Reminder Name 2. Recurring Reminder Message 3. Select Send Number 4. Auto Reply Message 5. Determine Timing and Start/End Date 6. Select Days to Send and Time to Send
Once you've completed the template, you can use it as a starting point anytime you want to create a new Remind-iT campaign.
Click on the "Smart Tools" icon.

Click on "Remind-iT©"

Click on "Create"
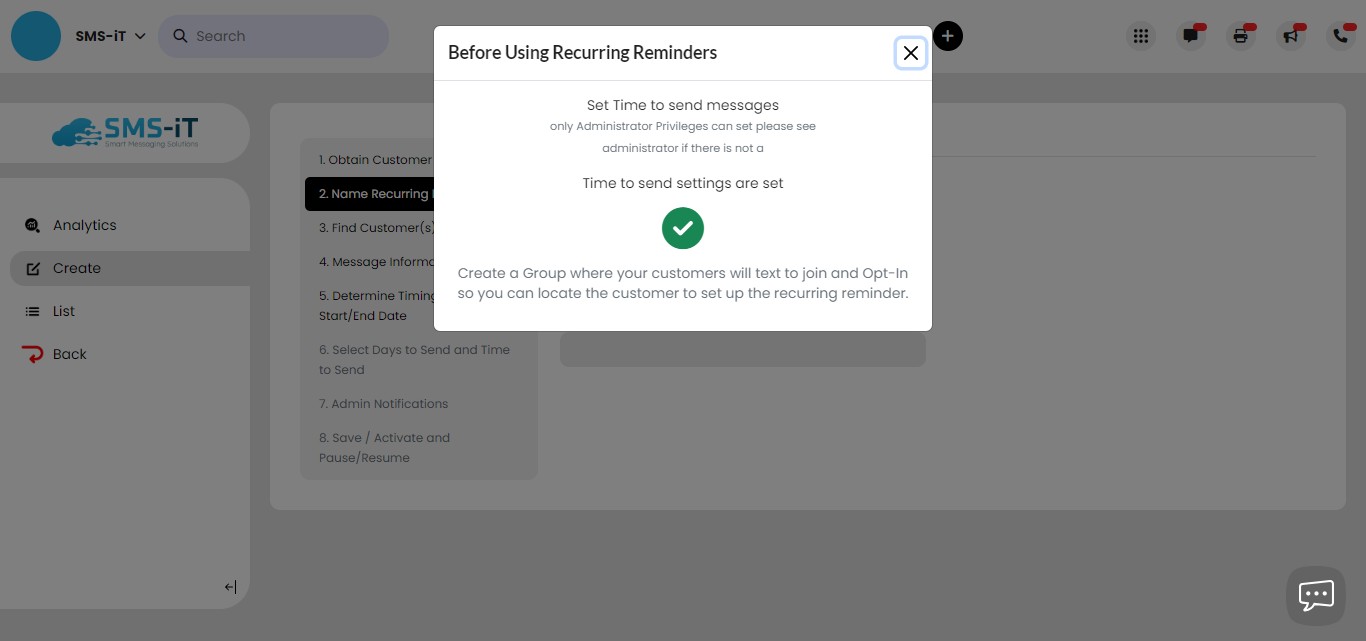
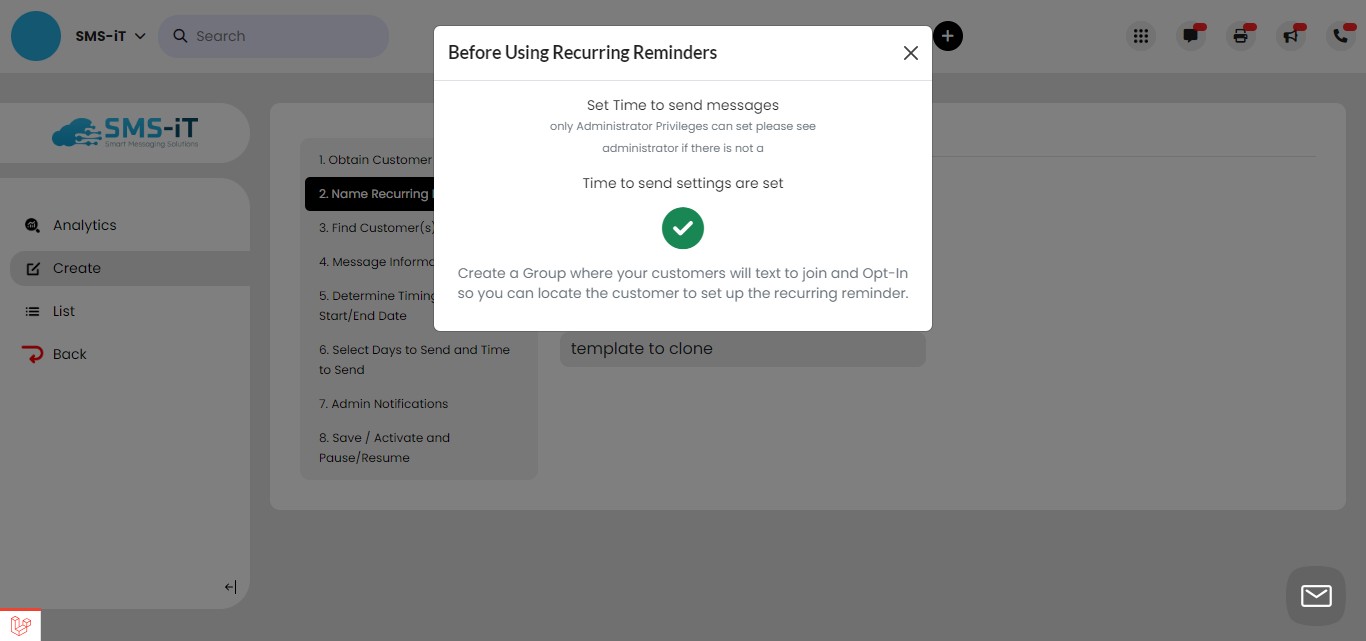
If you see a green checkmark, the settings are correct, and you can proceed. If you see a red checkmark, there may be an issue with the timing settings. In this case:
1. Review previous steps to ensure accuracy. 2. If you have admin privileges, adjust the timing settings. 3. If you don't have admin privileges, contact your system administrator for assistance.
Once the settings are correct and you see a green checkmark, move on to the next section.
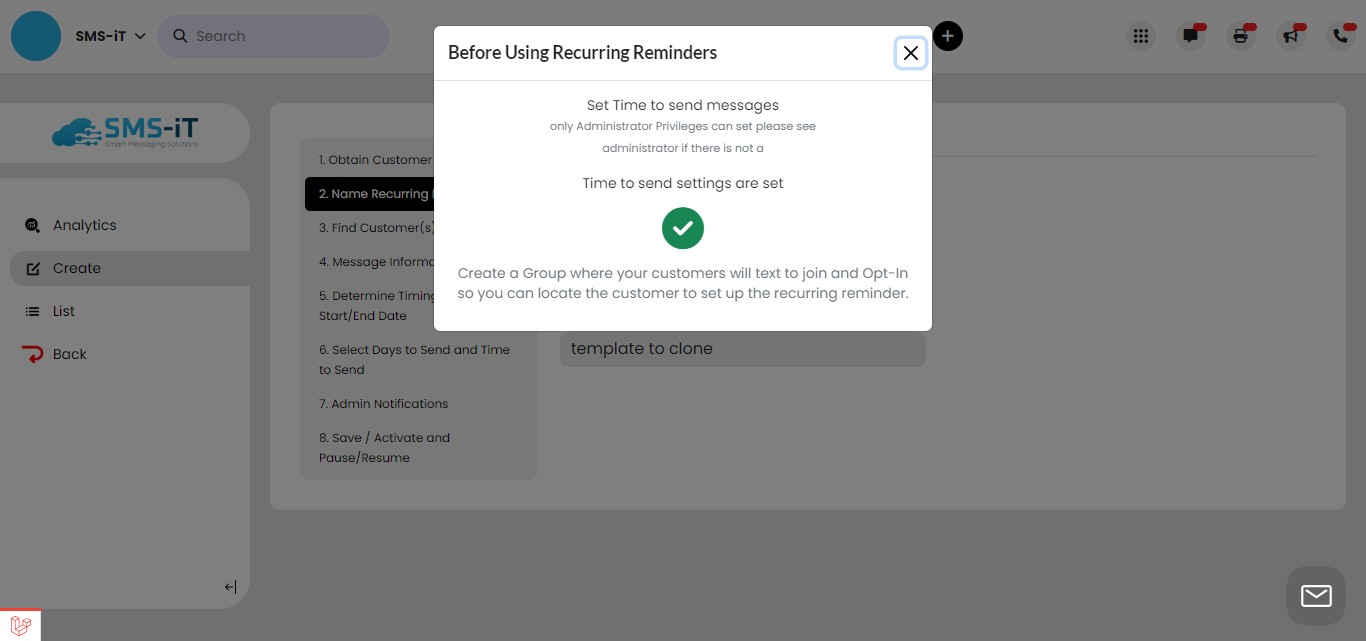
Close this pop-up.
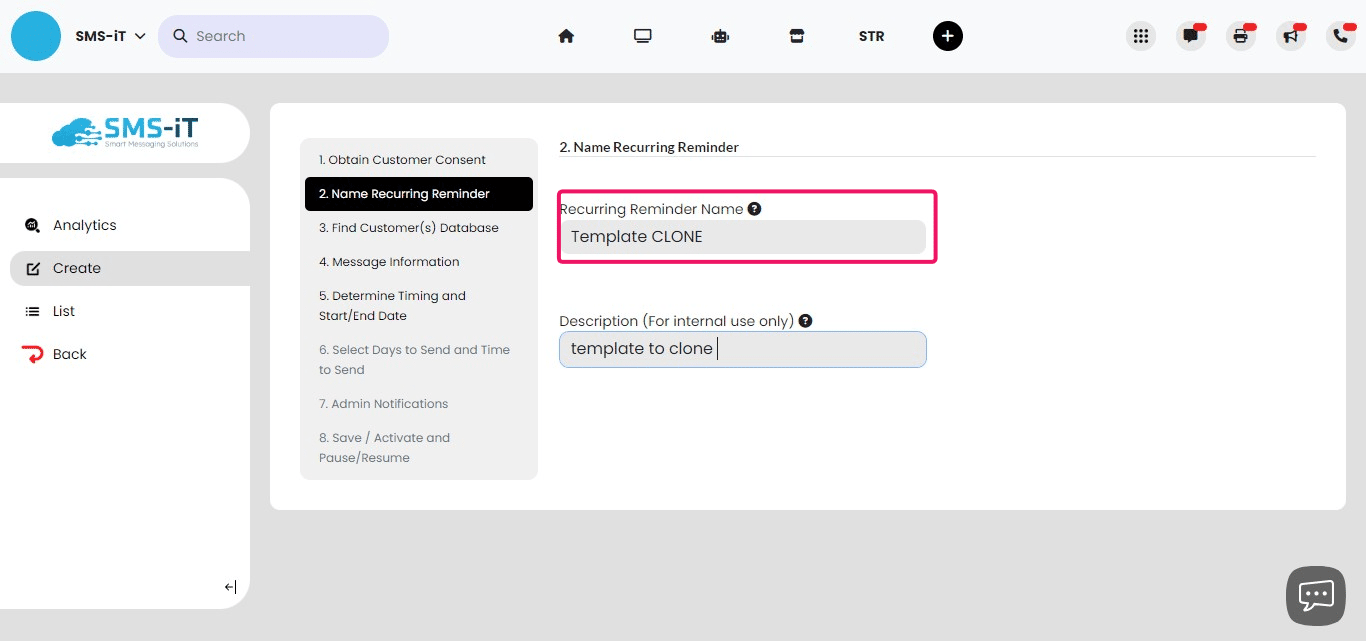
Navigate to 2. Name Recurring Reminder and name your template. Even though the Description field is not required, it's a good idea to provide a brief note there to remind yourself that this is a cloned template.
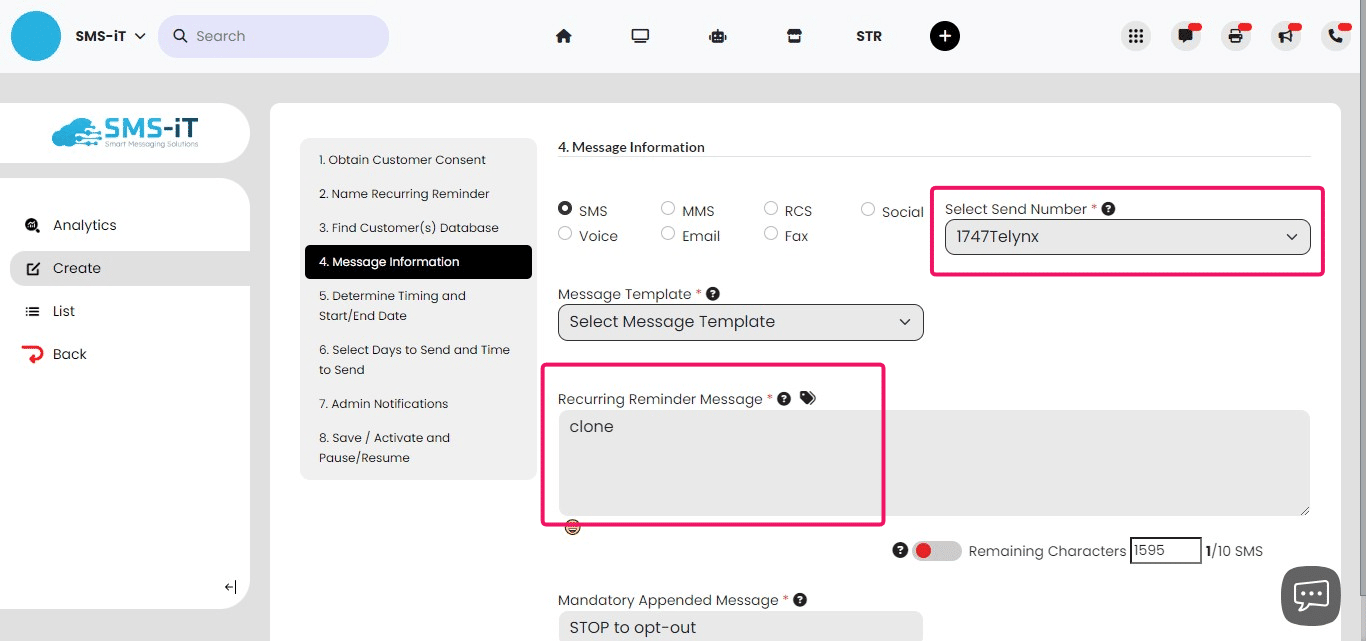
Navigate to 4. Message Information. Here you will Select a Send Number and add a Recurring Reminder Message.
Navigate to 5. Determine Timing and Start/End Date. Select Option 1
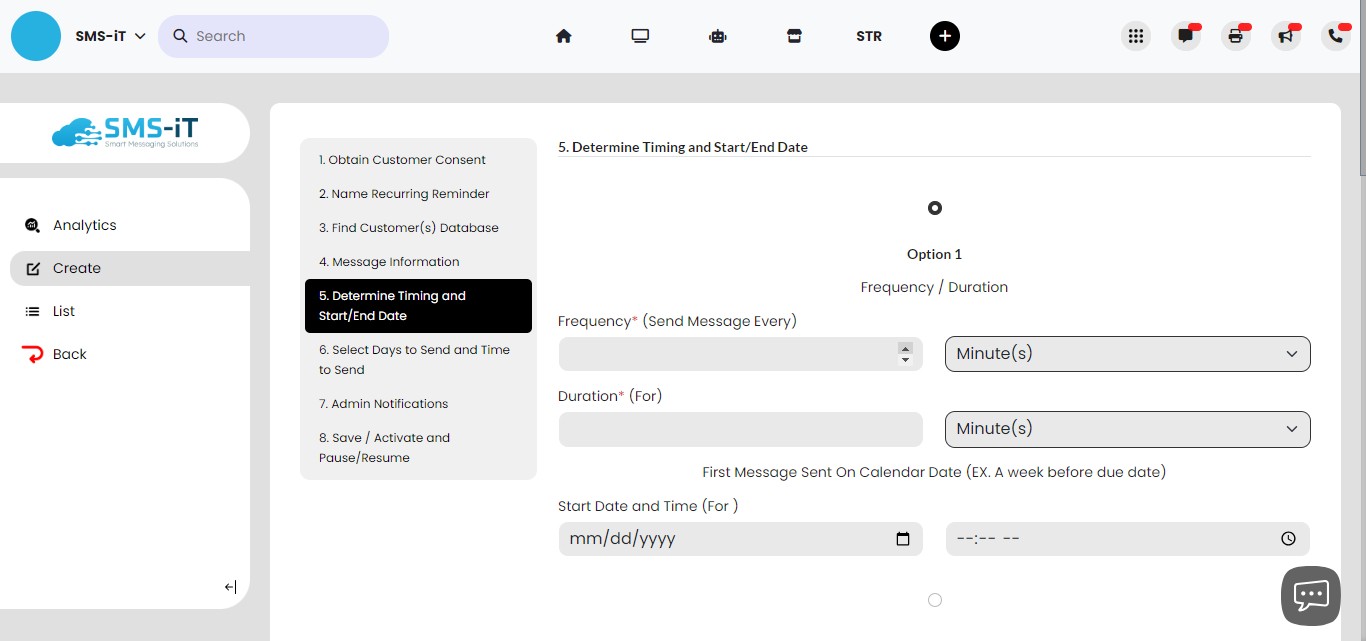
Fill in the four fields indicated.
Navigate to 6. Select Days to Send and Time to Send. Fill in the three fields indicated.
Click on "Save & Activate"

The template is not currently associated with a group, so it won't send any messages until you've completed setting it up and connected it to a group with opted-in contacts. You can safely proceed with cloning your template without worrying about it being active or sending unintended messages.
Create a group
Before you can set up your Remind-iT recurring messages, you'll first need to create a group within the SMS-iT platform to house your opted-in audience. This group will serve as the recipient list for your reminders.
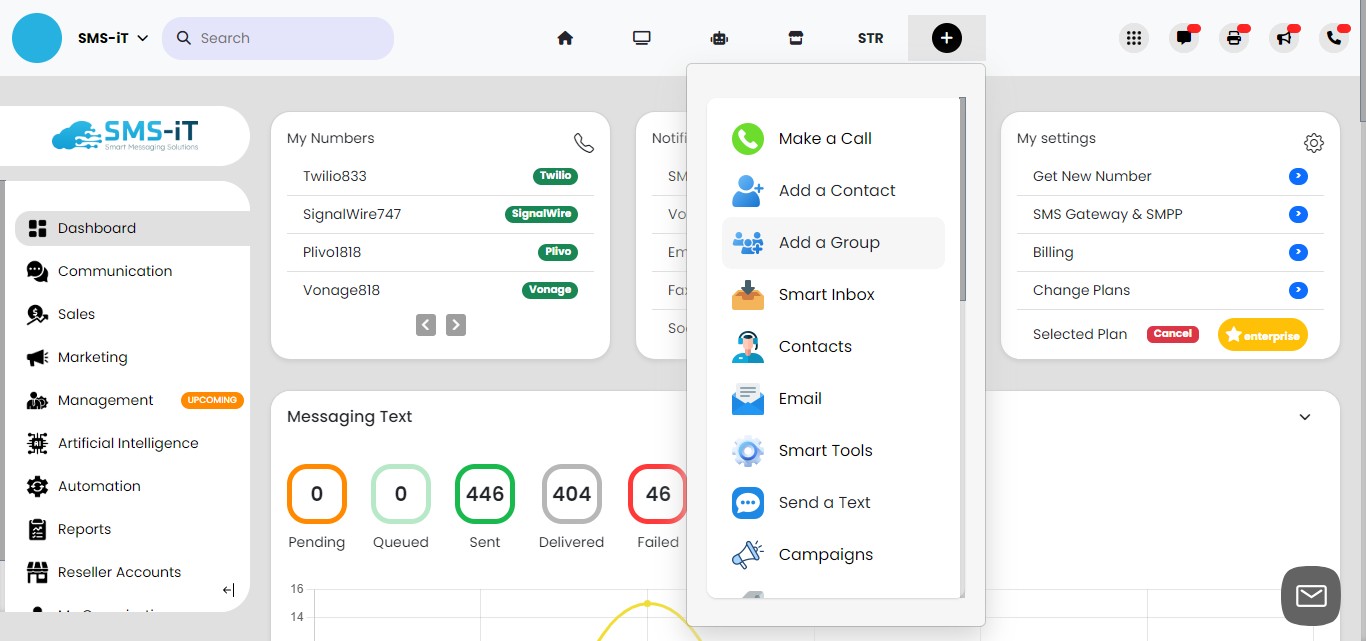
Click on "Quick Links"
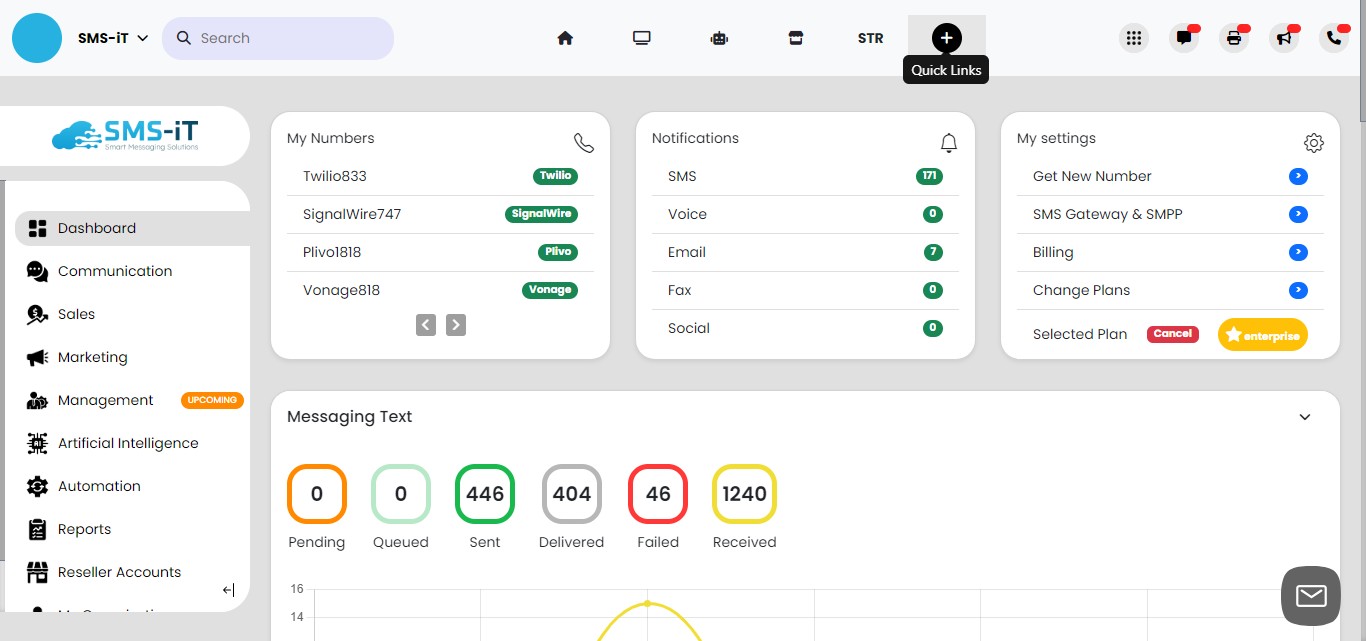
Click on "Add a Group"
Click on "Save"
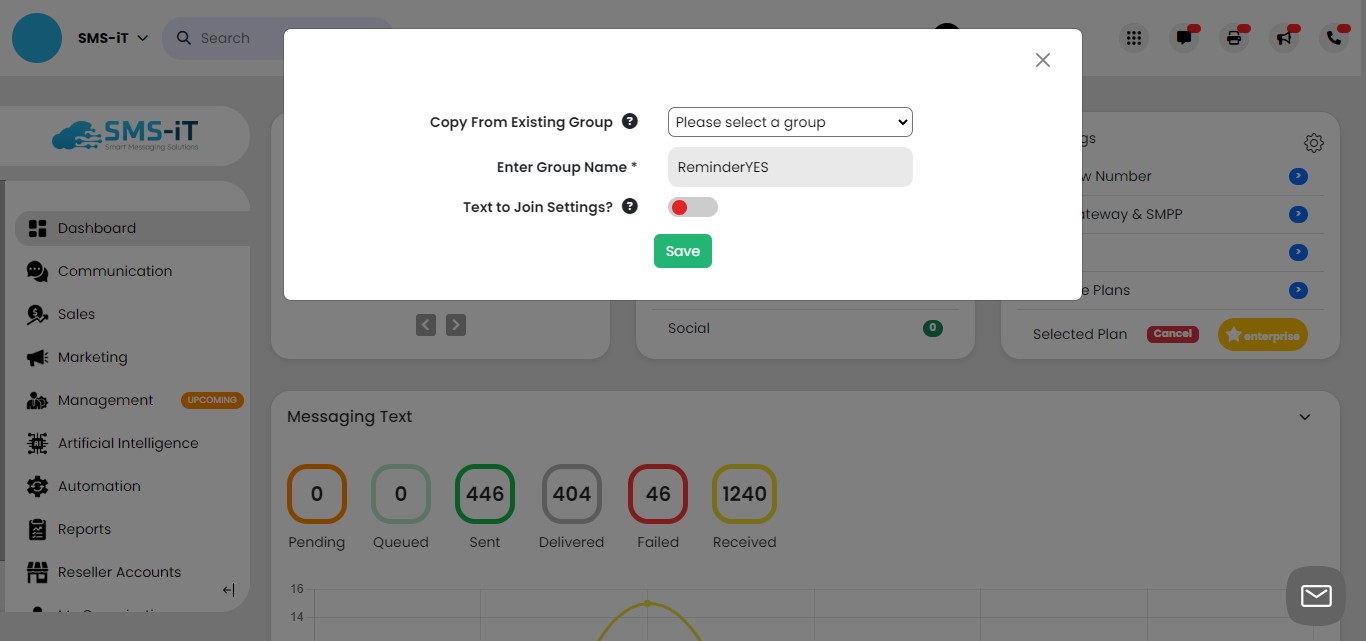
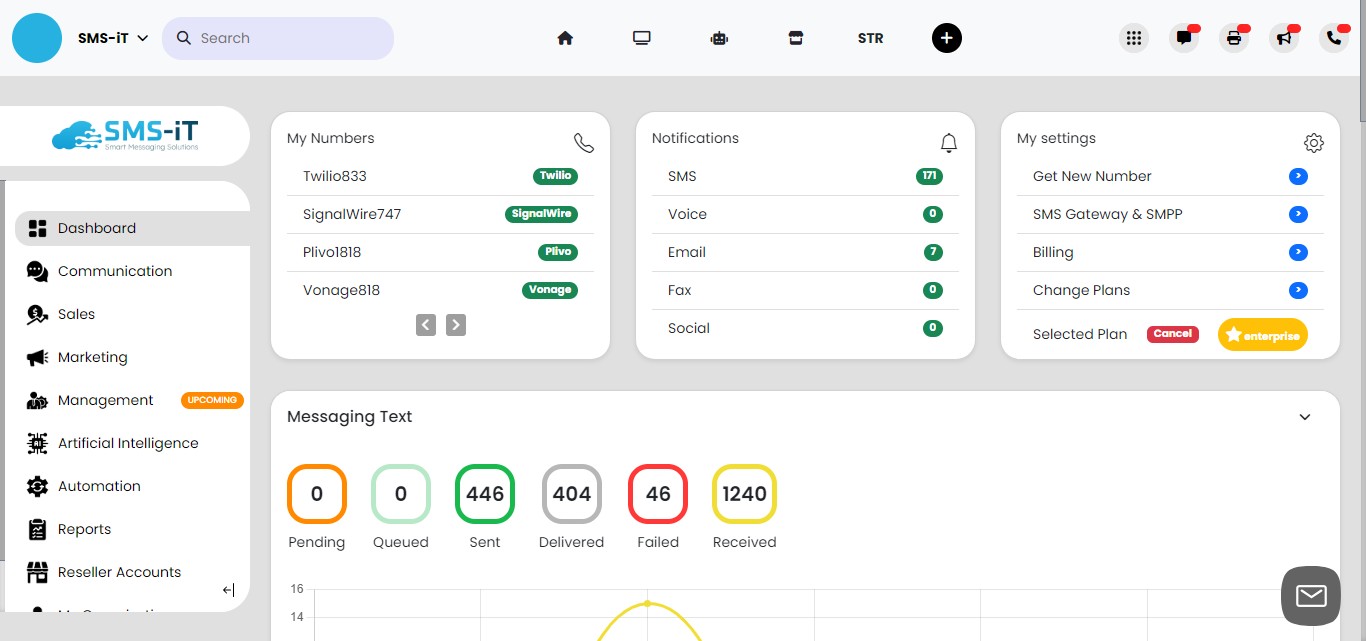
Your group has been created.
Creating your first reminder from your template
Click on "Smart Tools"

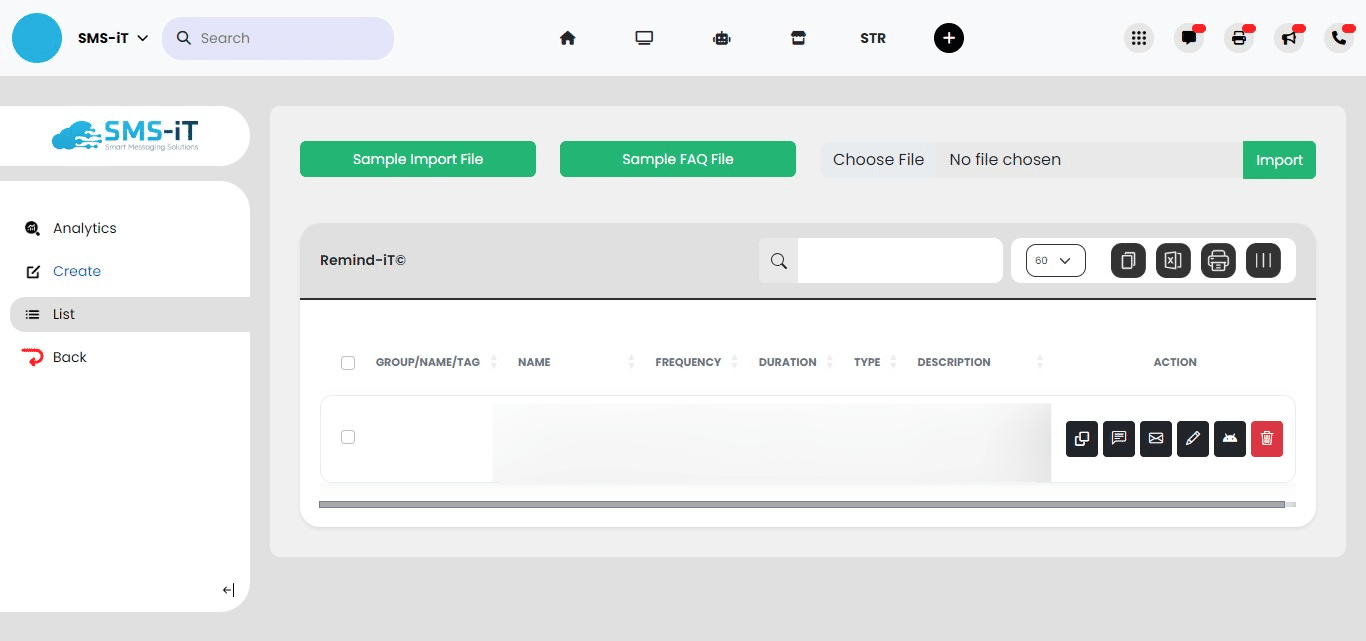
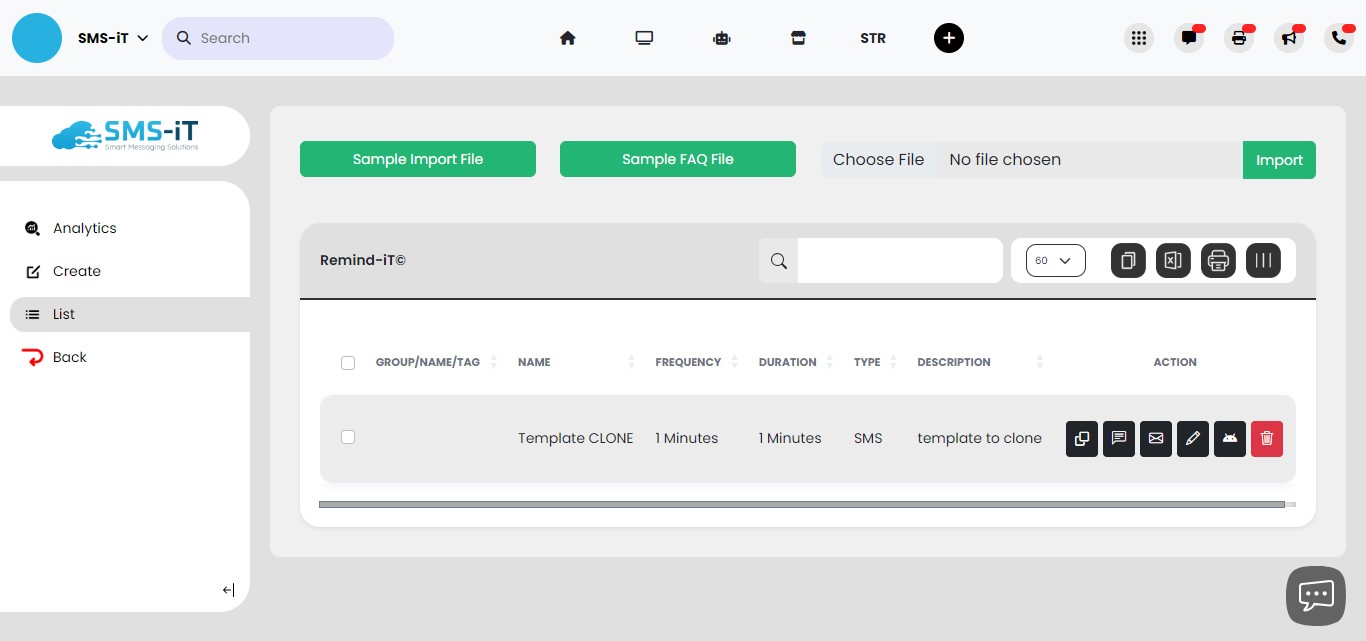
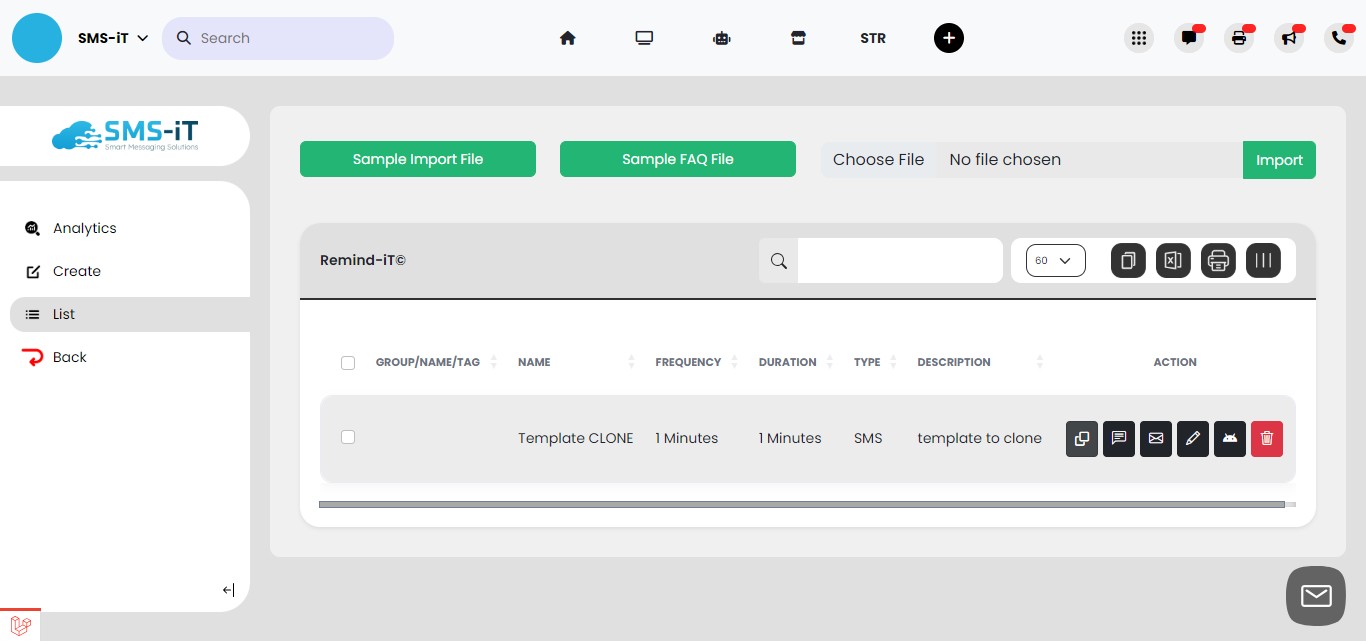
Click on "Remind-iT©"
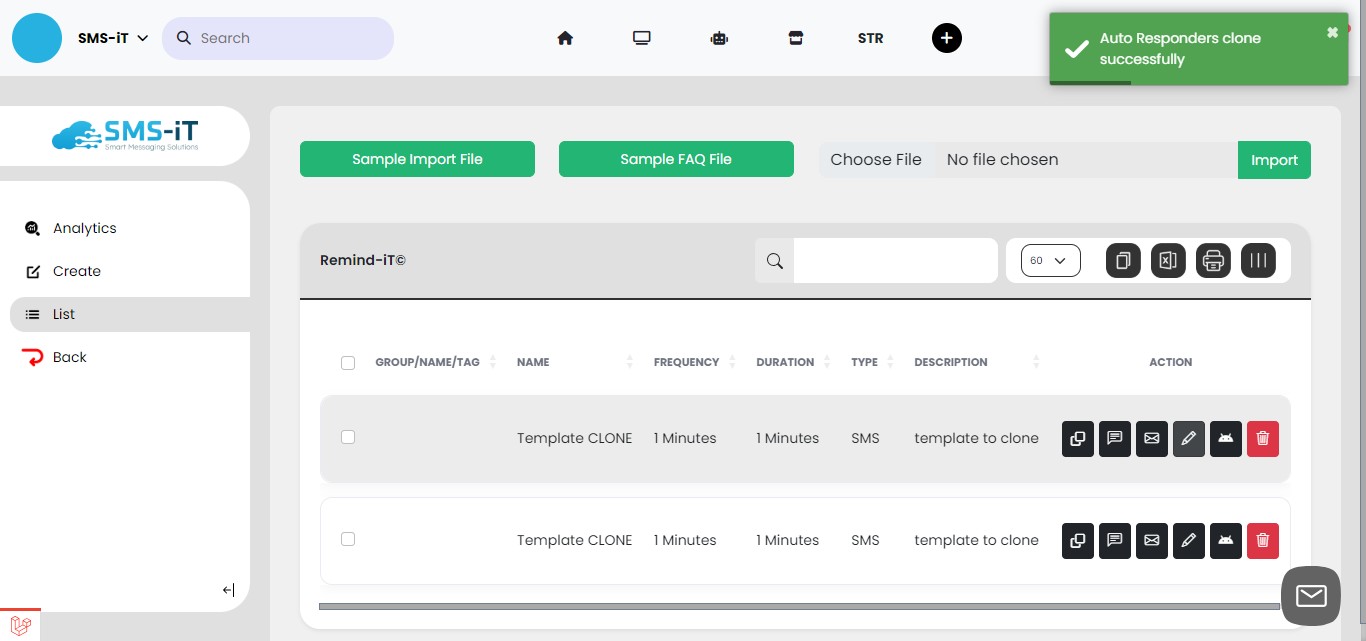
To create a new reminder, click the "Clone" icon to duplicate the template you set up earlier. This cloned version will serve as the basis for your new reminder.
Click the "Pencil" icon to edit your reminder.
Close the pop-up. (If it's a red checkmark see the steps at the beginning of this guide).
Name Recurring Reminder
Close out of pop-up.
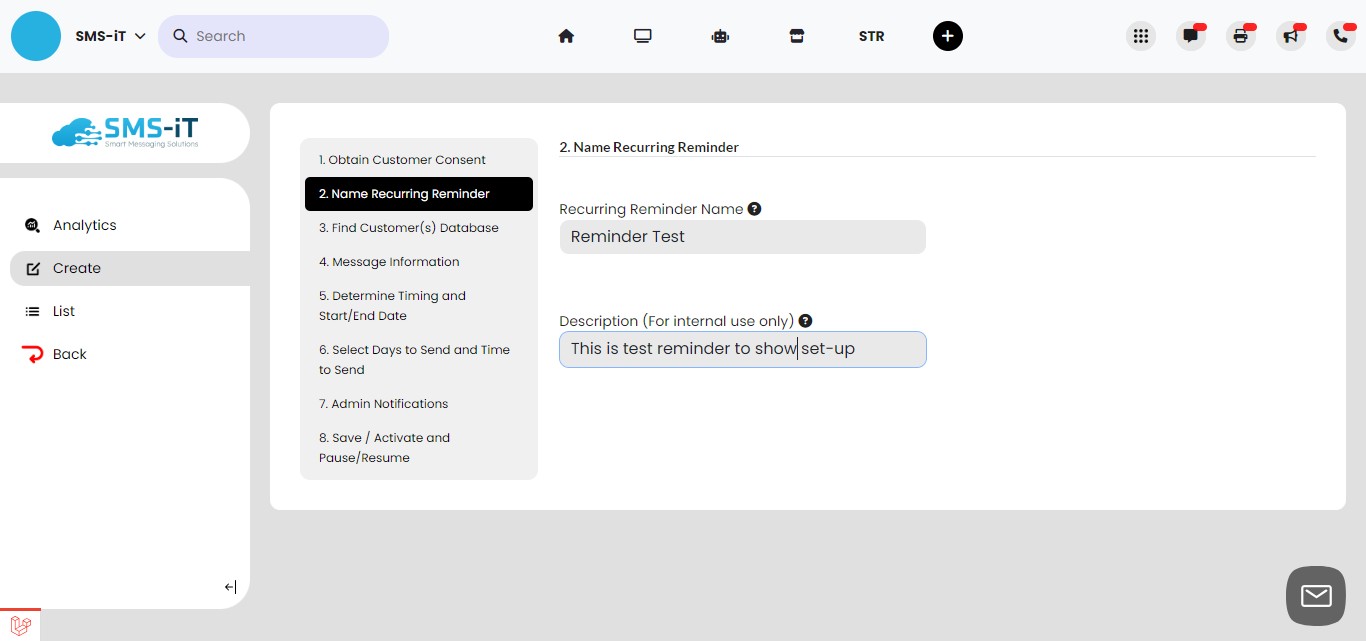
Navigate to 2. Name Recurring Reminder and name your reminder and add a Description (optional)
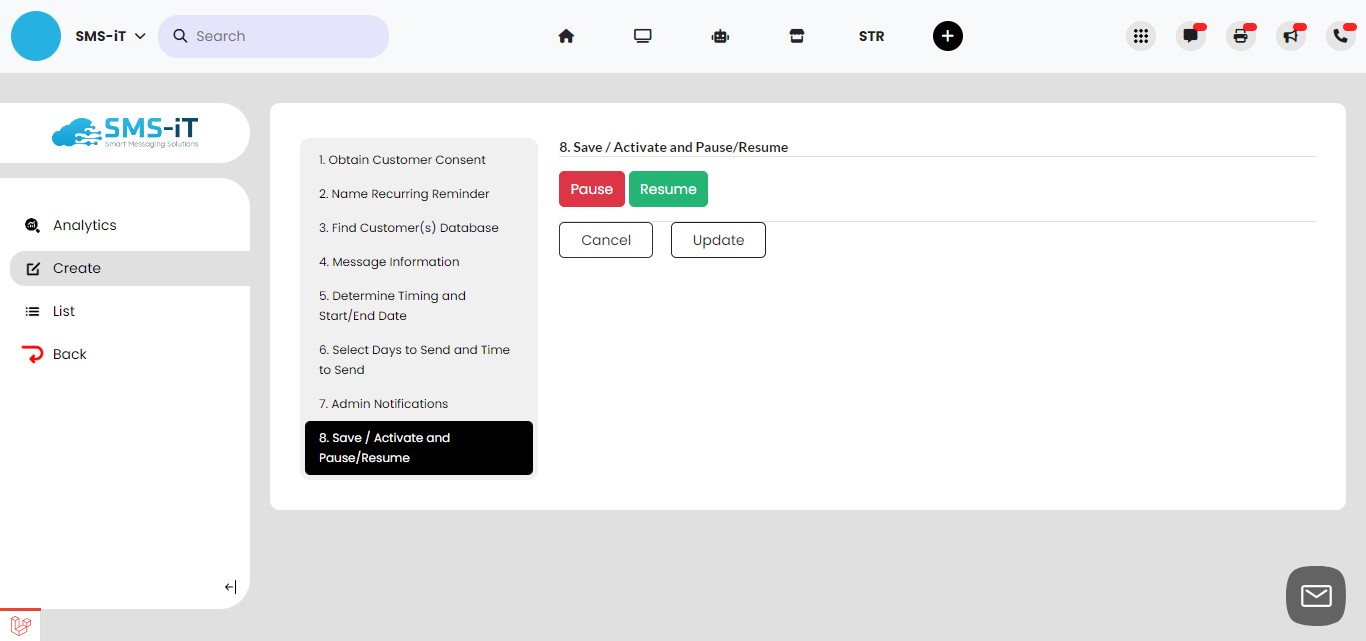
Go to Step 8: Save/Activate and Pause/Resume and click "Update." You can save your progress as you move through each section or save everything at the end of the process.
Opting in your customers
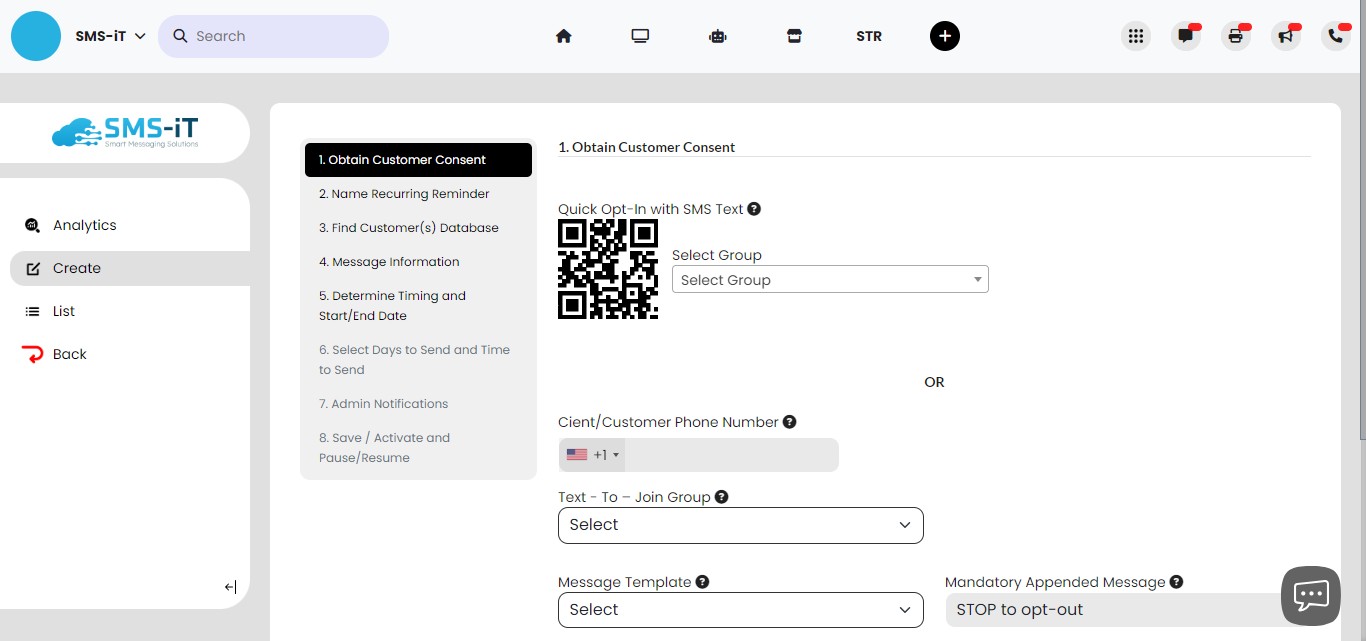
Go to Step 1: Obtain Customer Consent. Customers must opt-in to your system to receive recurring reminders. We'll discuss three methods for opting in.
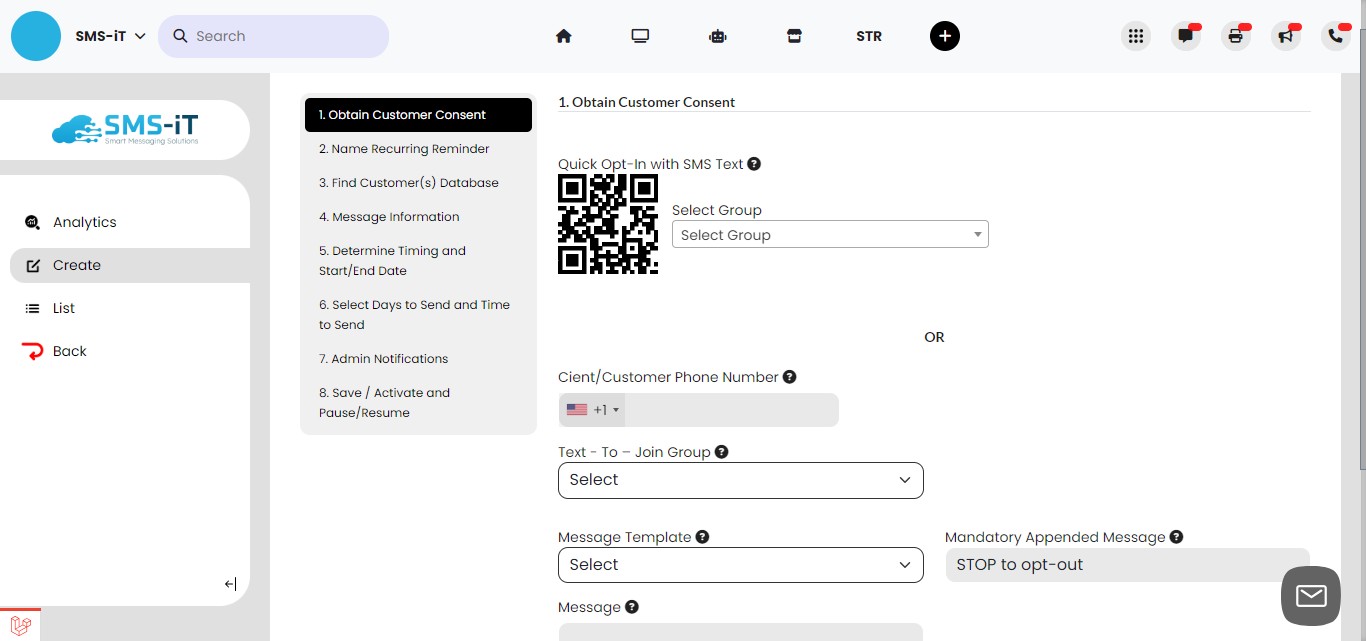
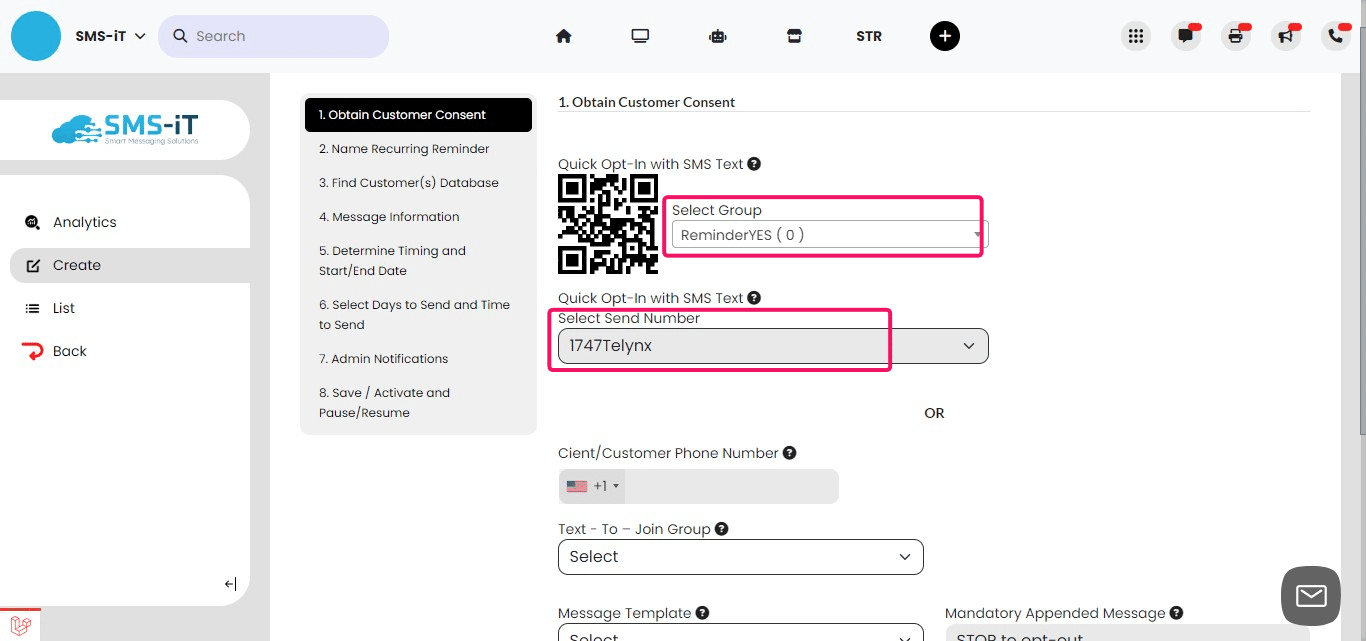
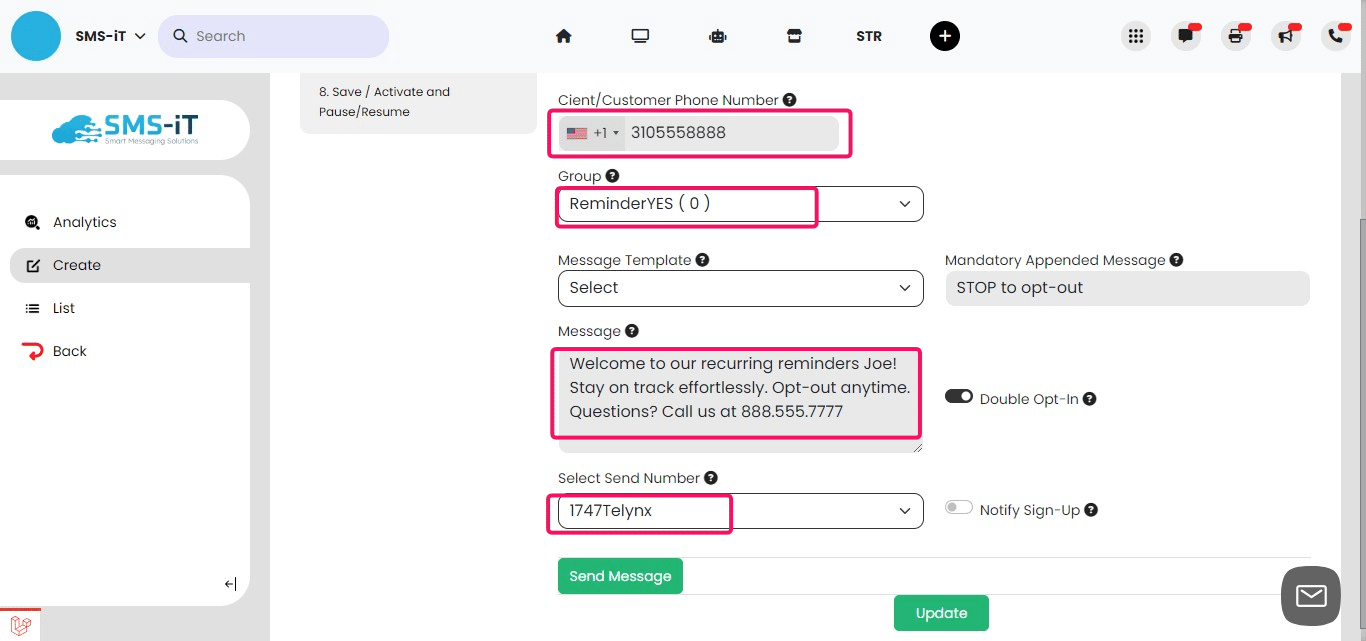
QR Code Opt-In: 1. Select a Group from the dropdown menu to assign the customer to upon opting in 2. Choose a Send Number that the opt-in confirmation and future messages will come from 3. Have the customer scan the generated QR code using their smartphone camera 4. This will automatically populate their text message field with the opt-in keyword 5. When the customer sends this keyword text, they will be opted-in to your selected Group
This QR code method allows customers to quickly and easily opt themselves in without needing to manually type out the keyword.
Select the Group you had just created and a send number. The QR code will auto-generate. Then follow the instructions in the green box above.
Agent Phone Opt-In: 1. While on the phone with the customer, the agent can ask if they would like to opt-in to SMS messages 2. If the customer verbally agrees, the agent can send them a message confirming they have been opted-in 3. For added confirmation, enable the "Double Opt-In" setting 4. With Double Opt-In, after receiving the initial opt-in message, the customer must reply "Y" to fully complete their opt-in
Verbal opt-in is legally acceptable, but some businesses may prefer the additional assurance of a double opt-in.
Fill or select the required fields. For this example, we selected Double - Opt-in.
A third option for opting-in customers is to use Joinify-iT, which is an opt-in web-based kiosk that can be accessed through a browser, embedded on your website, or shared via a link in SMS or email. - 1. Set up a Joinify-iT opt-in page, which serves as a web-based kiosk for customers to enter their contact information and opt-in to your messaging service 2. Customers can access the Joinify-iT page through a direct link, by navigating to it on your website, or by clicking a link shared via SMS or email 3. When a customer submits their information through Joinify-iT, they will be automatically added to your selected Group 4. You have the option to enable Double Opt-In for Joinify-iT, which will send a confirmation message to the customer's provided phone number or email 5. If Double Opt-In is enabled, the customer must respond to the confirmation message to complete their opt-in process - Joinify-iT offers a flexible, web-based solution for obtaining customer opt-ins. By making the Joinify-iT link available across multiple channels, such as your website, SMS, and email, you provide customers with a convenient way to sign up for your messaging service at their preferred time and place. - To recap, the three opt-in methods available are: 1. QR Code Opt-In: Customers scan a QR code and send a keyword to opt-in 2. Agent Phone Opt-In: Agents obtain verbal consent and send a confirmation message 3. Joinify-iT Web-Based Opt-In: Customers submit their information through a web-based kiosk - Choose the method(s) that best suit your business requirements and customer preferences, or use a combination of these methods to optimize your opt-in strategy.
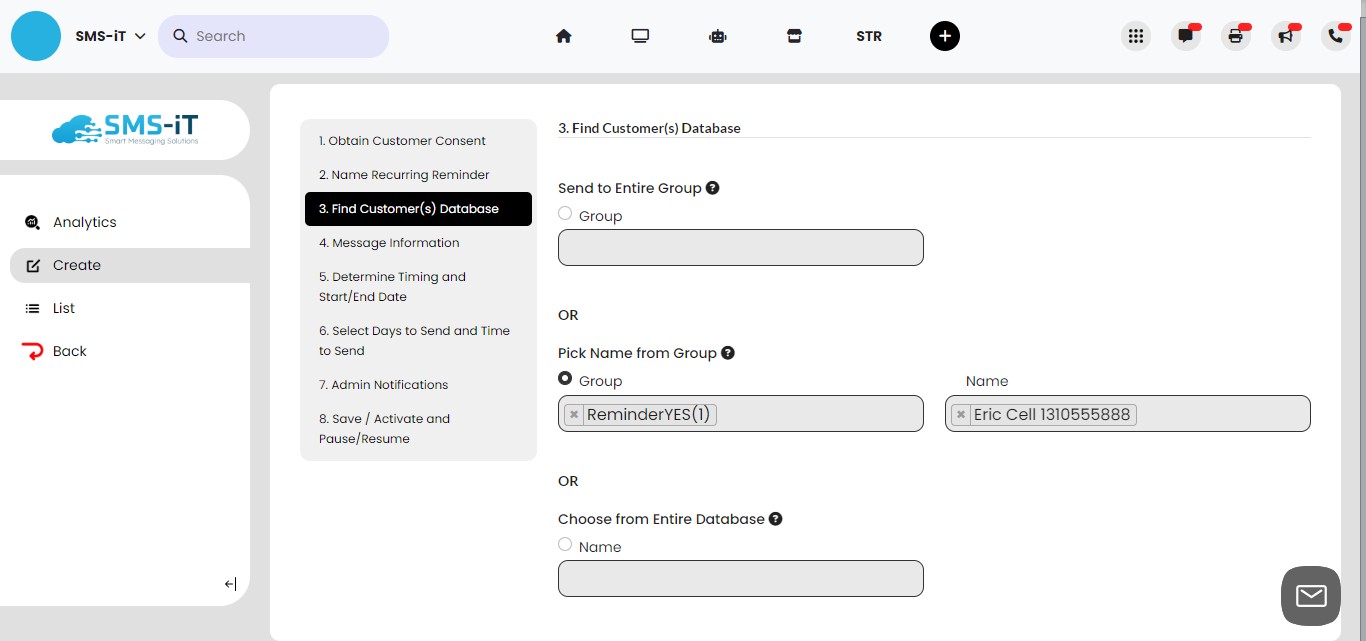
- Find Customer(s) Database
To find the customer(s) for your reminder, you have three options:
1. Send to Entire Group: Select a group to send the reminder to all customers within that group.
2. Pick Name from Group: Choose a group, then select one or more specific customers from that group to receive the reminder.
3. Choose from Entire Database: Pick individual customers from your entire database to send the reminder to, regardless of their group associations.
Simply select the method that best suits your needs for this particular reminder.
In this example, we selected a group, then a customer within that group. You can add multiple customers by continuing to select them from the dropdown menu.
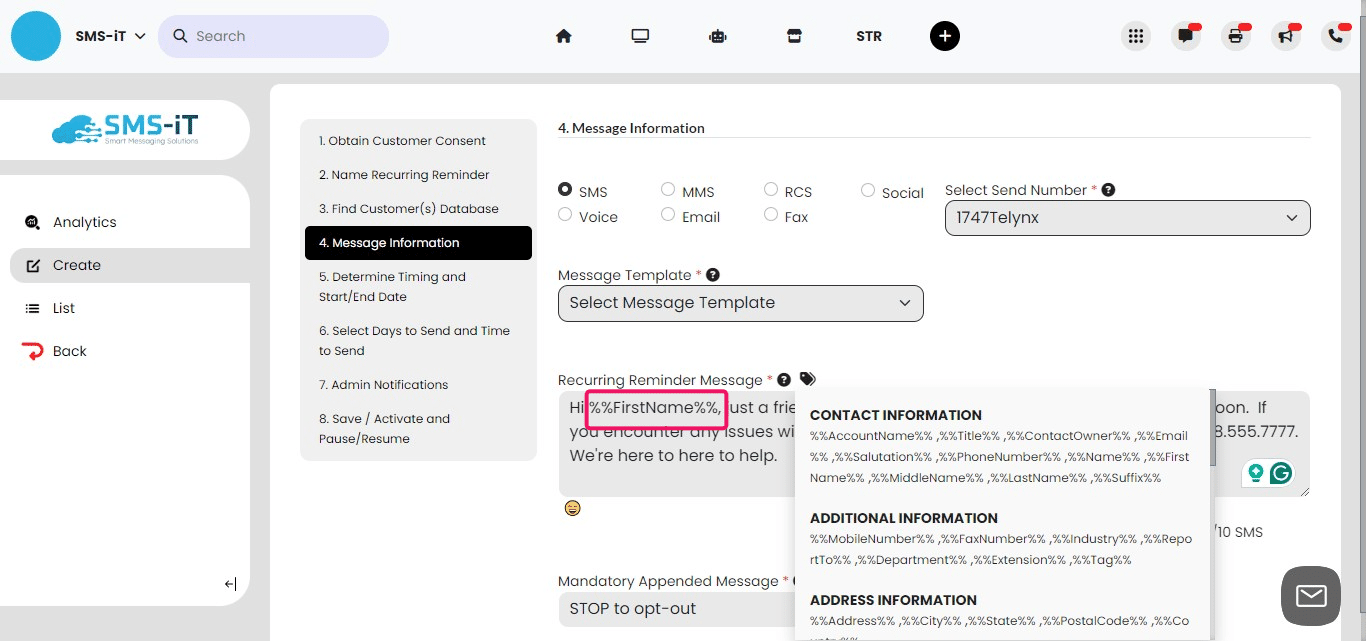
- Message Information
Fill in or select the following fields.
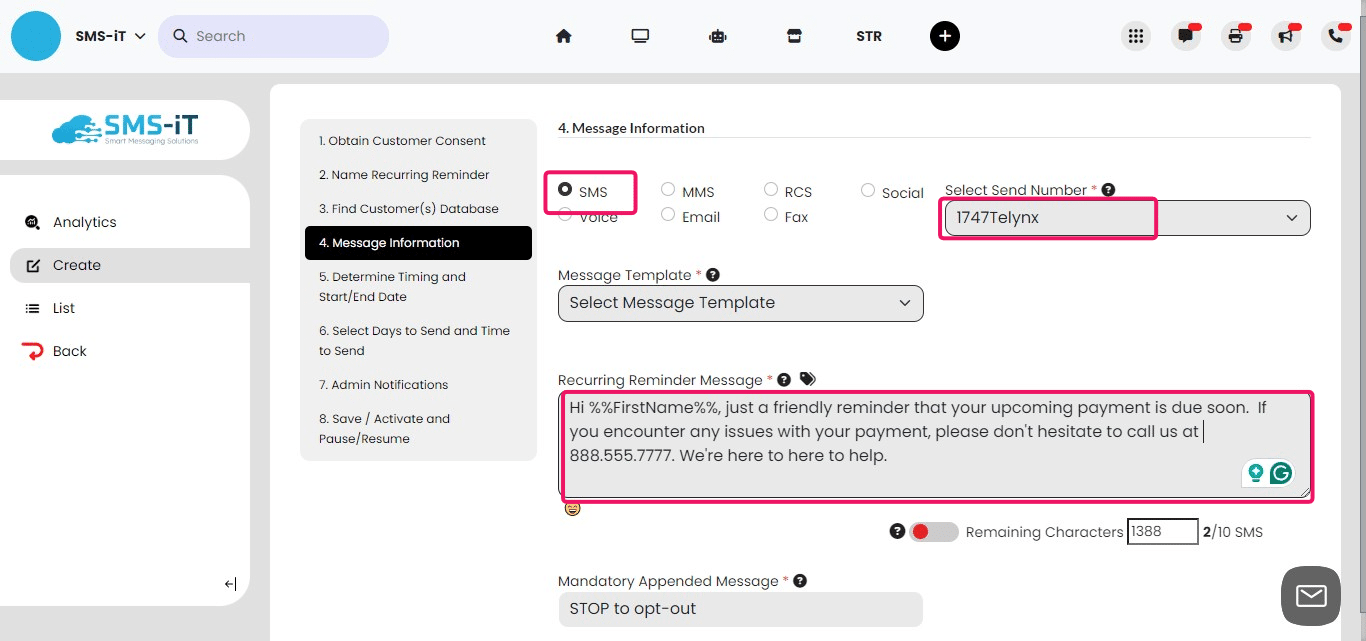
A note about Merge Tags. (Merge tags are placeholders that insert personalized information into messages, such as names or emails, from a database, allowing for customized communication.) To insert a merge tag, click the "Tag" icon, choose the merge tag(s) you want to include and click on it in the menu pop-up. In this example, we added the first name of the customer. (Also, make sure that the first name is in the customer contact form.)
You can select one timing option per campaign from the three available options. We'll cover each option in detail.
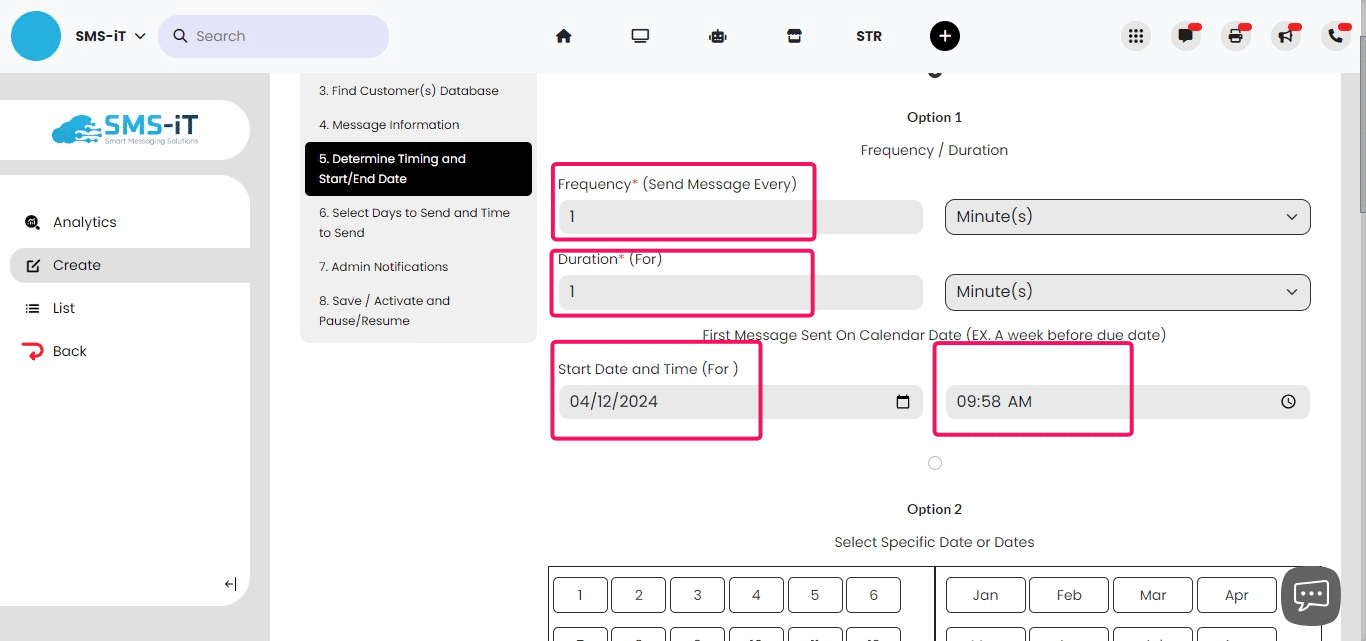
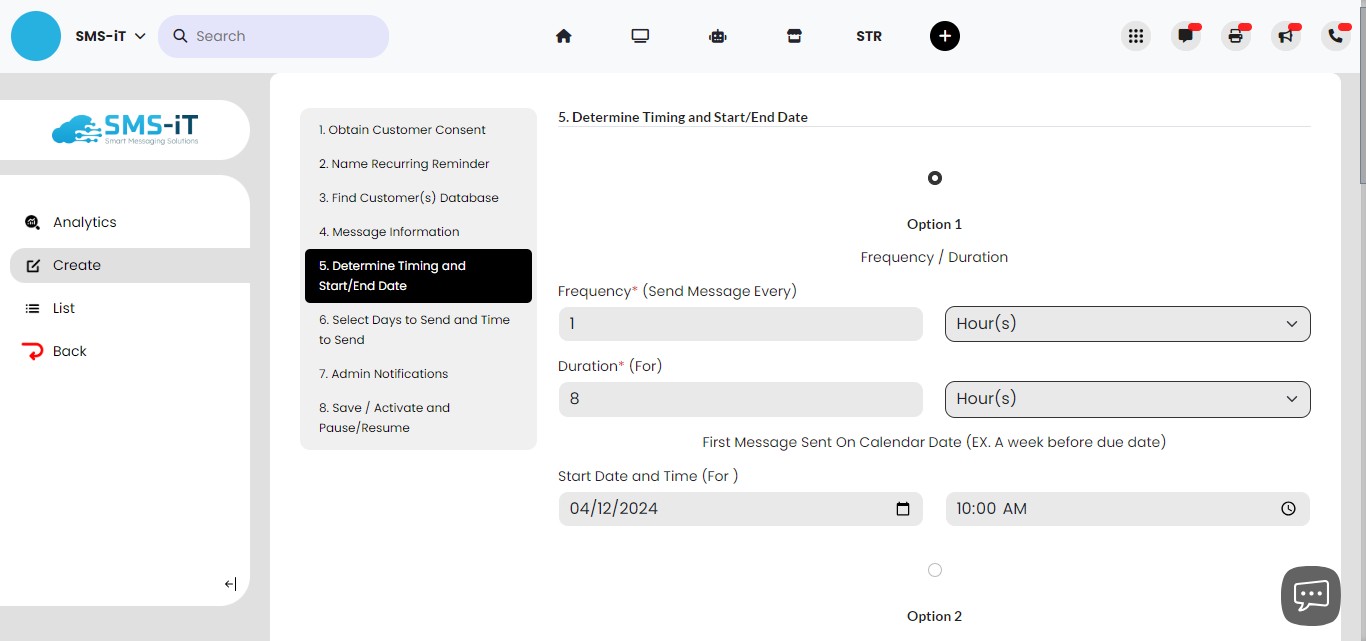
- Determine Timing and Start/End Date: Option 1
Option 1 in the "Determine Timing and Start/End Date" section lets you adjust the frequency and duration of reminder messages. Here's how:
Frequency: Choose how often reminders are sent, selecting from minutes, hours, weeks, months, or years. Duration: Specify how long reminders continue, selecting the timeframe from the dropdown menu First Message Sent On Calendar Date: Select the date for the first reminder message. Start Date and Time: Set the initial date and time for the reminder series. By configuring these settings, you can create a reminder that sends messages at your preferred frequency for a specified duration, starting at a particular date and time
For Option 1, let's use an example where you want to send a message every hour for 8 hours, resulting in 8 messages. This scenario might be for a notice at a convention or a similar event.
- Determine Timing and Start/End Date: Option 2
Option 2: How to Select Multiple Dates and Months for Your Remind-iT Campaign
1. Choose your dates: In the "Option 2" calendar, click on each date you want messages sent.
2. Select months: Check the boxes next to each month you want the selected dates to apply to.
3. Set start date and time: Input the date and time you want the recurring series to begin in the "First Message Sent On" field.
4. Specify duration: In the "Duration" field, input the number of days you want the series to run.
5. Select date conditions: Choose how to handle selected dates that don't occur in certain months - either move to the closest available day or skip sending that month.
You've now created a recurring reminder series that will automatically send on your selected dates and months, for the specified duration, intelligently adapting to month length variations.
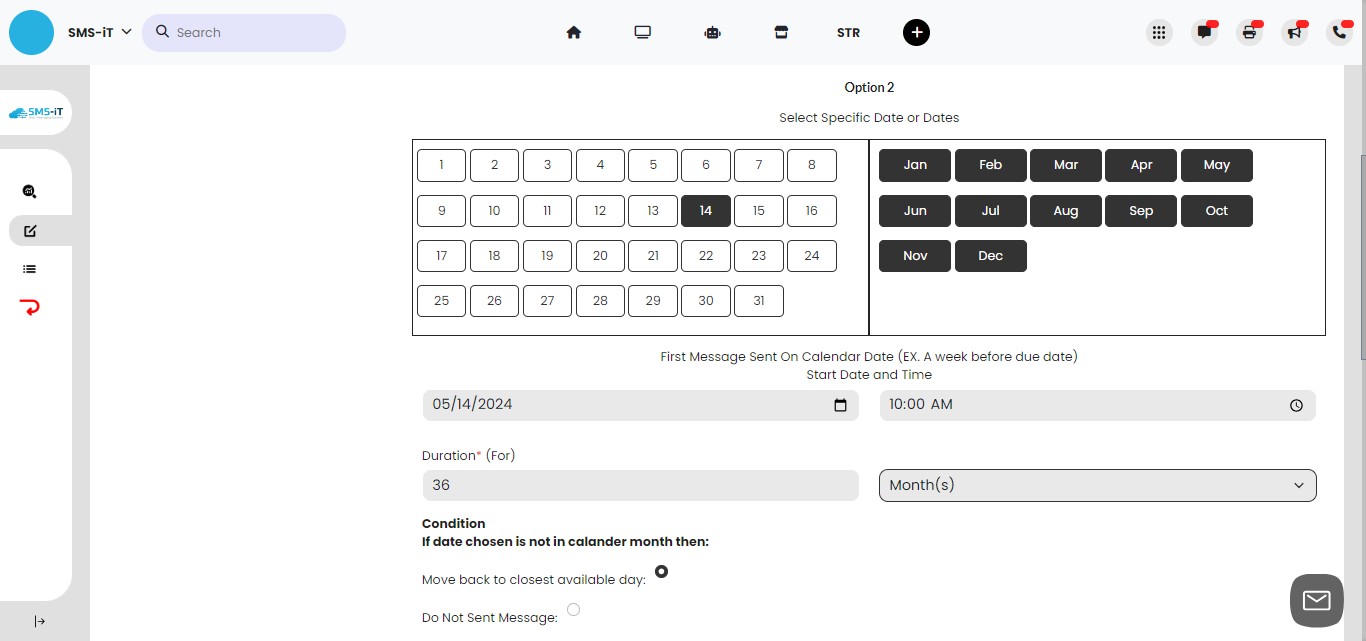
Example 1: Sending a Reminder on the 14th of Every Month
1. Select the 14th in the calendar 2. Check all 12 month boxes (Jan-Dec) 3. Set "First Message Sent On" to 05/14/2024 at 10:00 AM 4. Input 36 Month(s) in the "Duration" field for a 3-year campaign 5. Choose "Move back to closest available day" (optional) 6. Your reminder will send on the 14th of every month for 3 years, starting May 14, 2024.
Use Case: Sending a Monthly Bill Reminder
Set up a recurring reminder for the 14th of each month to notify customers of upcoming bill payments on the 20th. Scheduling reminders a few days before the due date gives customers time to resolve any payment issues by contacting you prior to the deadline.
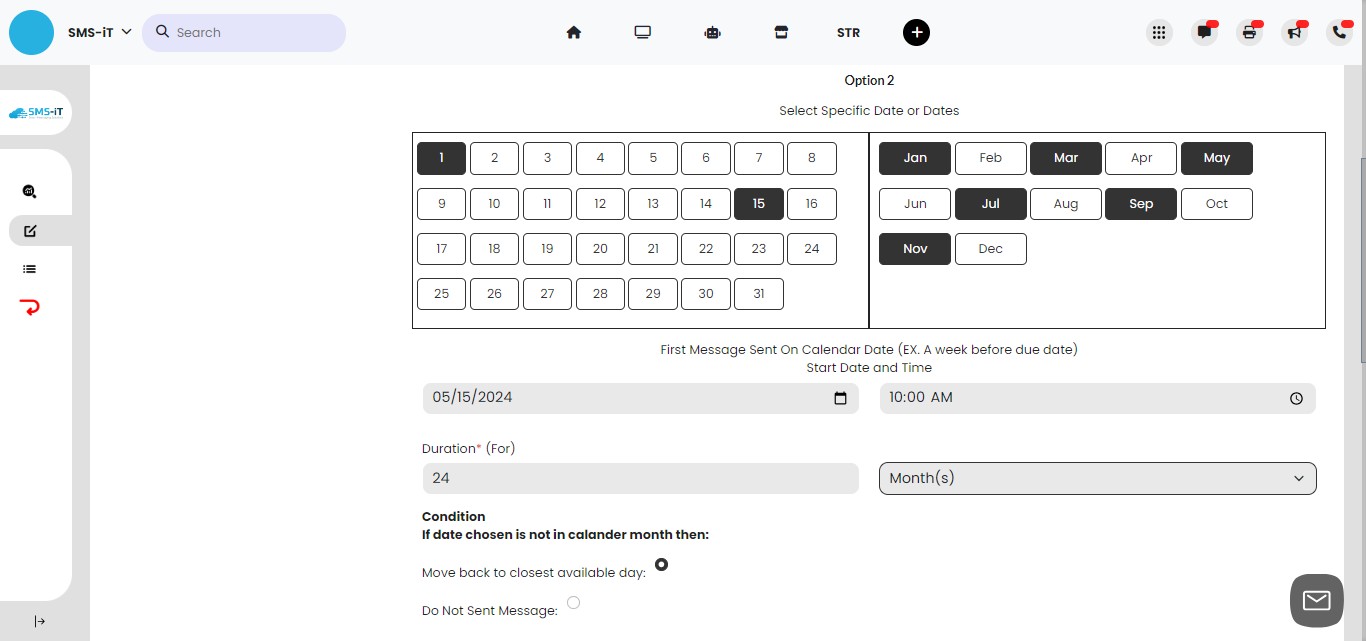
Example 2: Suppose you run a subscription box service and want to send marketing messages on the 1st and 15th of every other month encouraging upgrades, for the next two years.
In Remind-iT, you would: 1. Click on 1 and 15 in the calendar 2. Check every other month boxes for the year 3. Input your campaign start date and time, say 05/15/2024 10:00 AM 4. Enter for the duration of 24 months (Note: 24 months are calendar months meaning you'll send 6 reminders a year for 2 years.) 5. Select "Move back" as your date condition
Your upgrade reminders will now go out on the 1st and 15th for every other month starting May 15.
With Remind-iT Option 2's granular recurring message controls, the possibilities are endless for creating a reminder series that perfectly suits your business needs. Try it out and take your customer communication to the next level!
- Determine Timing and Start/End Date: Option 3
Option 3 lets you choose which days of the week you want your reminder sent, and which week of the month.
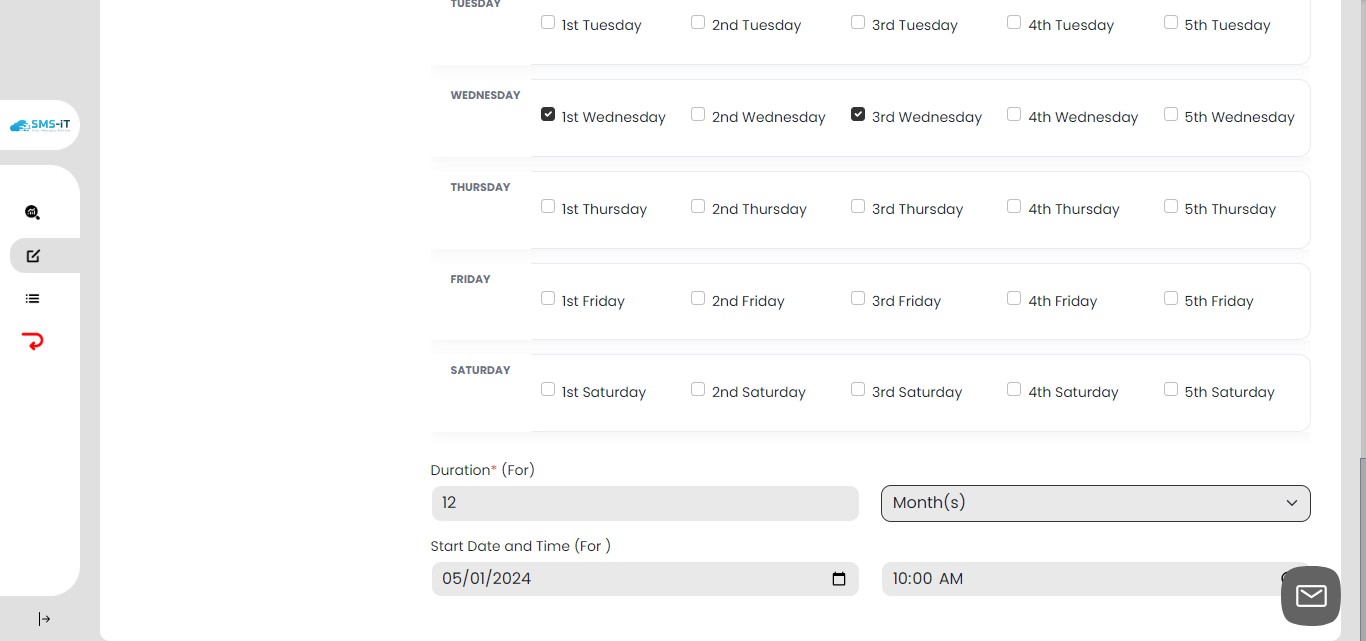
Pick the days of the week you want your reminder sent (Sunday through Saturday). For each day you picked, choose which week of the month to send it: 1st: sends on the first Sunday, Monday, etc. of the month 2nd: sends on the second Sunday, Monday, etc. of the month 3rd, 4th, 5th: same idea - the 3rd, 4th or 5th time that day occurs in the month Decide how many months you want the reminders to keep going (the"Duration"). Choose what date and time you want the first reminder to be sent ("Start Date and Time"). The system will automatically send your reminders on the days and weeks you picked, for the number of months you chose, starting from your start date.
Option 3 Use Case: Weekly Team Meeting Reminder
Suppose you have a team meeting every 1st and 3rd Wednesday of the month at 11 am, and you want to send out recurring reminders to your team. Here's how you would set that up using Option 3:
1. In the Wednesday row, check the boxes for "1st Wednesday" and "3rd Wednesday". (more)
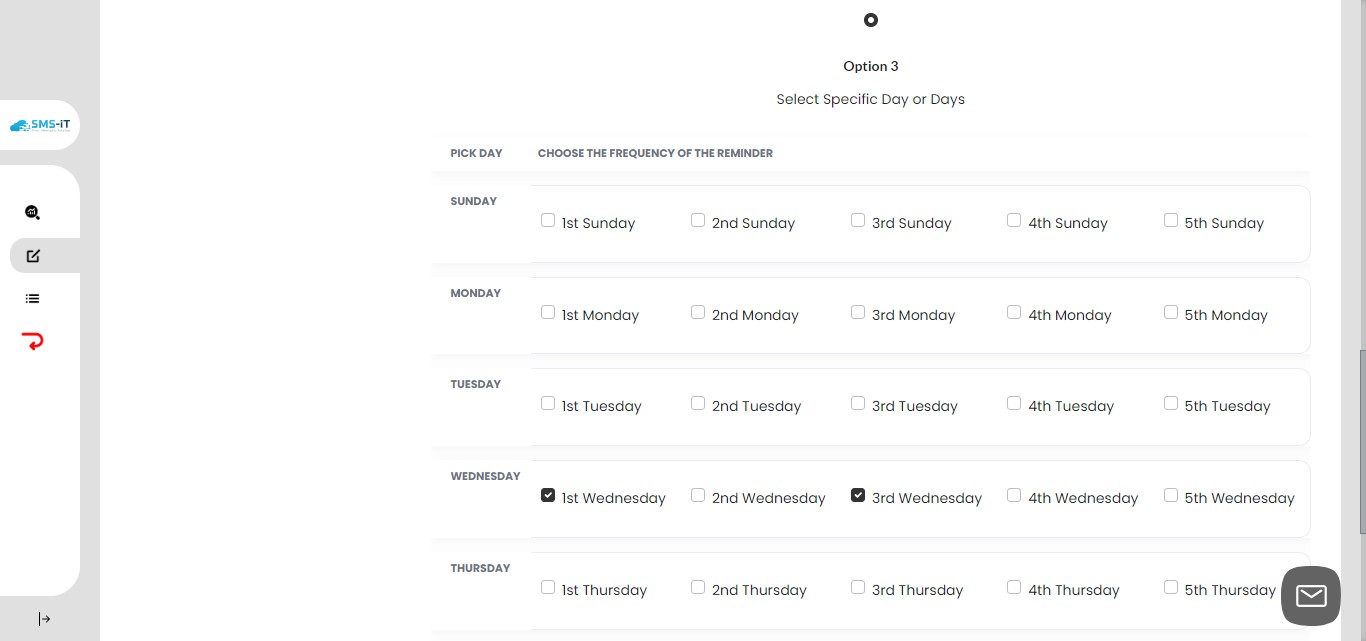
2. Set the "Duration" to 12 months, so the reminders will continue for a full year.
3. Set the "Start Date and Time" to 05/01/2024 at 10:00 AM, which is the first occurrence of your meeting.
Now, Remind-iT will automatically send out meeting reminders on the 1st and 3rd Wednesday of each month at 10 am, starting from May 1, 2024, and continuing for the next 12 months.
This use case demonstrates how Option 3 can be handy for setting up recurring reminders for events that occur on a regular schedule, but not necessarily every single week. The flexibility to choose specific weeks of the month is particularly useful for meetings or events that follow a less frequent cadence.
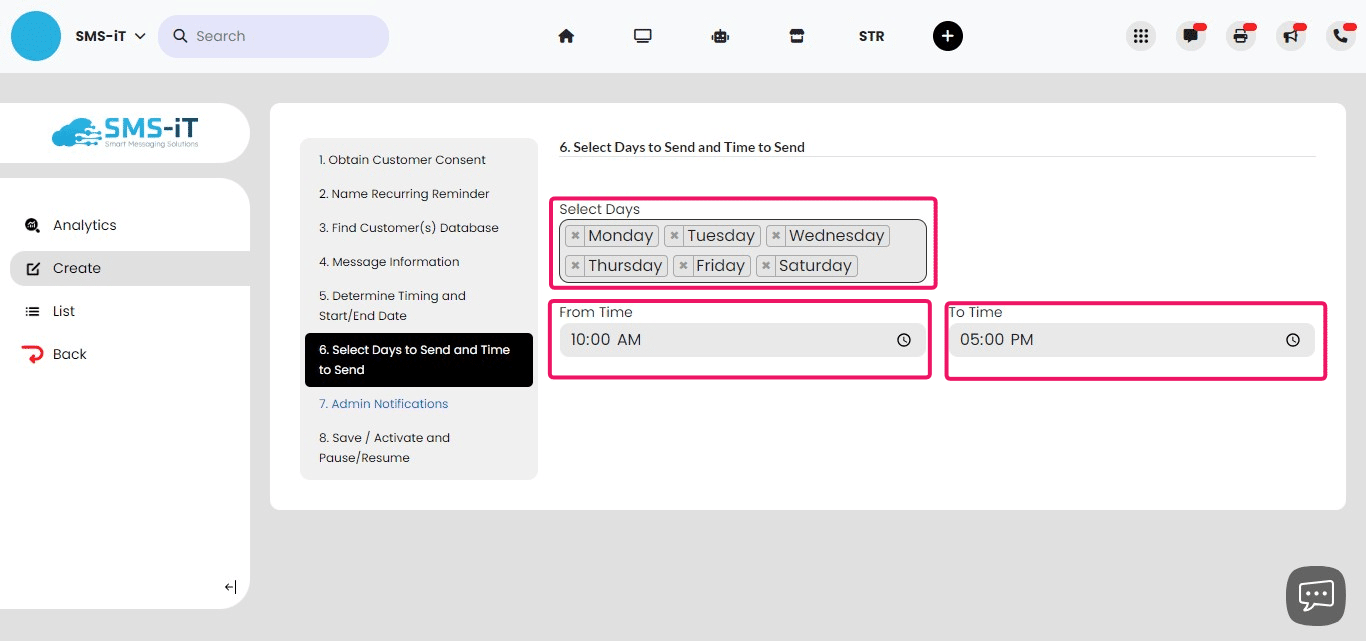
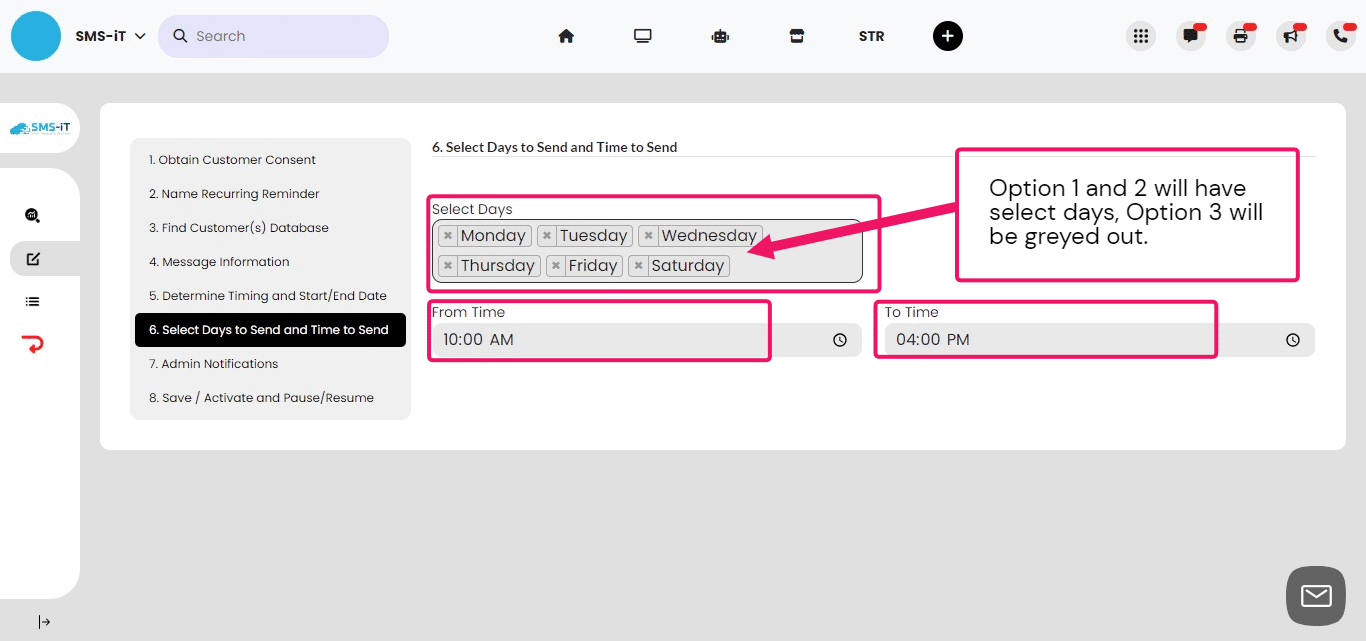
- Select Days to Send and Time to Send
for Options 1 and 2 you will select days to send. Option 3 is mandatorily enabled. (Days are chosen in Option 3)
Navigate to 6. Select Days to Send and Time to Send
1. Choose the days of the week: Check the boxes next to the desired days (Monday to Saturday). 2. Set the time range: Select the "From Time" and "To Time" using the dropdown menus or manual input. If time fields are not present, you may set the time in another step. 3. Review your selections: Confirm the chosen days and times. Make changes if needed by modifying the checkboxes or time fields. Proceed to the next step once you're satisfied with your selections
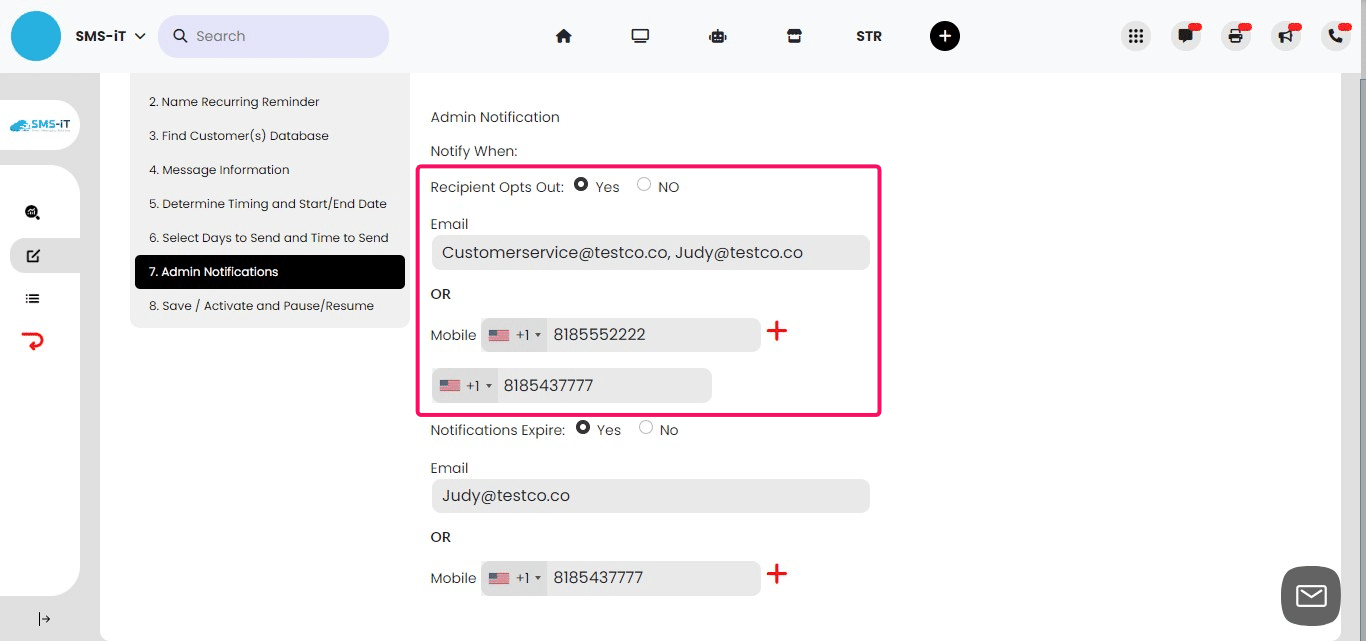
- Admin Notifications
Admin notifications keep your team informed about recipient opt-outs and reminder expiration. After completing this step, proceed to save, activate, or pause your reminder campaign.
Navigate to 7. Admin Notifications
1. Select "Yes" or "No" to notify when the recipient opts out.
2. Enter admin email addresses:
- Input the email addresses of admins to notify.
- Separate multiple email addresses with commas.
3. Enter admin mobile numbers (optional):
- Click "+" to add a mobile number field.
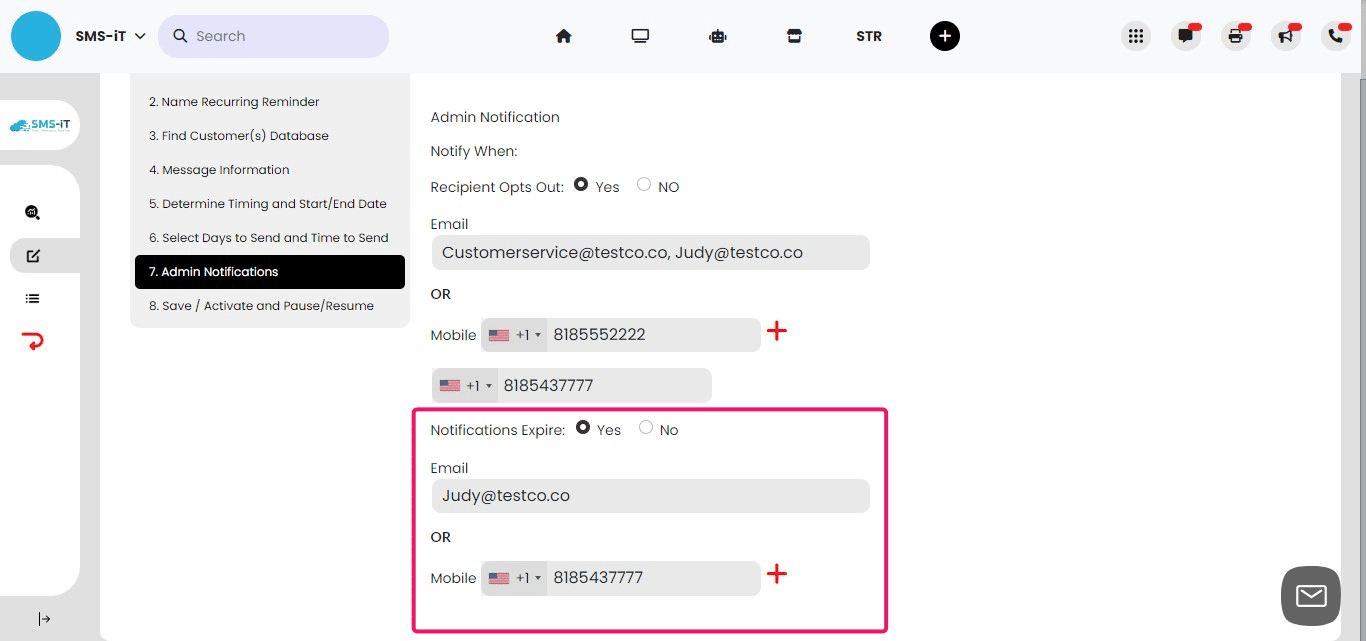
4. Set notification for reminder expiration:
- Select "Yes" or "No" to notify admins when the reminder expires.
- Add email and mobile.
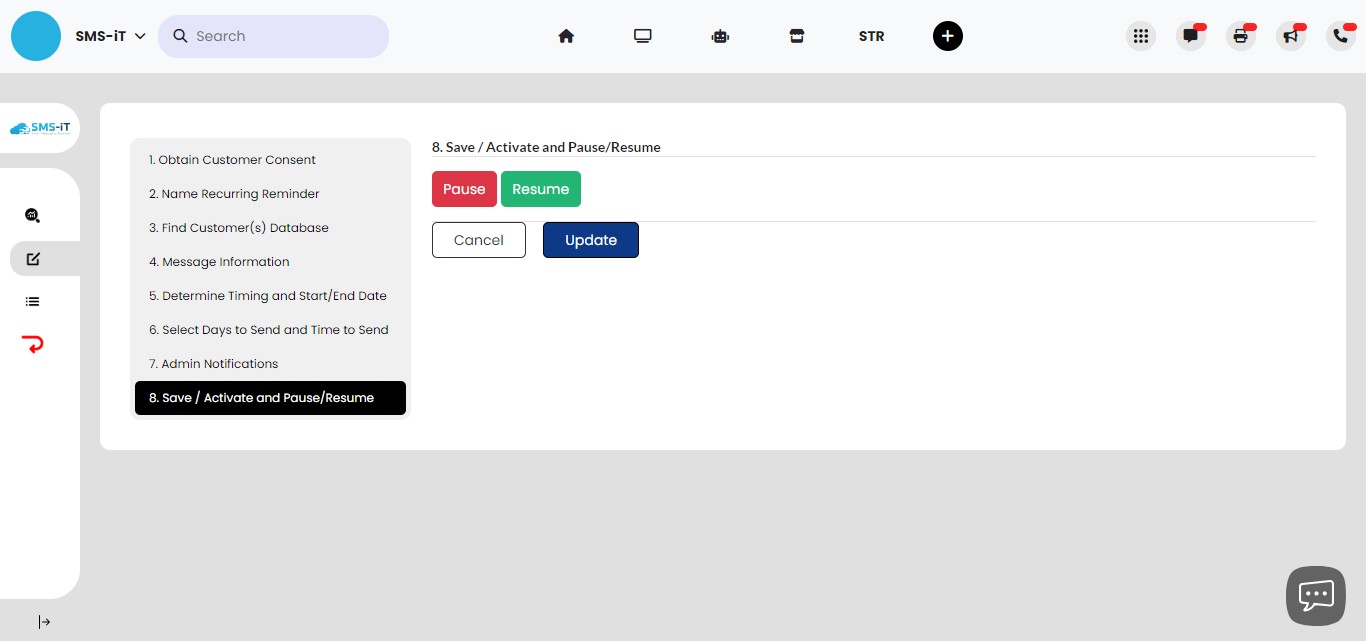
- Save/Activate and Pause/Resume
Save/Activate: Click this button to save and start your configured reminder campaign. The reminders will be sent according to the schedule and settings you provided. Pause: Temporarily pause or stop an active reminder campaign. Resume: Restart a previously paused reminder campaign. Update: Modify the settings or details of an existing reminder campaign before saving/activating it again.