
Payment Settings: Integrating Stripe API and Webhooks
Navigate to https://aicpanel.smsit.ai/home
This tutorial will guide you through the process of setting up Stripe integration in your SMS-iT CRM. We'll cover adding your Stripe API keys and configuring webhooks to ensure seamless payment processing.
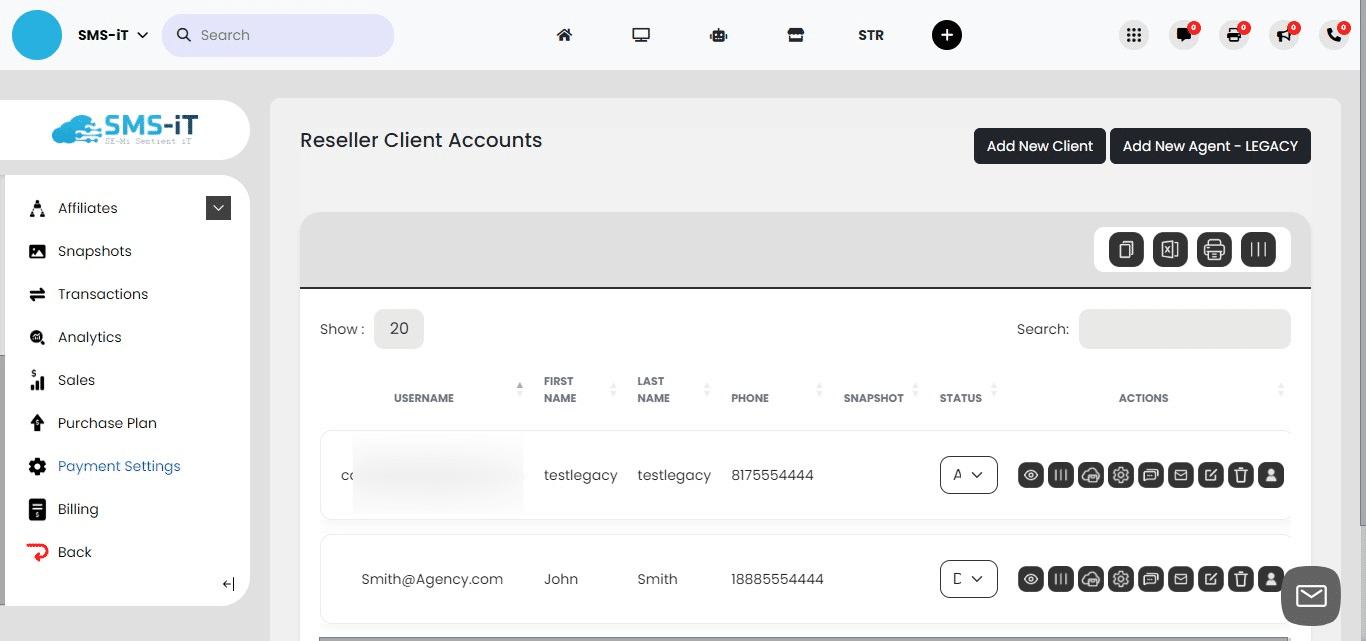
Click on "Reseller Accounts"
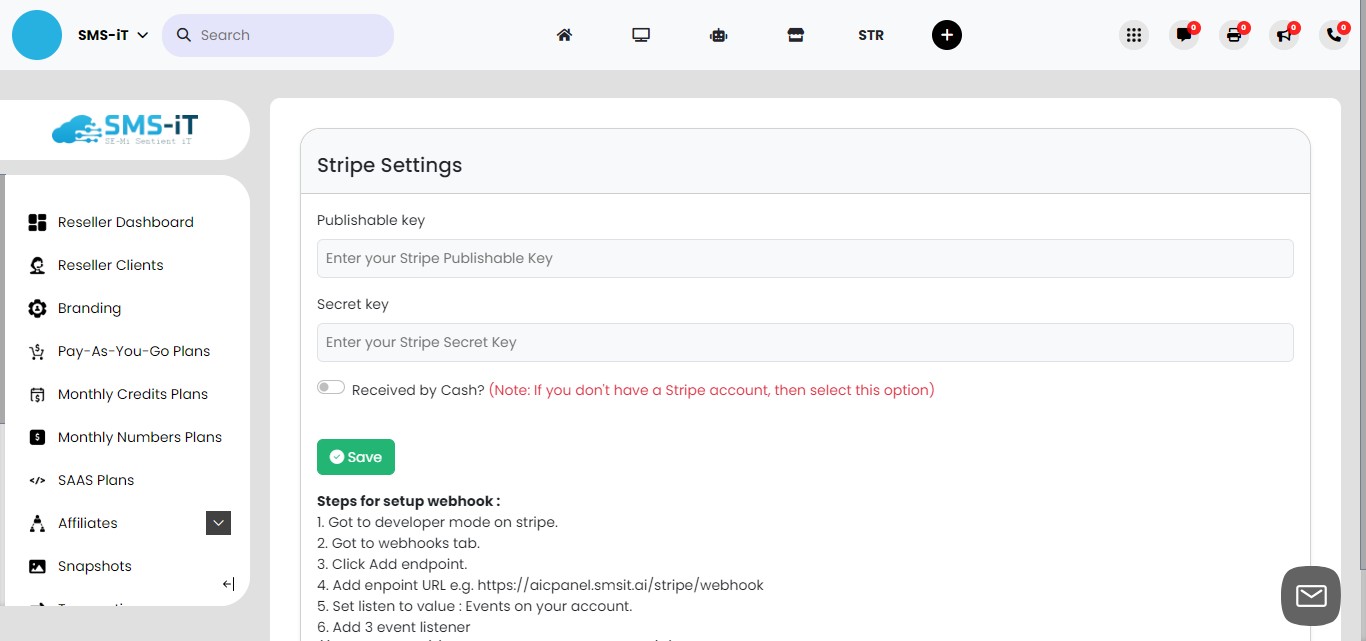
Click on "Payment Settings"
We will now proceed with the Stripe setup process. This involves configuring your API keys and webhooks to enable secure payment processing.
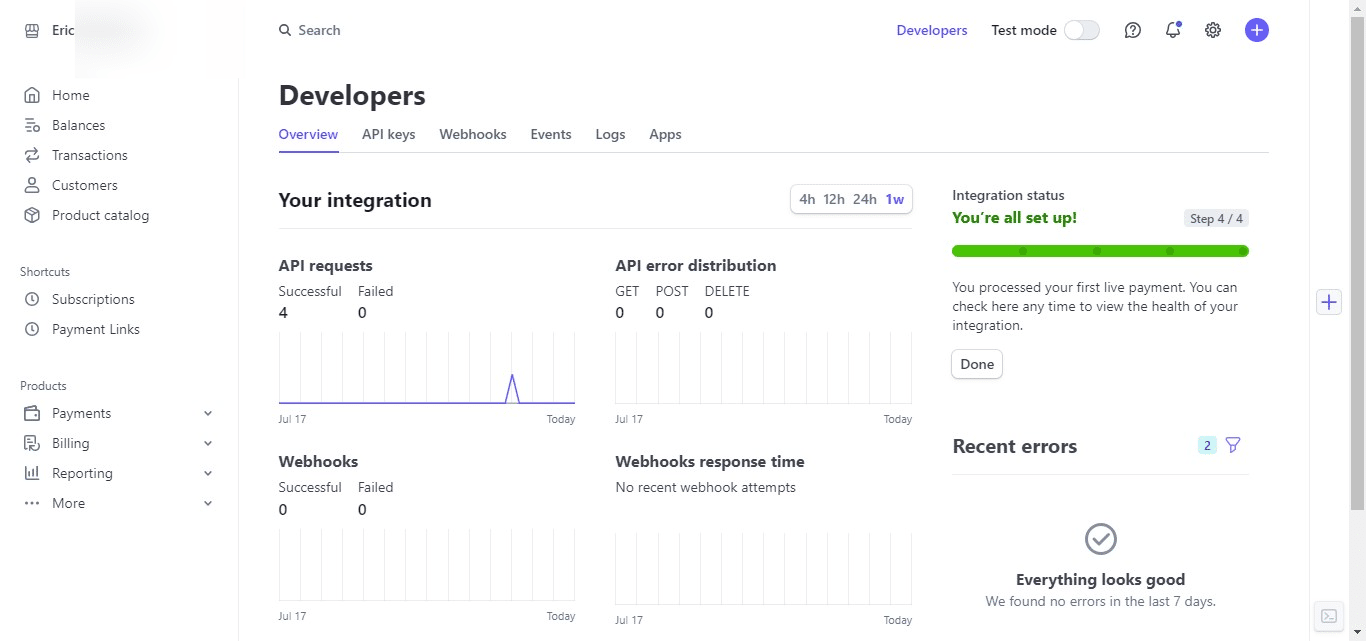
Navigate to the Stripe dashboard using the provided link. https://dashboard.stripe.com/dashboard Note: If you're not already logged in, you'll need to sign in to your Stripe account. If you don't have a Stripe account, you can create one through the link provided.
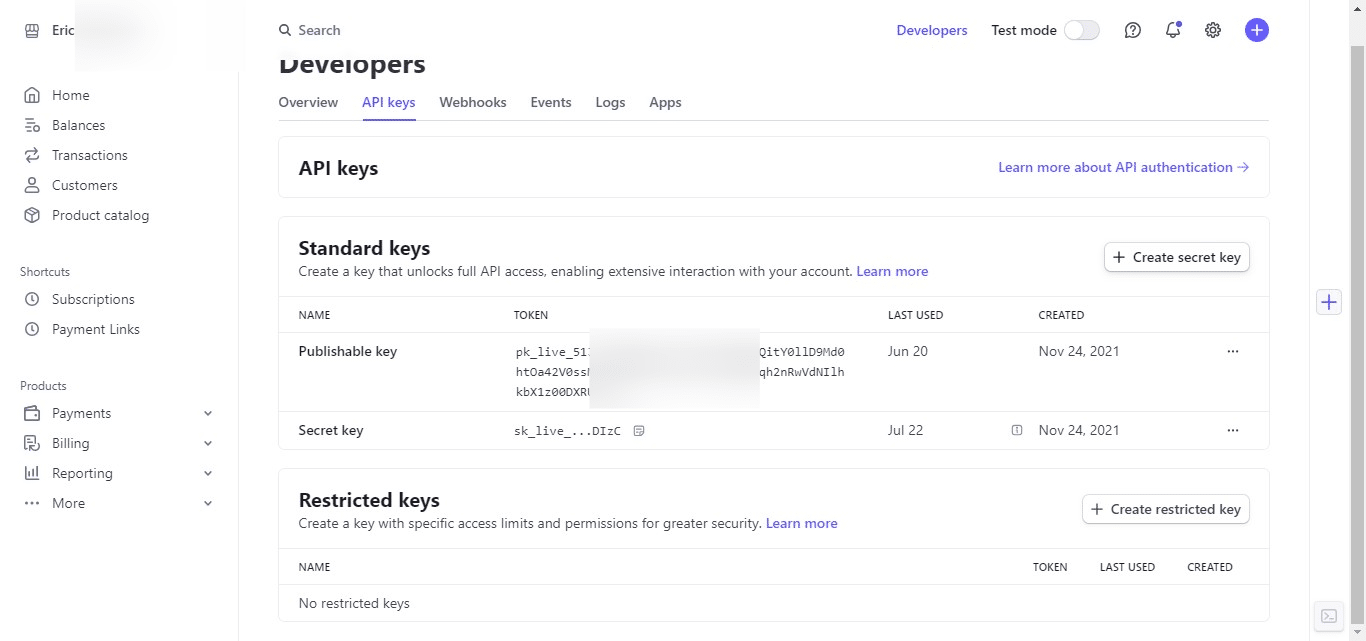
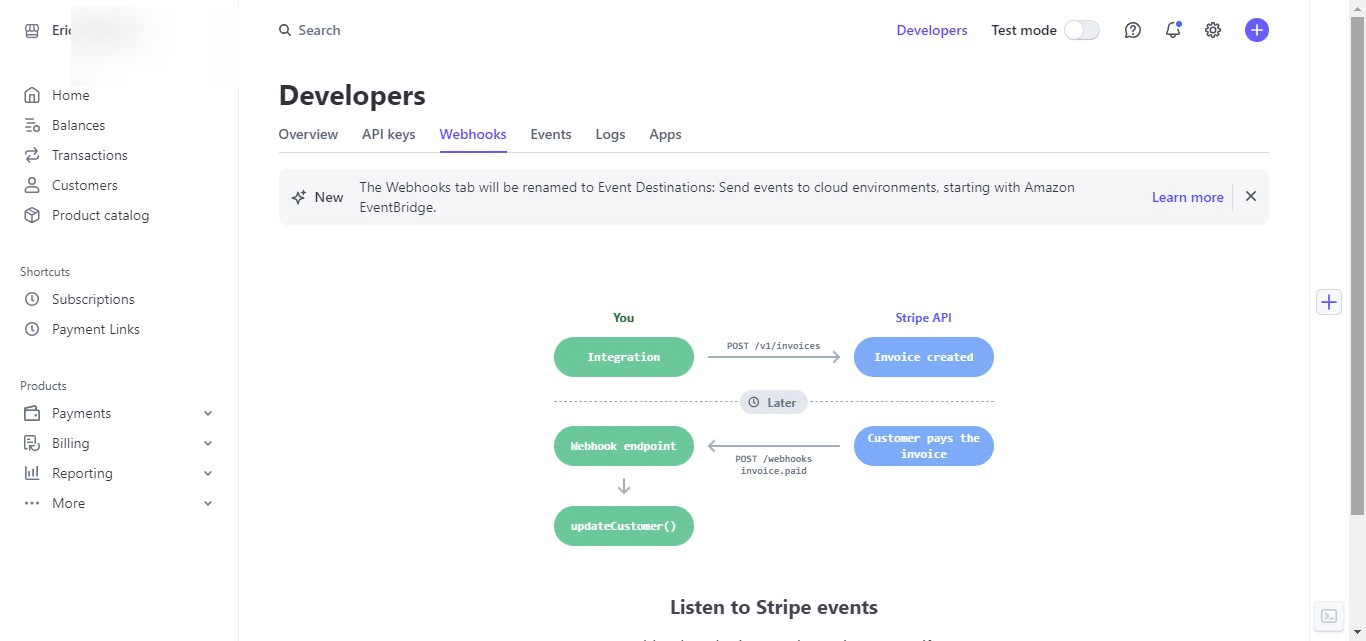
Click on "Developers"

API keys
Click on "API keys"
Click on "Create secret key"
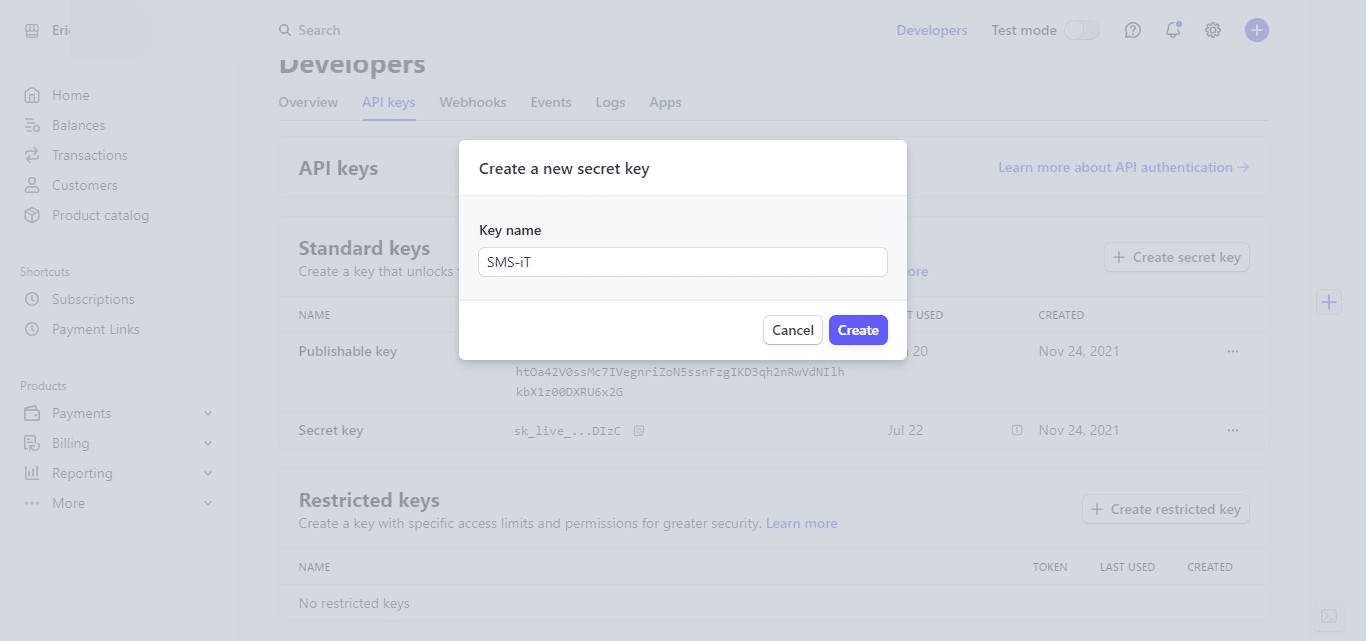
Provide a descriptive name for your secret key.
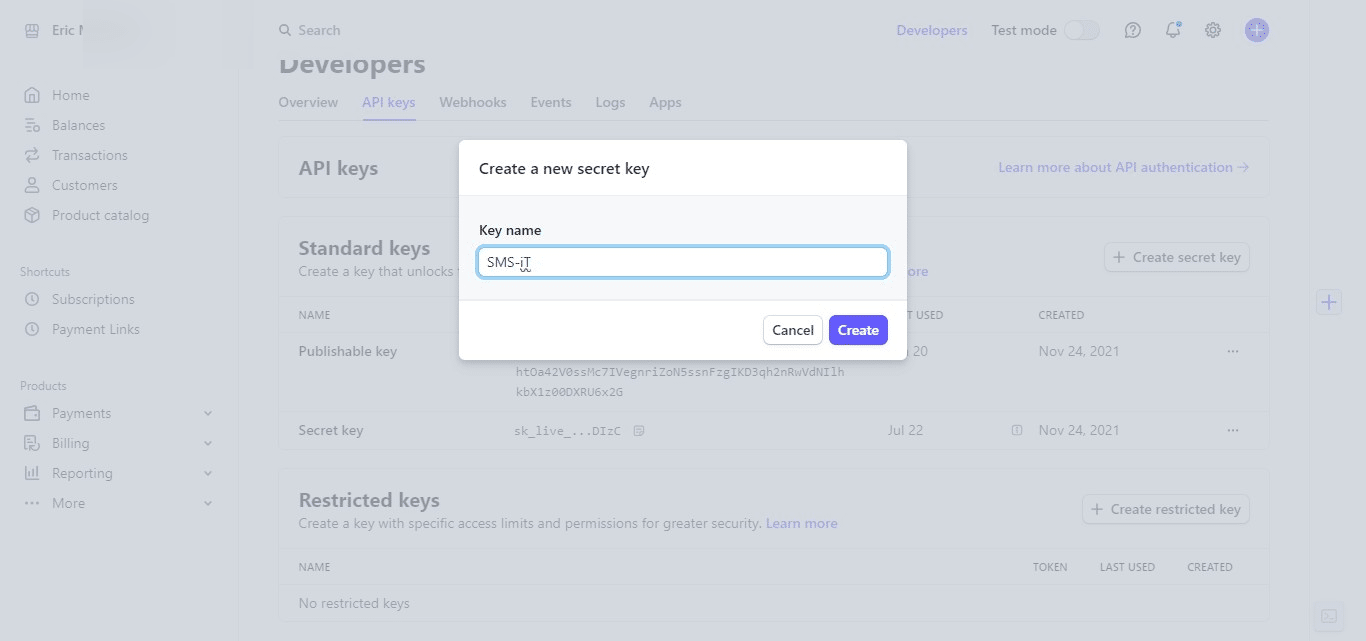
Click on "Create"
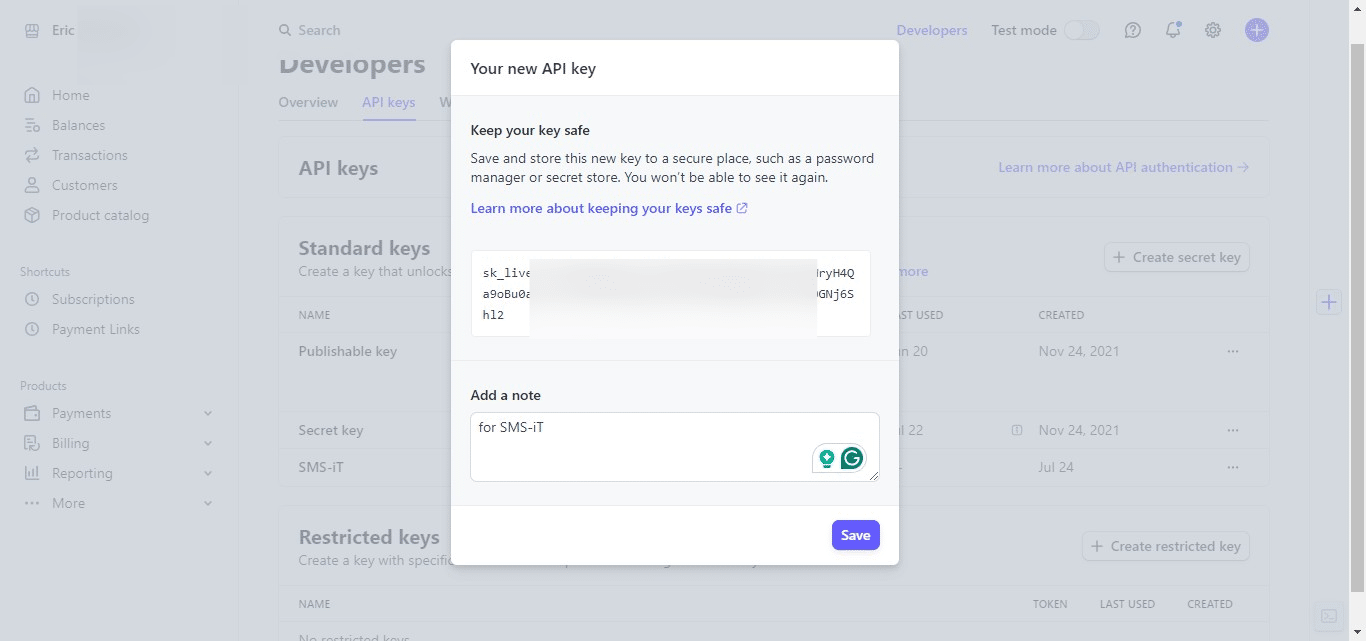
Important: Copy your newly created secret key immediately and store it securely. You won't be able to view it again after this step. It's recommended to temporarily paste it into a secure text file as a backup.
Optionally, add a note or description for your secret key. Then, click on the key to copy it to your clipboard.
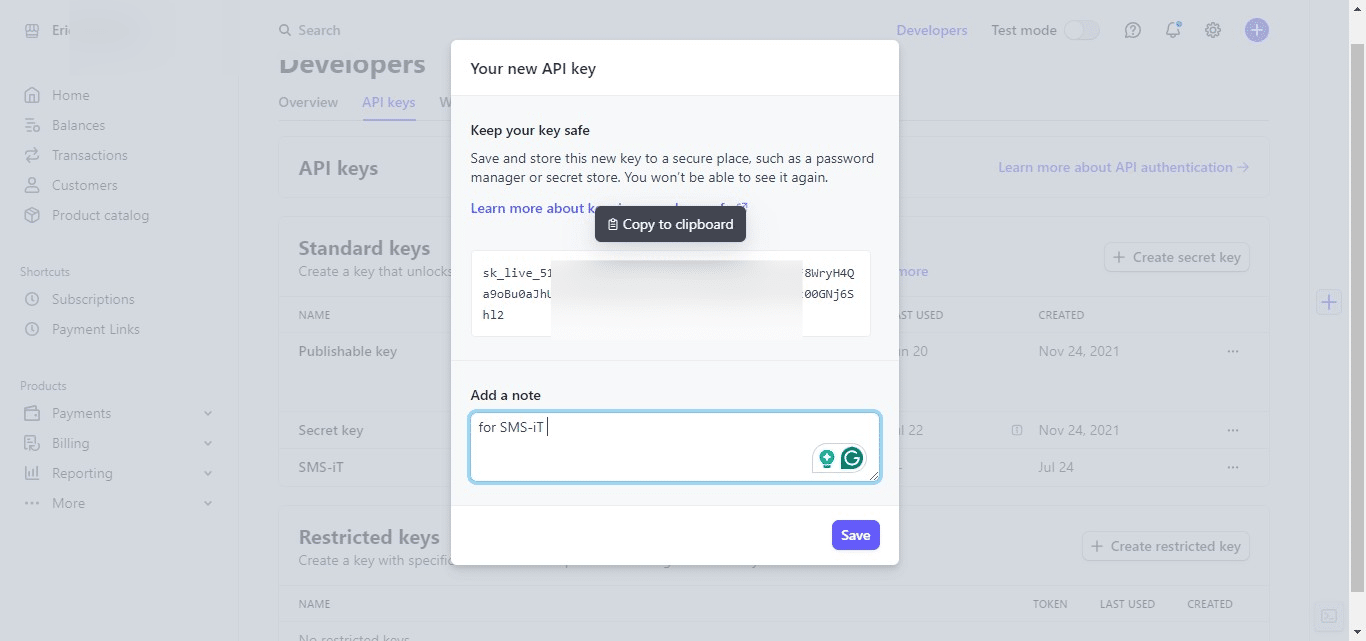
After copying your secret key, click the "Save" button to confirm the creation of your new API key.
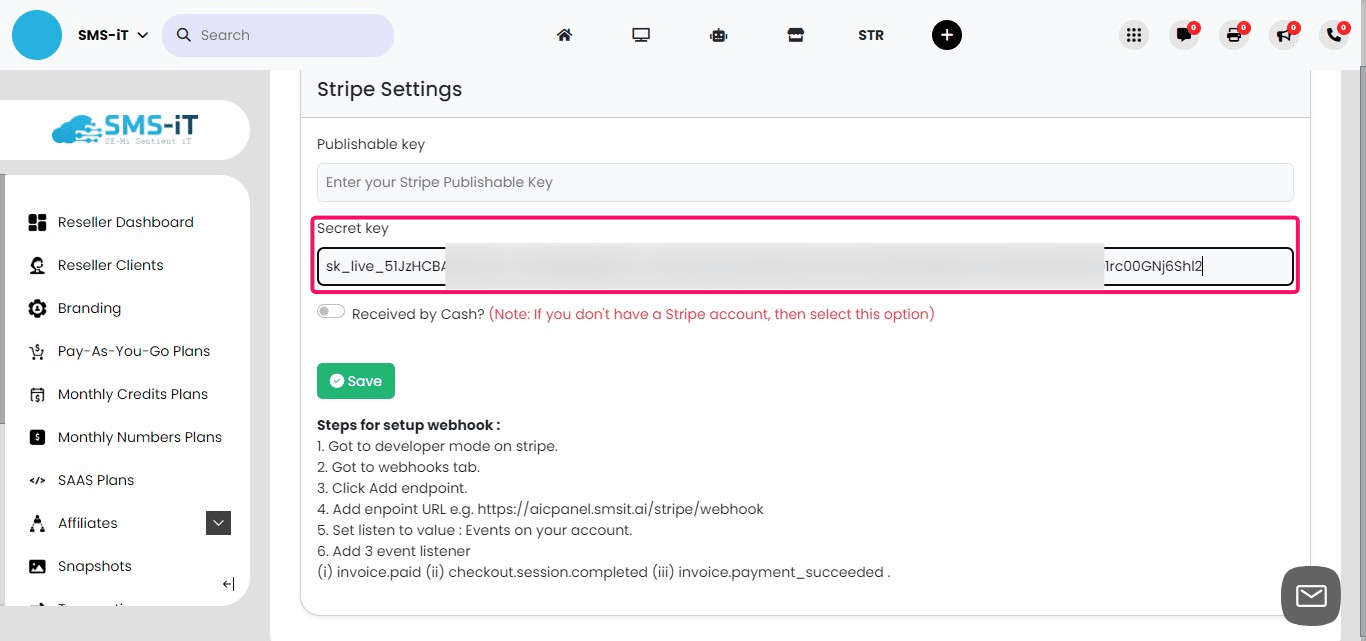
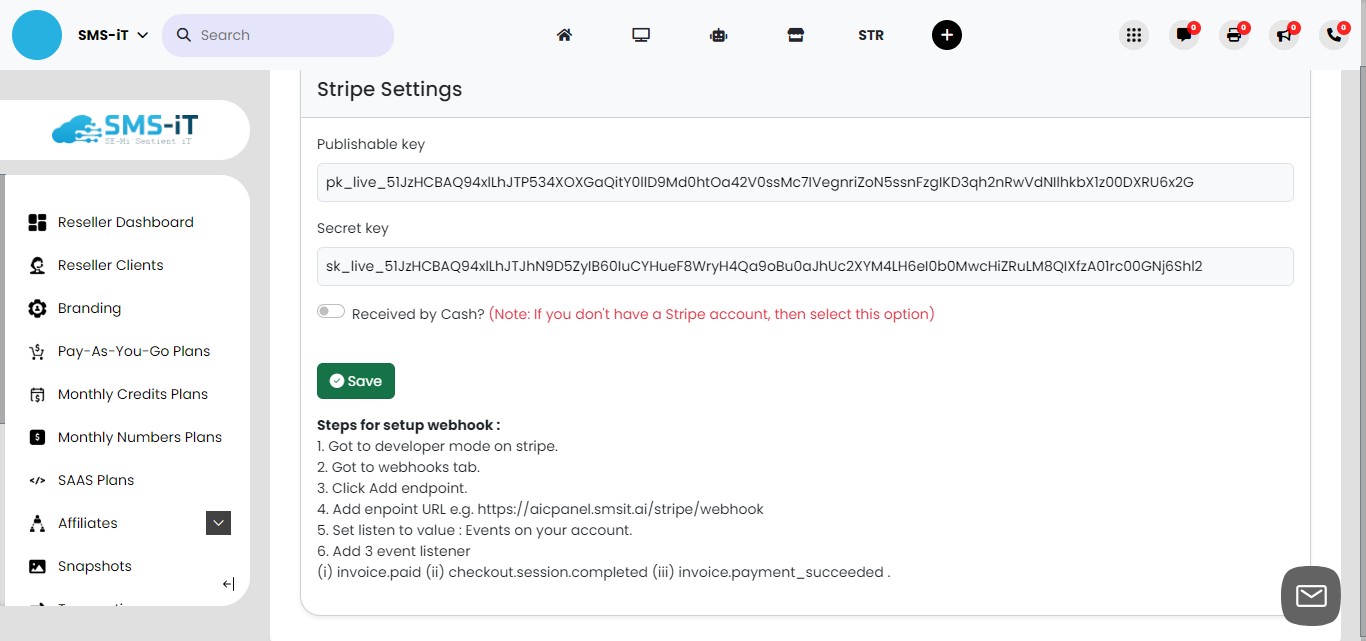
Return to your SMS-iT CRM Payment Settings page. Locate the "Secret key" field and paste your copied Stripe secret key into this field.
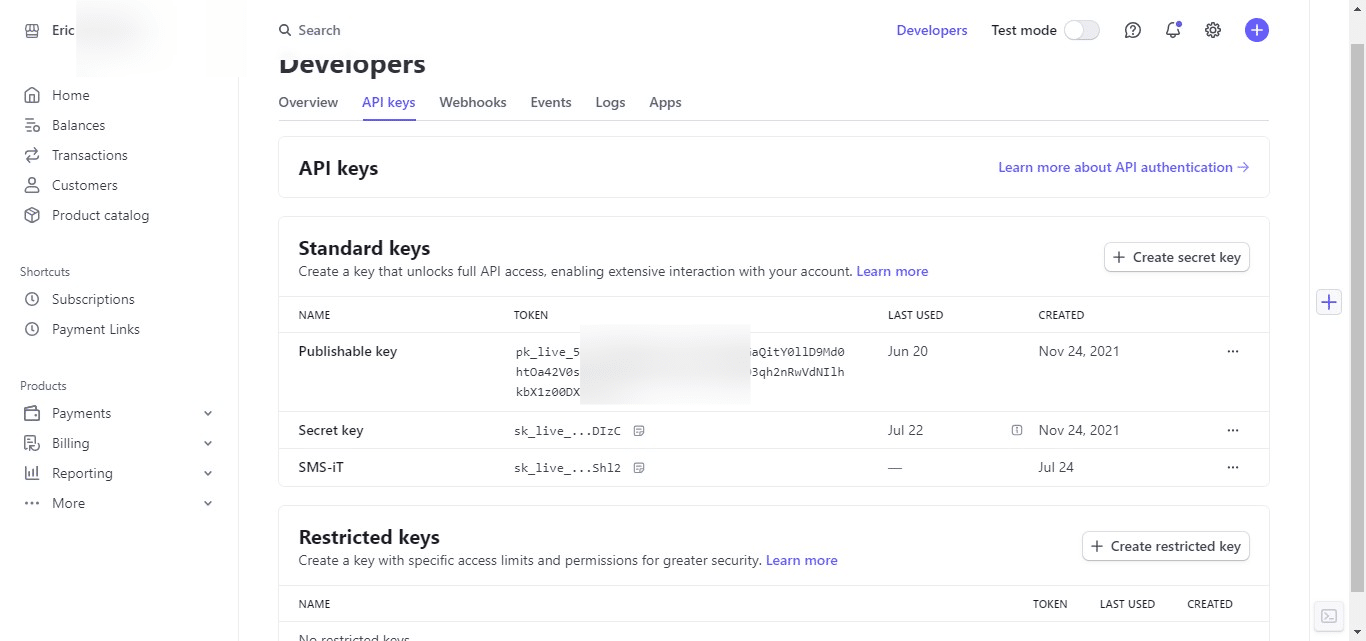
Back in your Stripe dashboard, find the "Publishable key" section. Click on the key labeled "Token" to copy your publishable key to the clipboard.
Switch back to your SMS-iT CRM Payment Settings page. Locate the "Publishable key" field and paste your copied Stripe publishable key into this field.
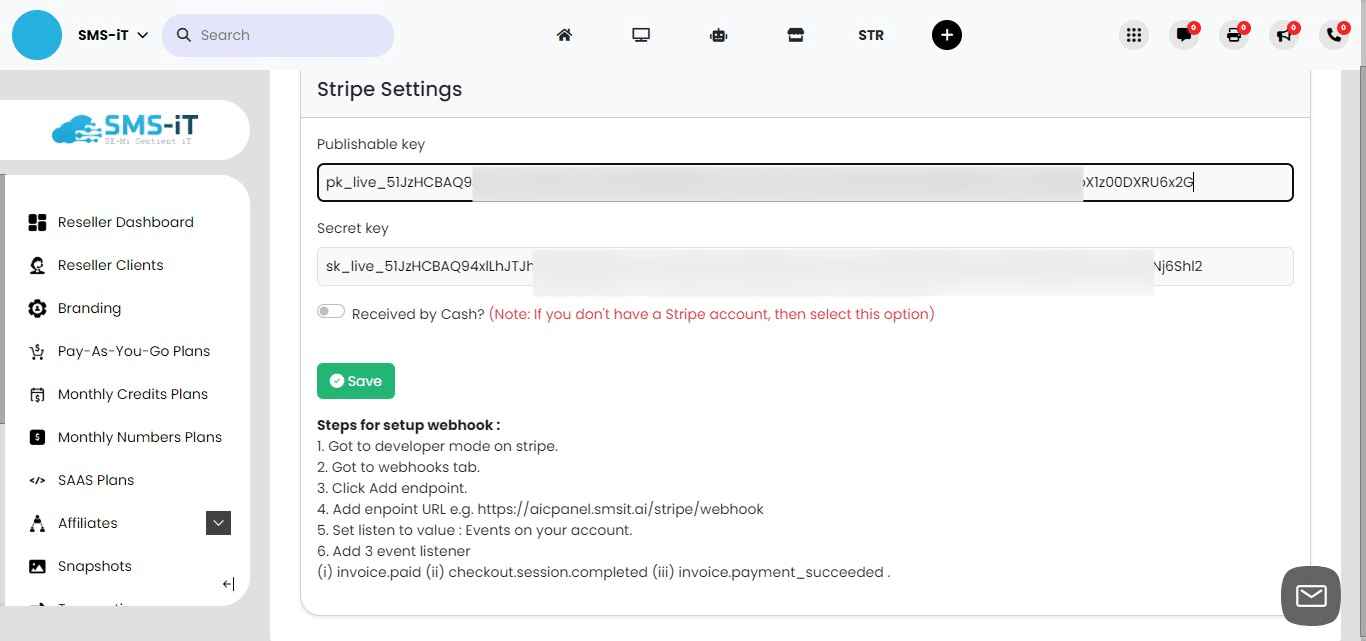
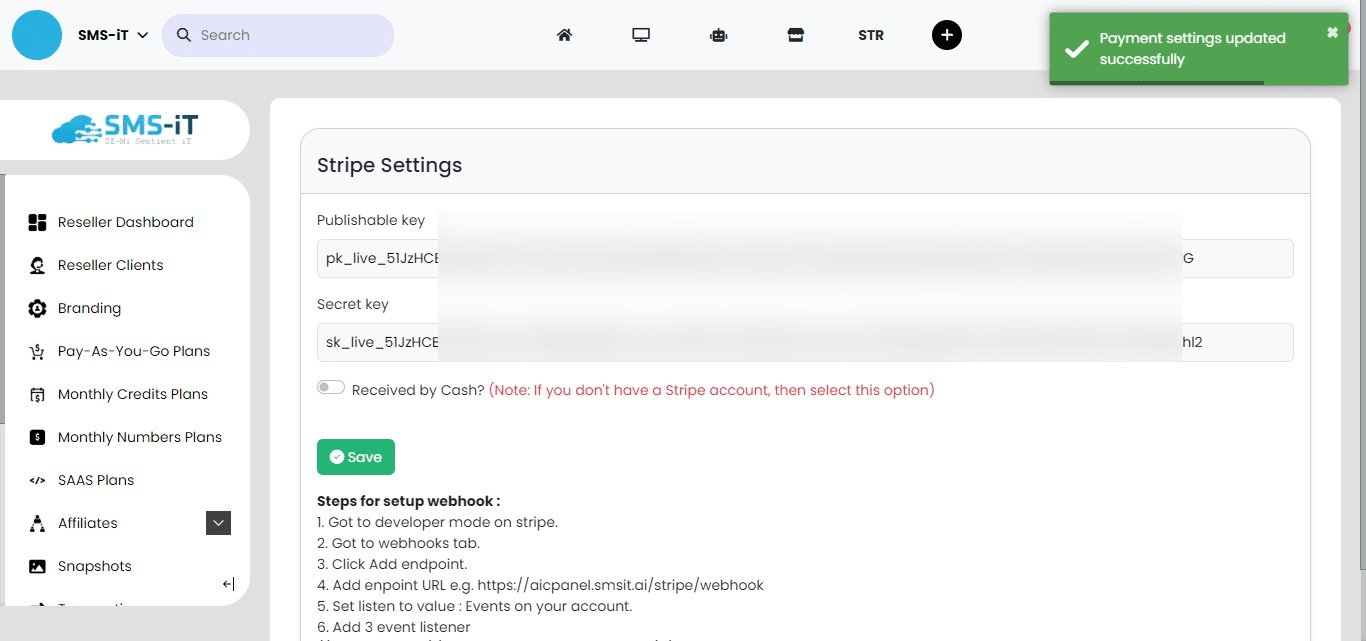
Click on "Save"
You should now see a confirmation message indicating that your Payment API keys have been successfully saved.
If you prefer not to use Stripe for payment processing, you have the option to toggle on "Received by Cash". This allows you to charge customers outside the SMS-iT ecosystem, which can be useful if your SMS-iT offering is part of a larger bundle or if you're managing payments separately.
Webhooks
Now that we've set up the API keys, let's configure webhooks. In your Stripe dashboard, click on "Webhooks".

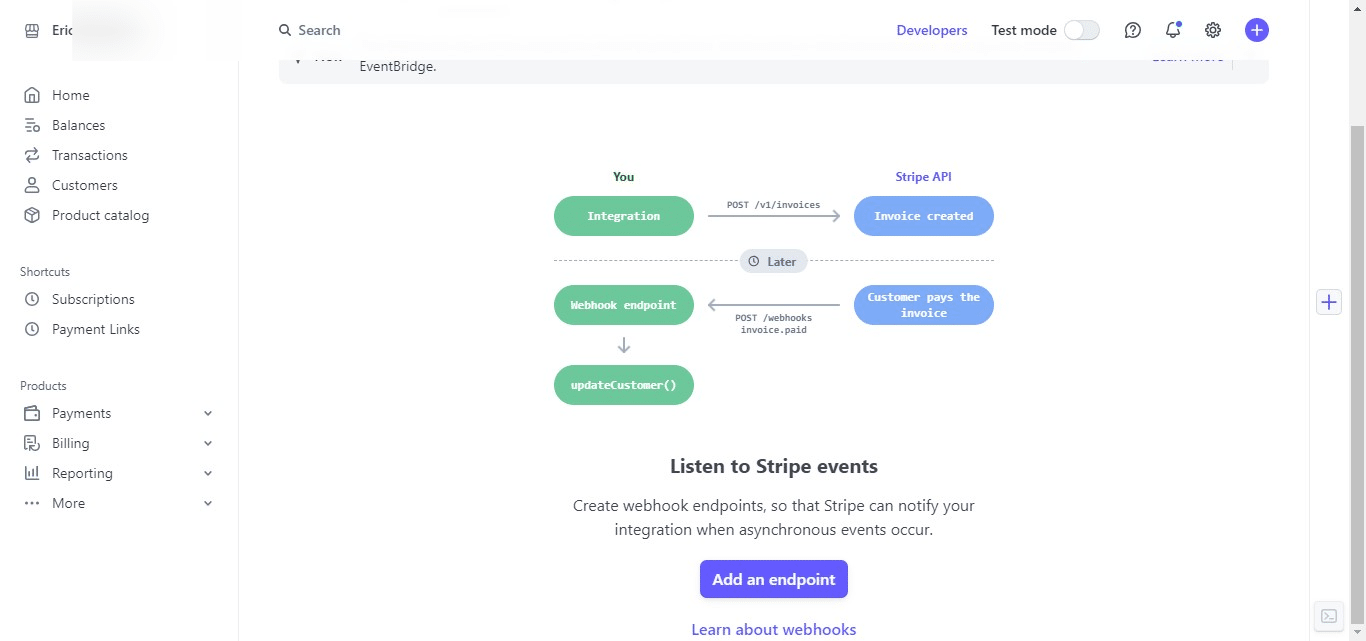
Scroll down
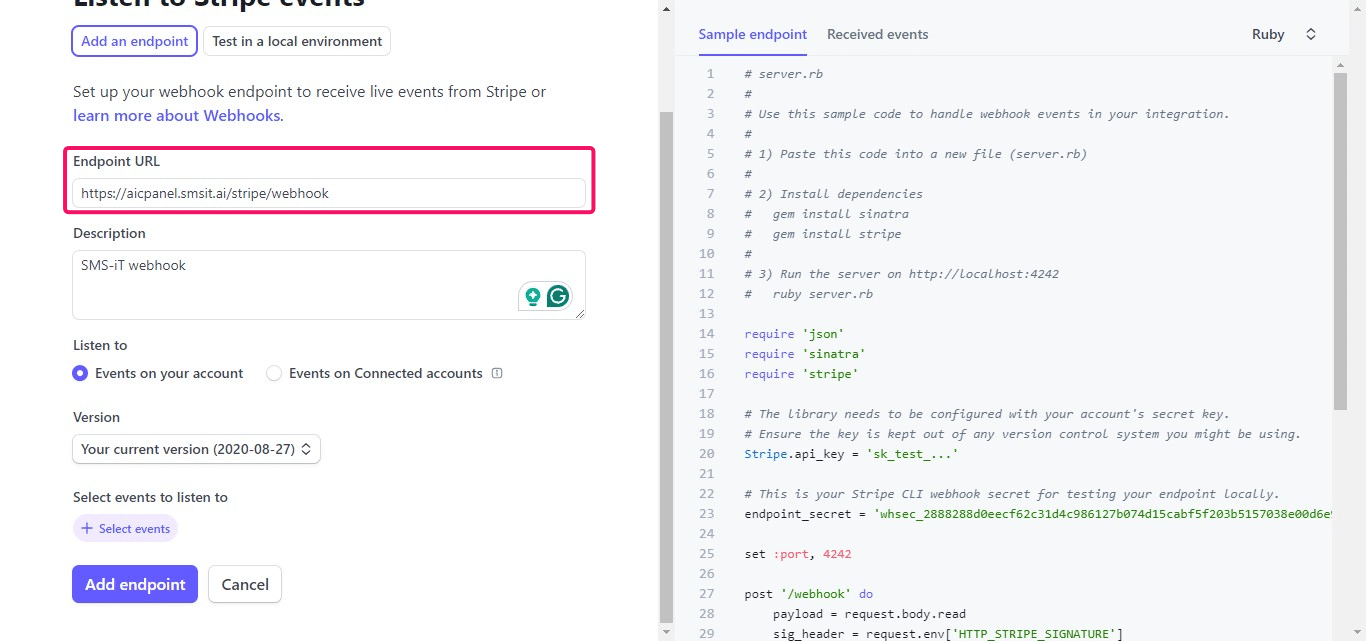
Click on "Add an endpoint"
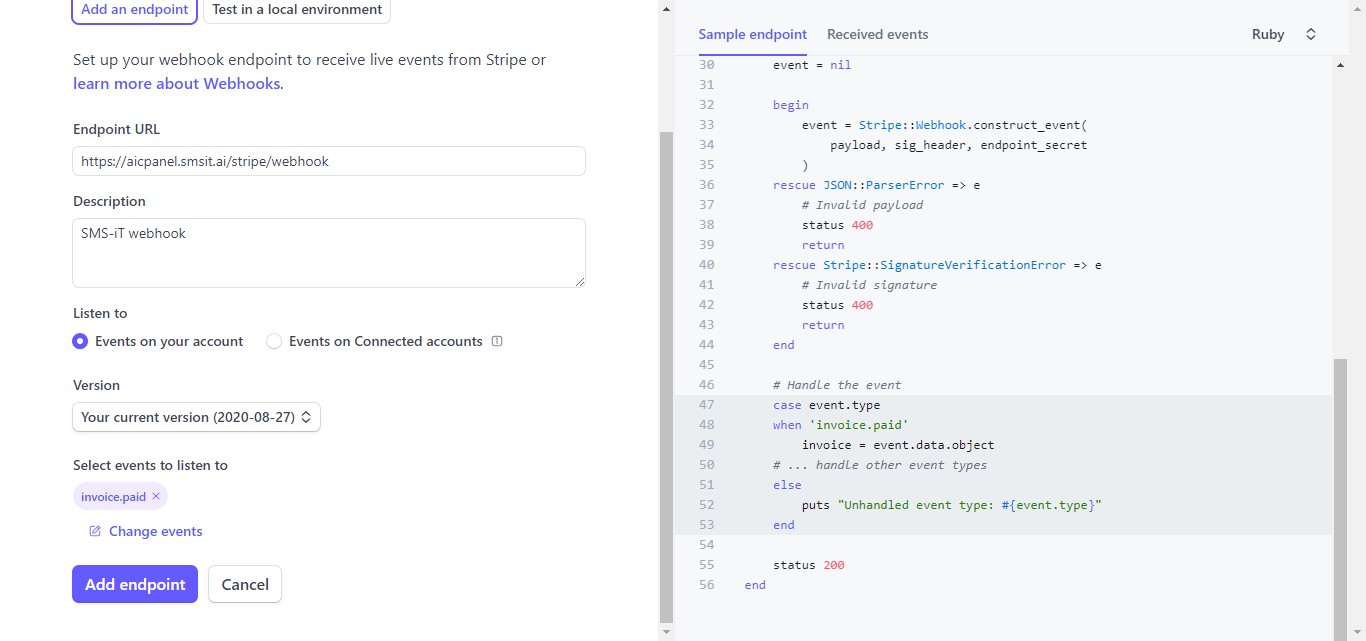
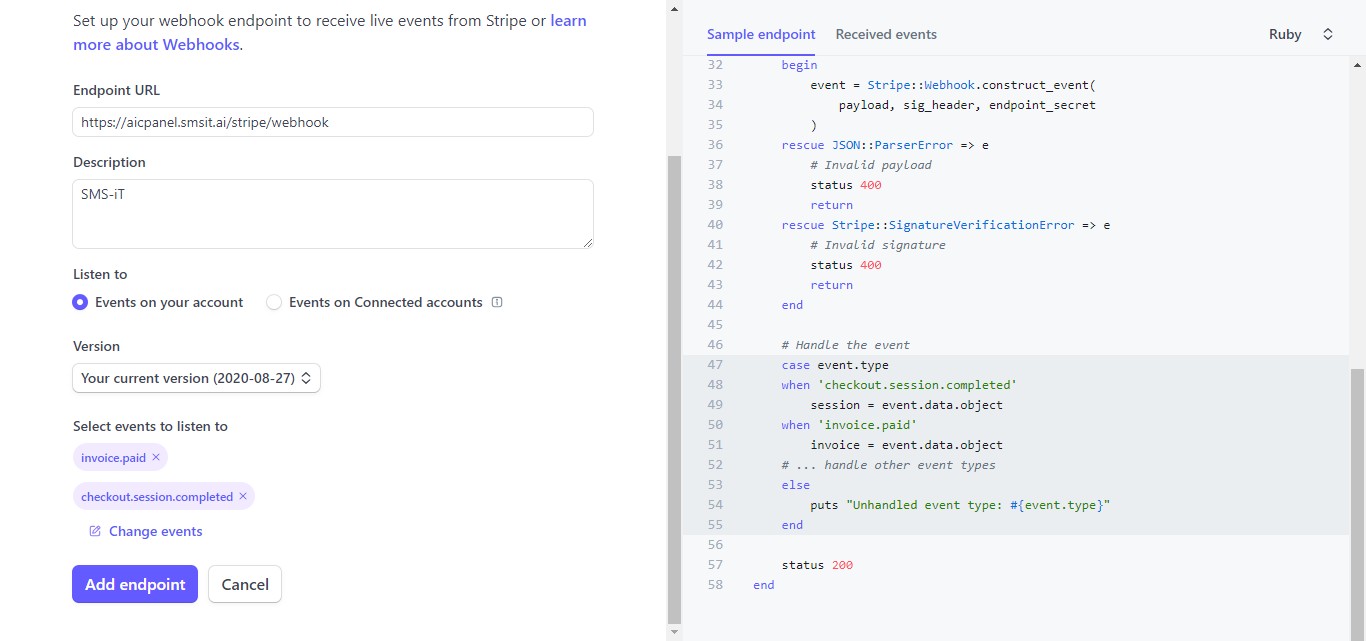
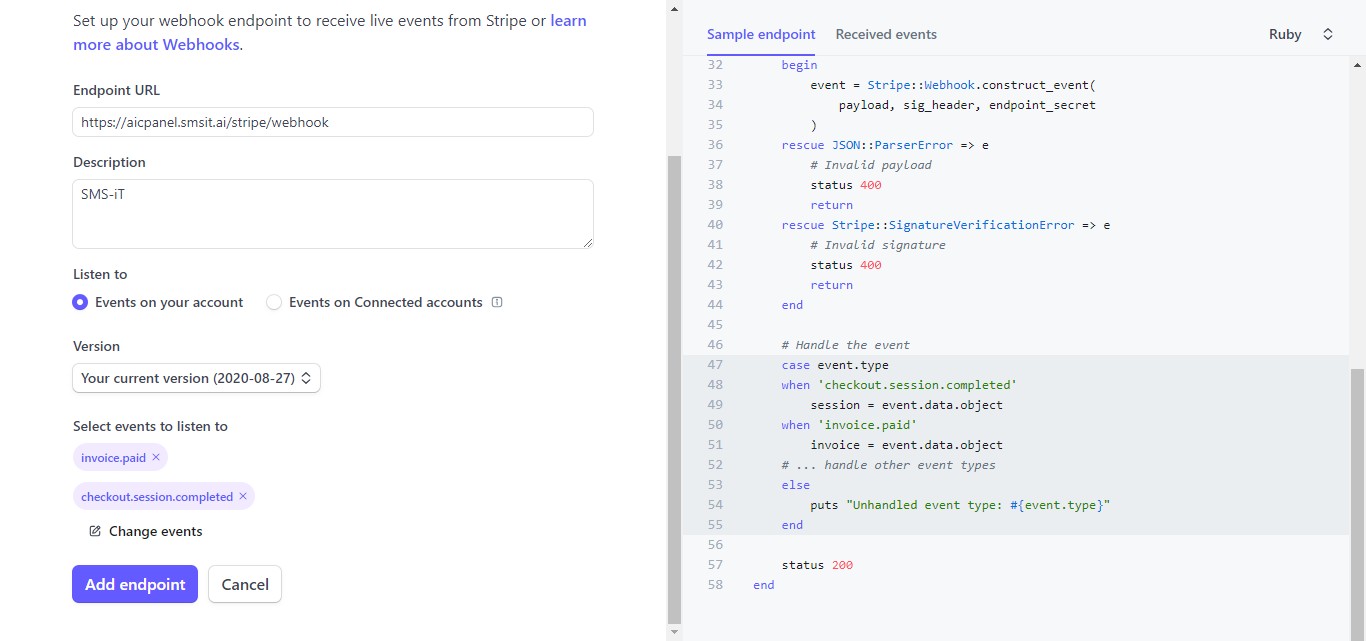
Add Endpoint URL
In the "Add Endpoint URL" field, copy and paste the following link: https://aicpanel.smsit.ai/stripe/webhook Provide a descriptive name in the "Description" field, such as "SMS-iT CRM Webhook".
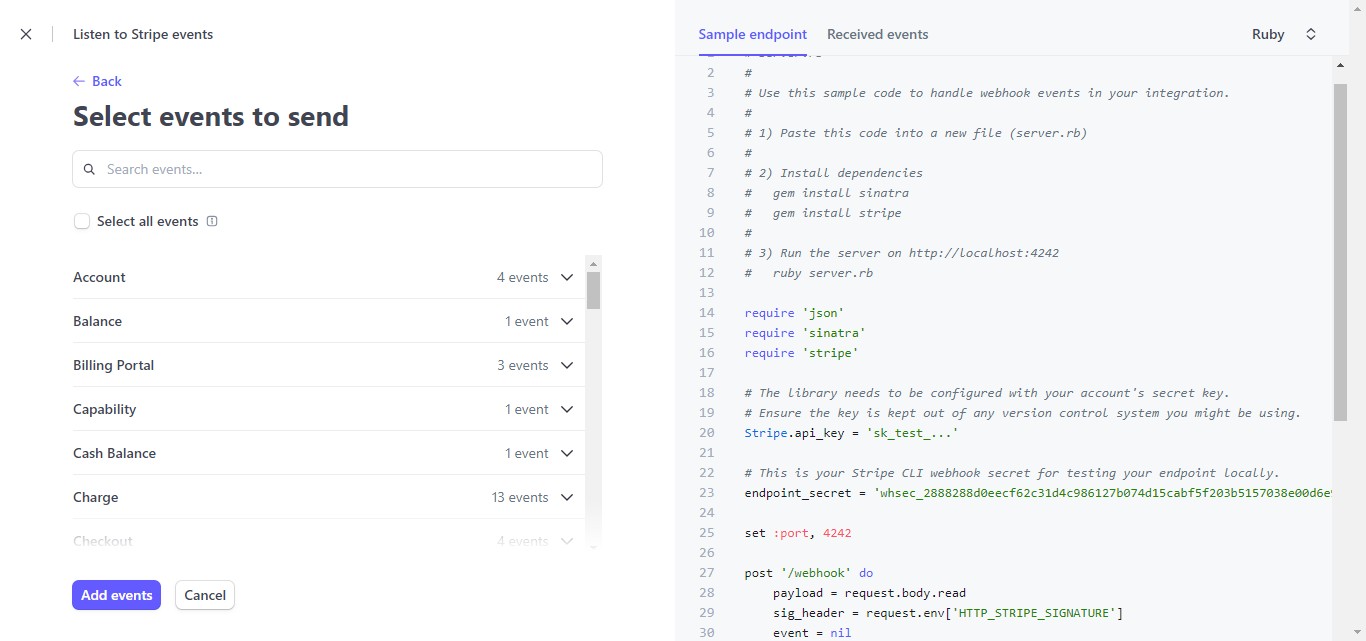
Selecting events to listen to
We'll now configure the events that the webhook will listen for. We need to add three specific events:
invoice.paid checkout.session.completed invoice.payment_succeeded
Click on the "Select events" button to choose which events your webhook will monitor.
To easily find the required events, we'll use the search bar provided in the event selection interface.
We'll now add each of the three required events one by one.
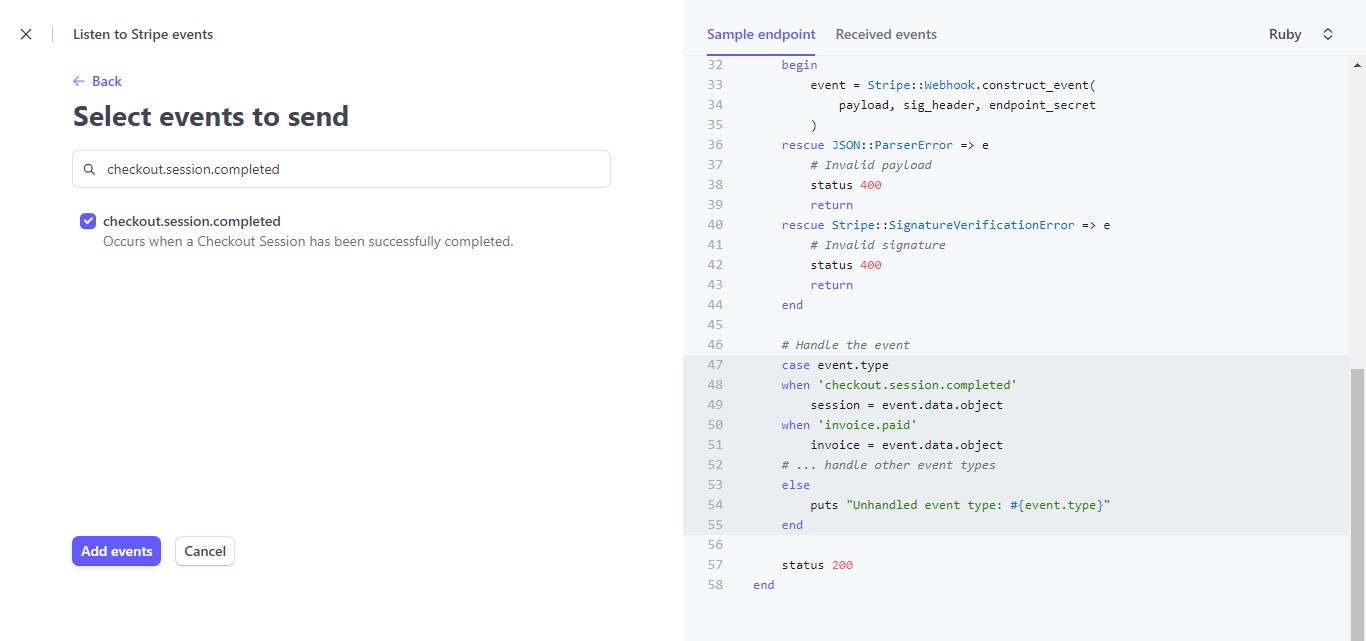
Copy the first event: invoice.paid
Paste "invoice.paid" into the search bar in the Stripe webhook event selection interface.
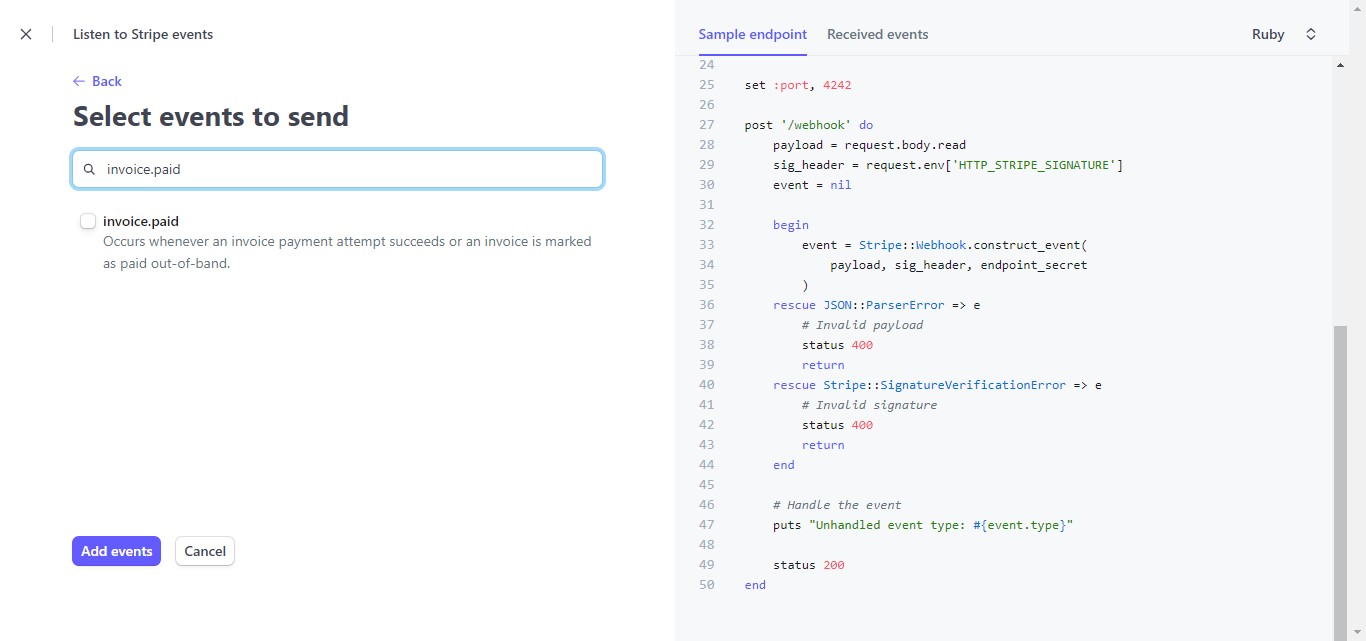
Once the "invoice.paid" event appears in the search results, click the checkmark next to it to select this event.
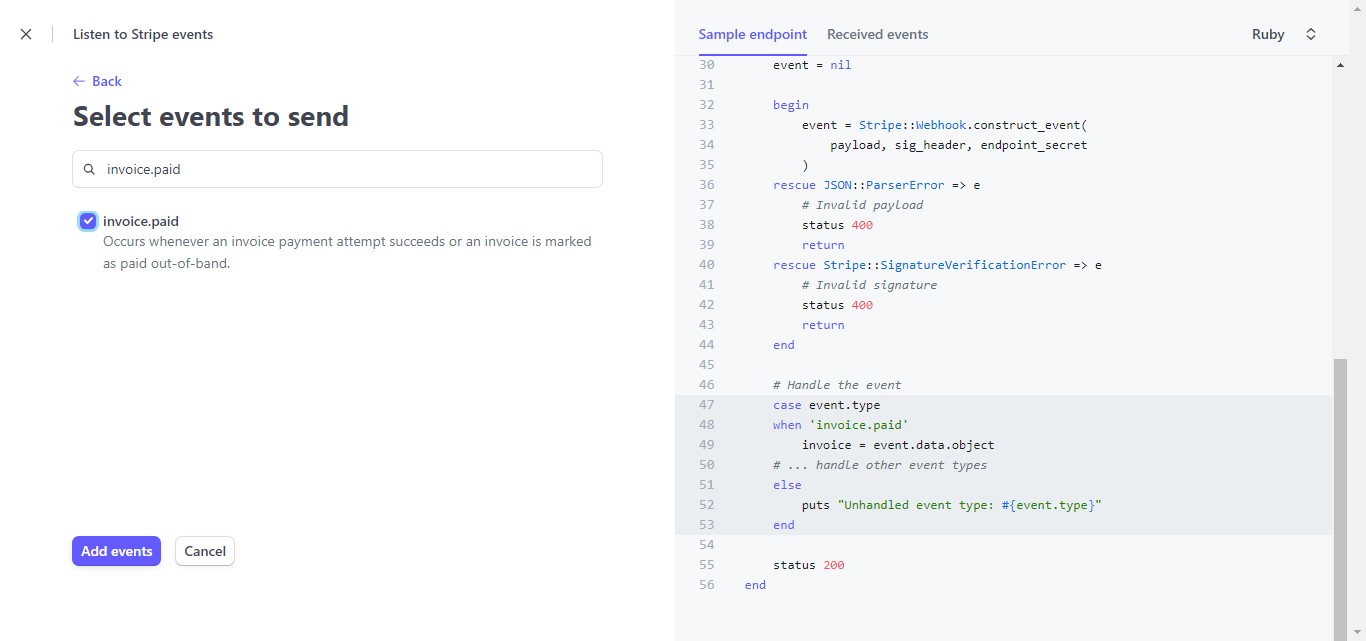
Click on "Add events" to add the event to your webhook.
You've successfully added the "invoice.paid" event to your webhook configuration.
Now, let's add the second event. Copy: checkout.session.completed
Click on the "Change events" button to add another event to your webhook.
Paste "checkout.session.completed" into the search bar in the Stripe webhook event selection interface. Once the "checkout.session.completed" event appears in the search results, click the checkmark next to it to select this event.

Click the "Add events" button to confirm the addition of the "checkout.session.completed" event to your webhook.
The "checkout.session.completed" event has been successfully added to your webhook configuration.
Click on "Change events" once more to add the final required event.
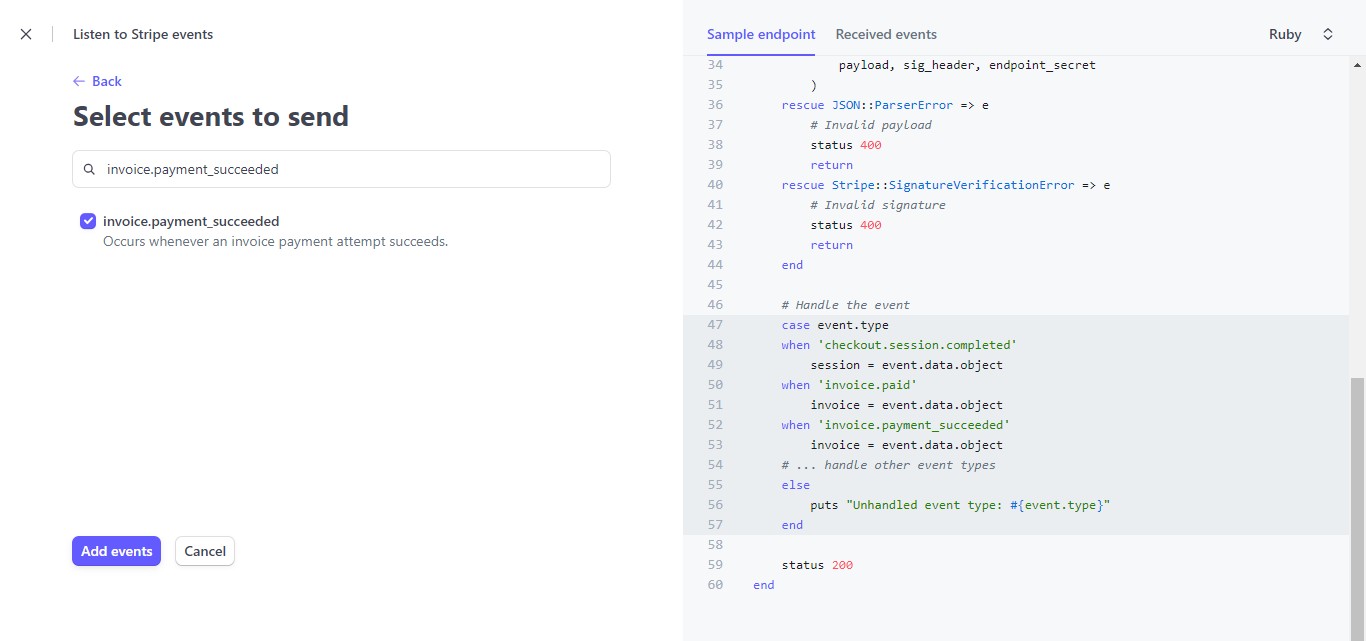
Copy the third and final event: invoice.payment_succeeded
Paste "invoice.payment_succeeded" into the search bar in the Stripe webhook event selection interface.
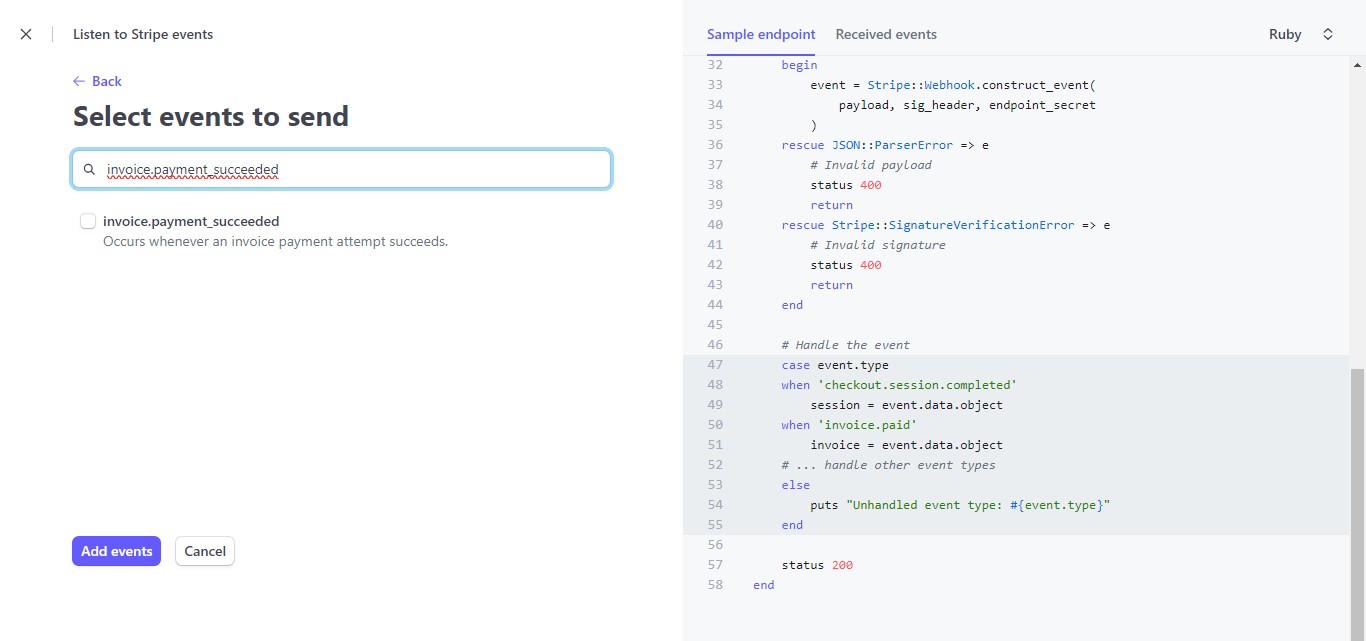
When the "invoice.payment_succeeded" event appears in the search results, click the checkmark next to it to select this event.

Click the "Add events" button to finalize the addition of the "invoice.payment_succeeded" event to your webhook.
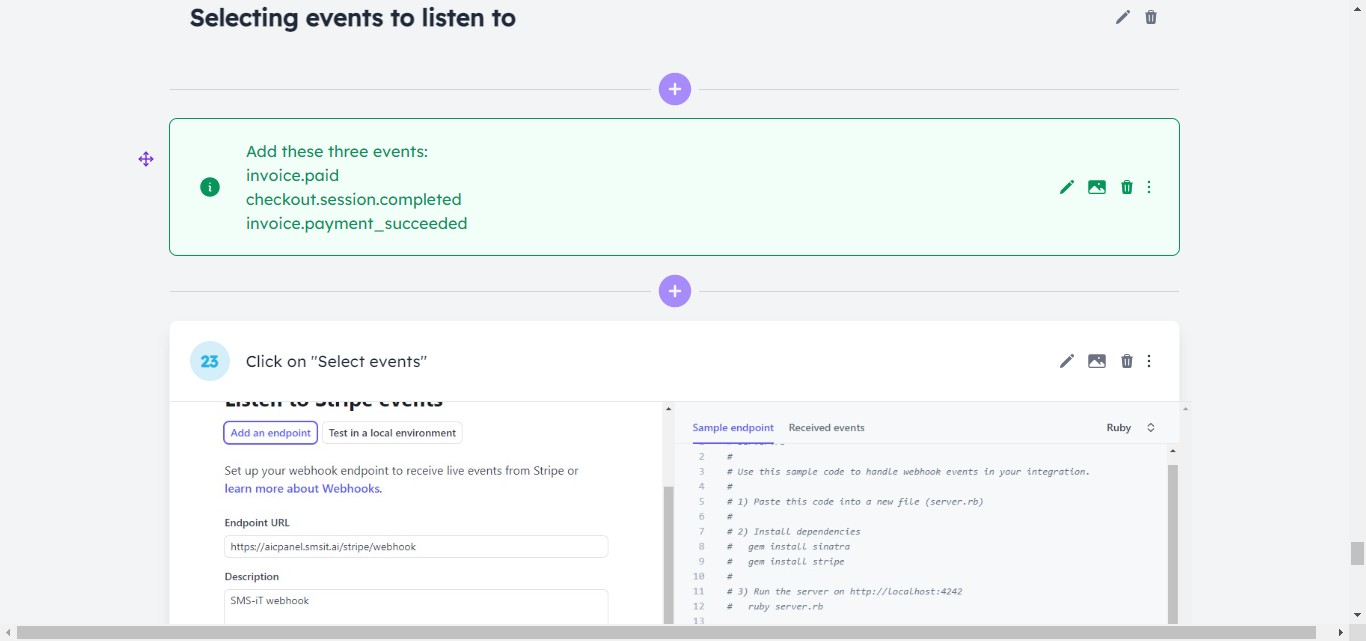
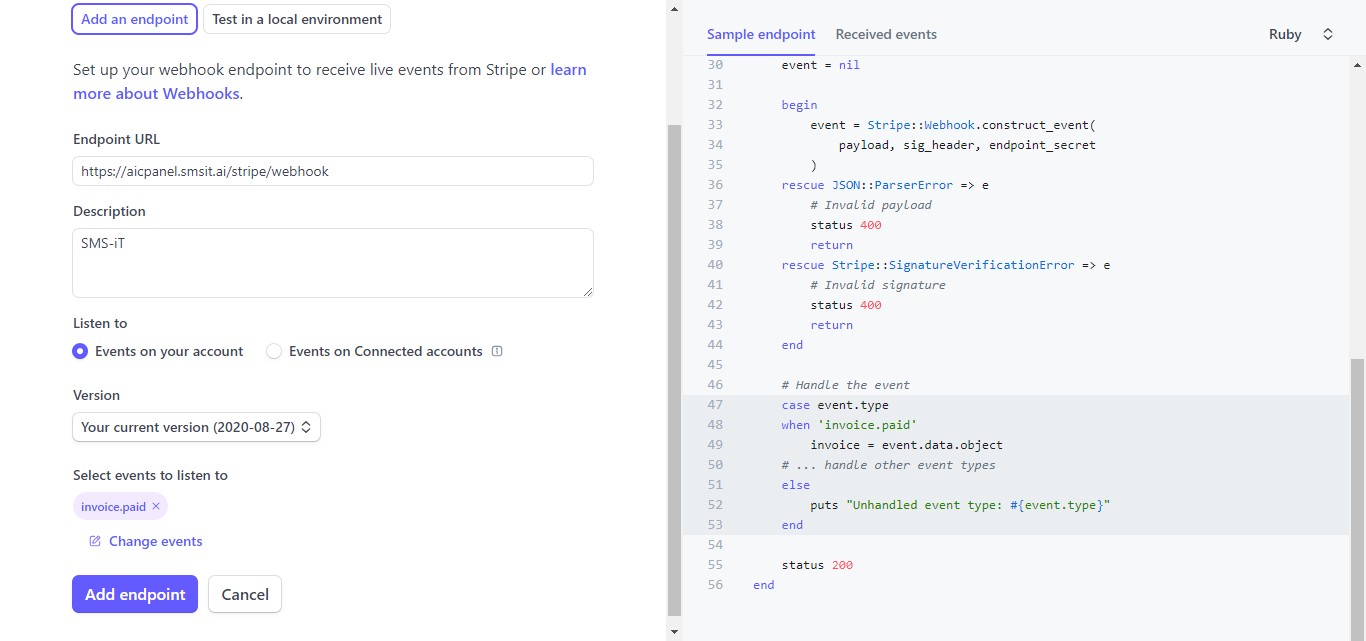
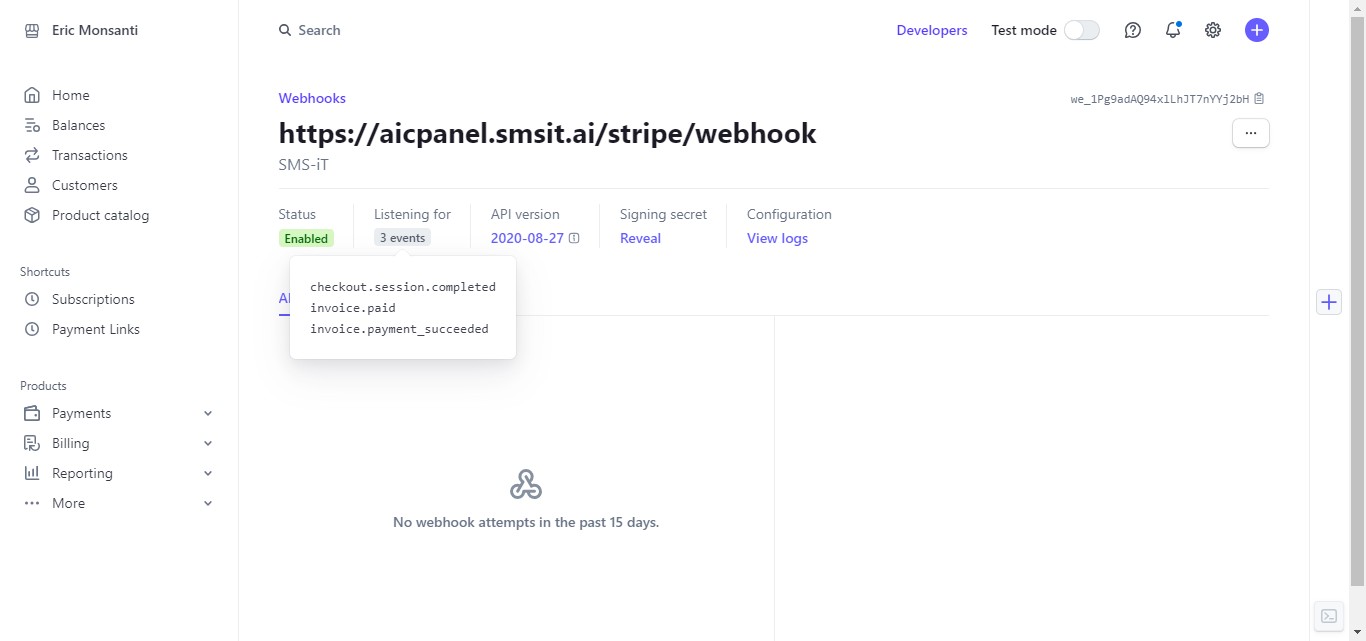
You have successfully added all three required events to your webhook configuration.
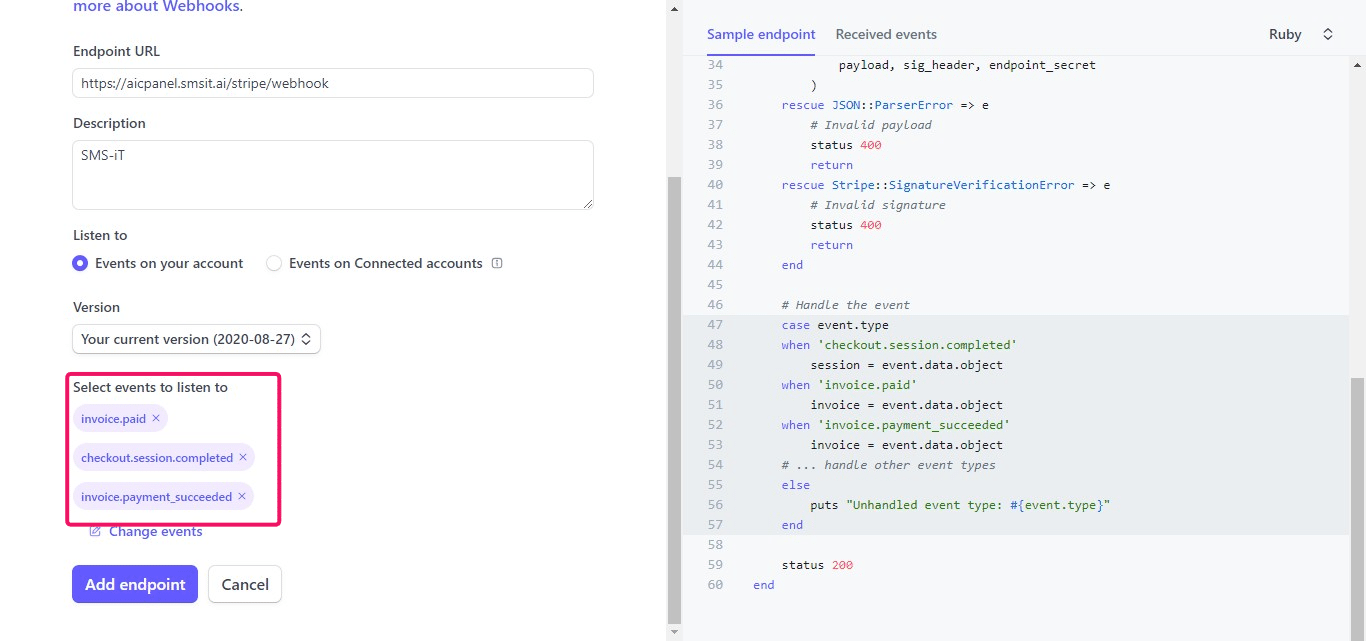
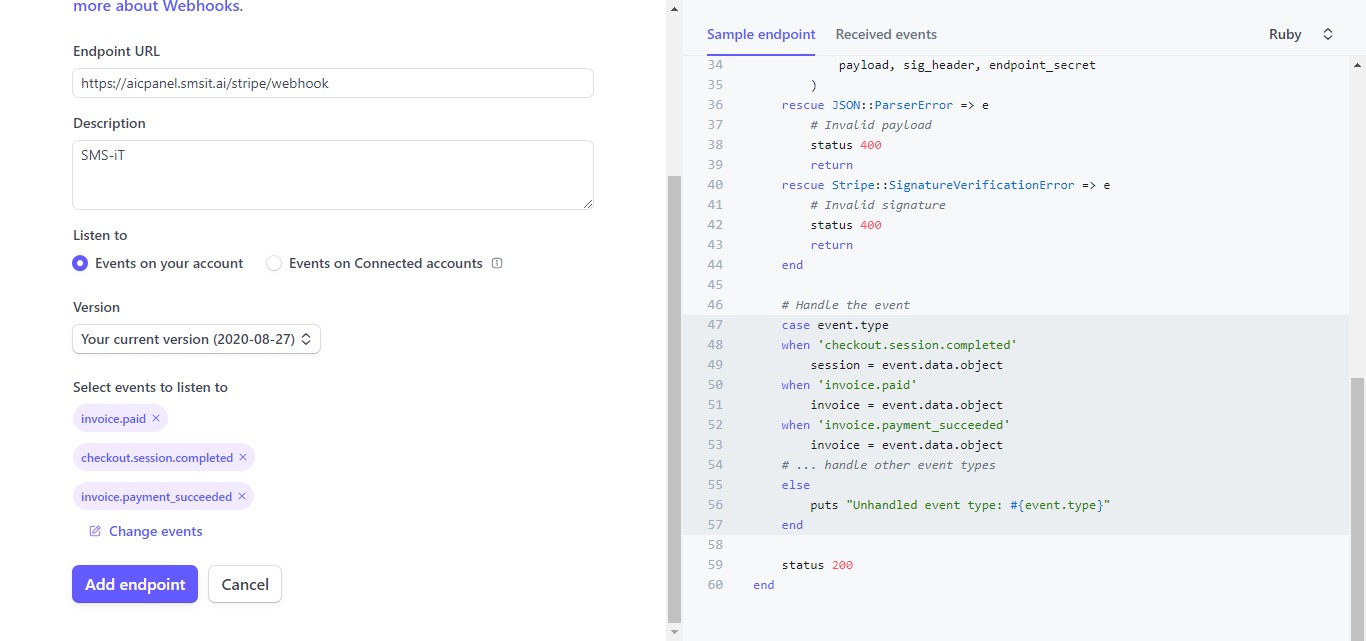
With all events configured, click on the "Add endpoint" button to create your new webhook.
Your webhook has been successfully created and configured in Stripe.
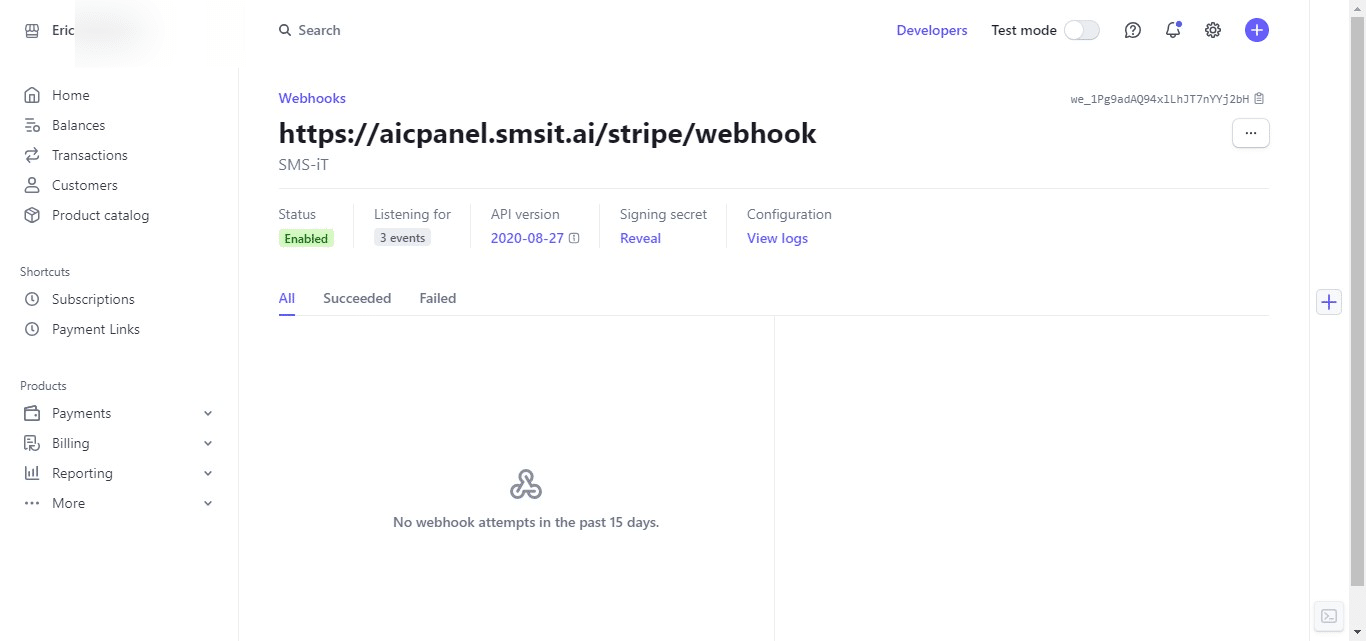
You can verify that your webhook is properly set up by checking the "Listening for" section, which should display all three events you've added: invoice.paid, checkout.session.completed, and invoice.payment_succeeded.
You have now completed the Stripe integration setup for your SMS-iT CRM. Close the Stripe dashboard and return to your SMS-iT CRM interface.
Closing Summary: This tutorial has walked you through the process of integrating Stripe payment processing with your SMS-iT CRM system. By following these steps, you've set up a secure and efficient payment gateway for your business. The SMS-iT CRM platform, with its Stripe integration, offers significant benefits for marketing agencies, small businesses, solo entrepreneurs, and professionals. This seamless payment processing integration allows you to: - Automate billing and invoicing processes - Securely handle customer payments - Streamline financial operations - Focus on your core business activities without worrying about payment technicalities - Provide a professional and trustworthy payment experience for your clients
By leveraging the power of SMS-iT CRM with Stripe integration, you're equipping your business with a robust tool that combines customer relationship management with efficient payment processing, ultimately driving growth and improving customer satisfaction.