Adding a Contact Manually
Navigate to https://aicpanel.smsit.ai/home
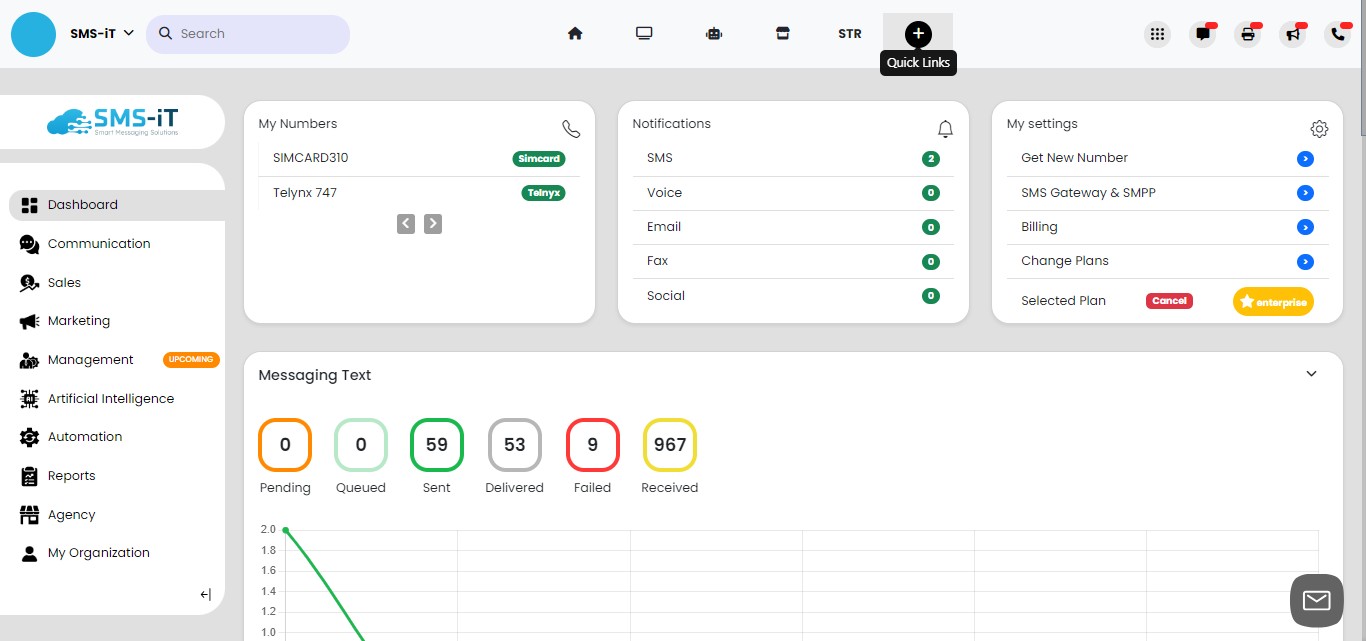
Click "Quick Links"

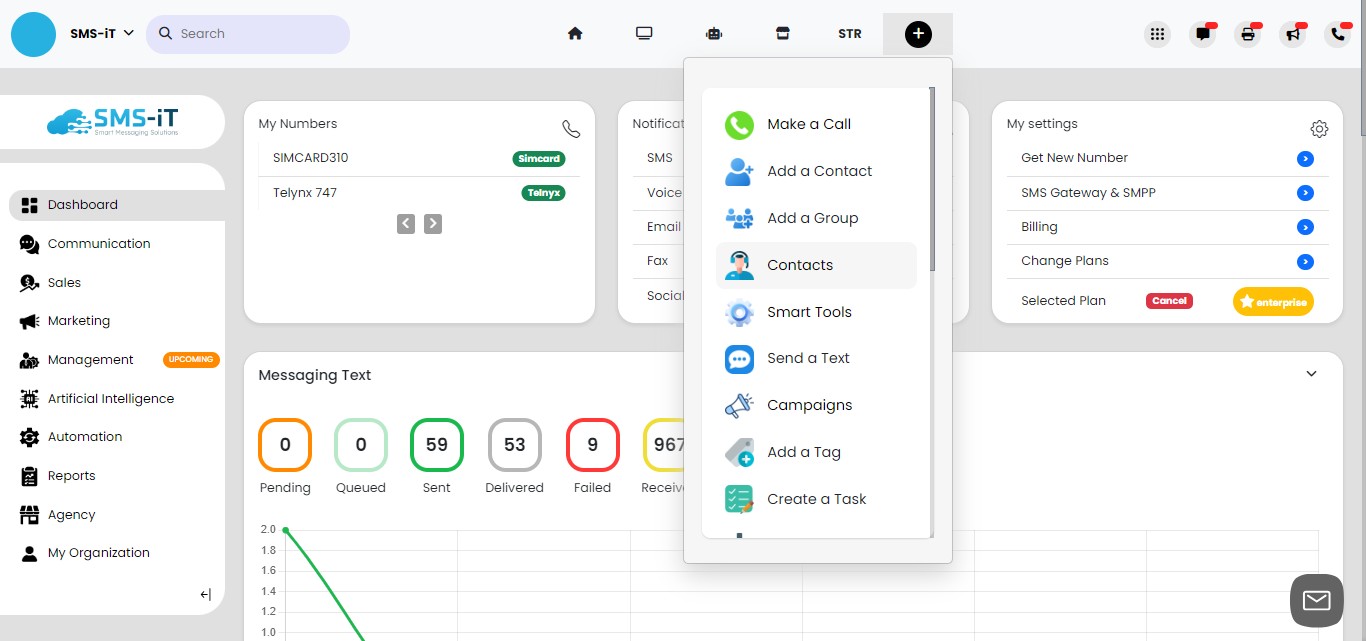
Click on "Add a Contact"

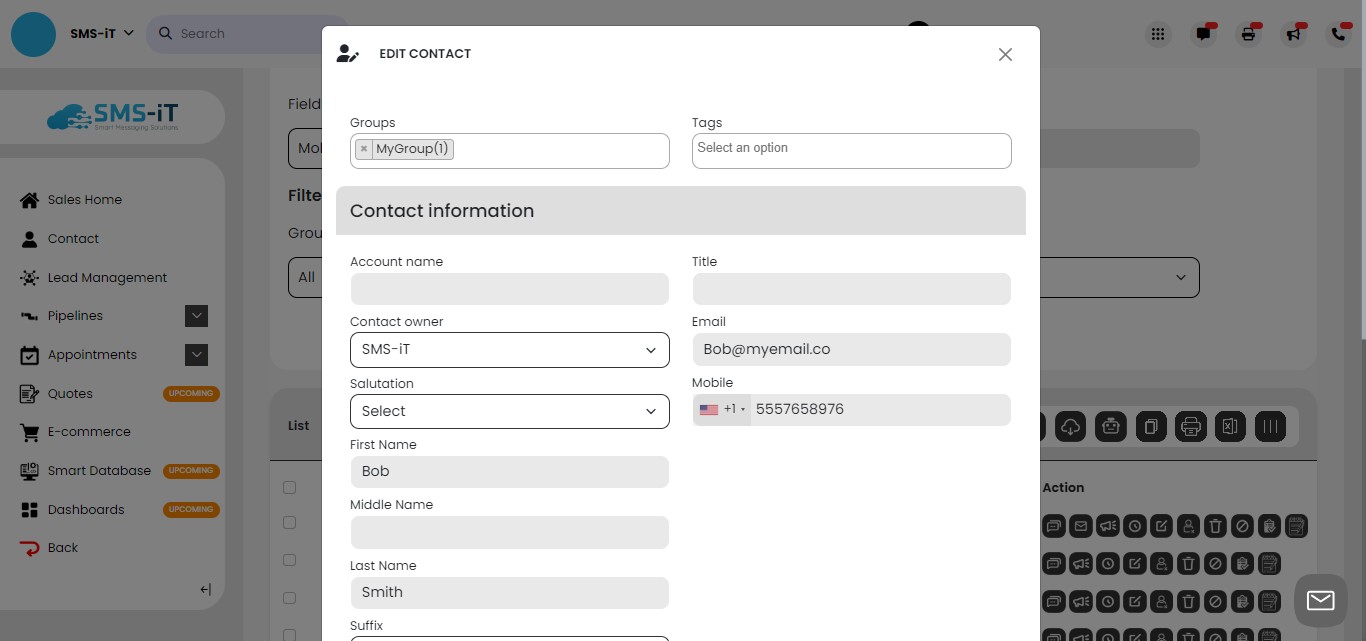
When adding a contact to the platform, there are three mandatory fields: Group, Email, and Mobile. Each contact must be assigned to a group for organization purposes. Additionally, you have the option to include either an Email or a Mobile number, or both, for each contact. These fields are essential for effectively managing and communicating with your contacts within SMS-iT.
Add a Group from the pull-down menu. If you haven't created a Group yet, follow this link to create your first Group.
](https://assets.guidejar.com/uploads/3ea3f3d3-c45e-4ecc-bffe-586c84845124/Fn7AYqjYuCNi6qxp2rJ7maNAQdg1/7a7b1b18-47d2-456d-acf4-710eb2c8f7a8/1707836703175.jpeg)
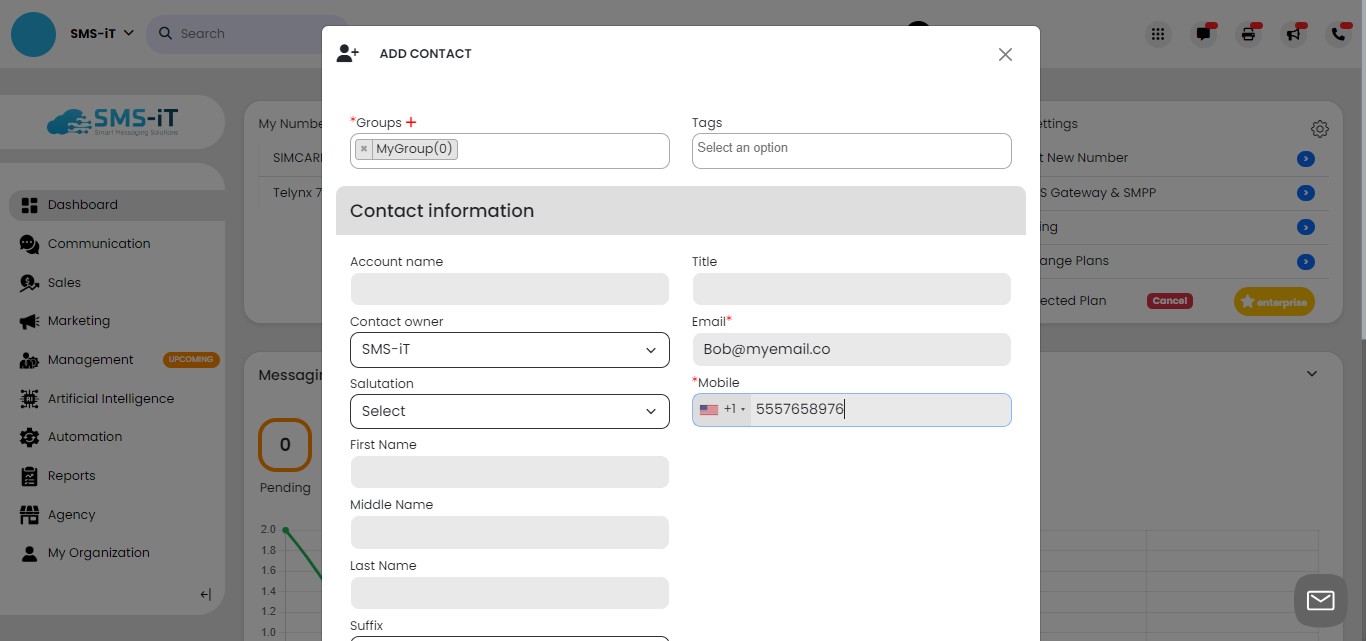
To save a contact in the SMS-iT platform, you must provide at least one of the mandatory fields: an Email address, a Mobile number, or both. Fill in the required information accordingly, ensuring that you include at least one valid contact detail before saving the contact entry.
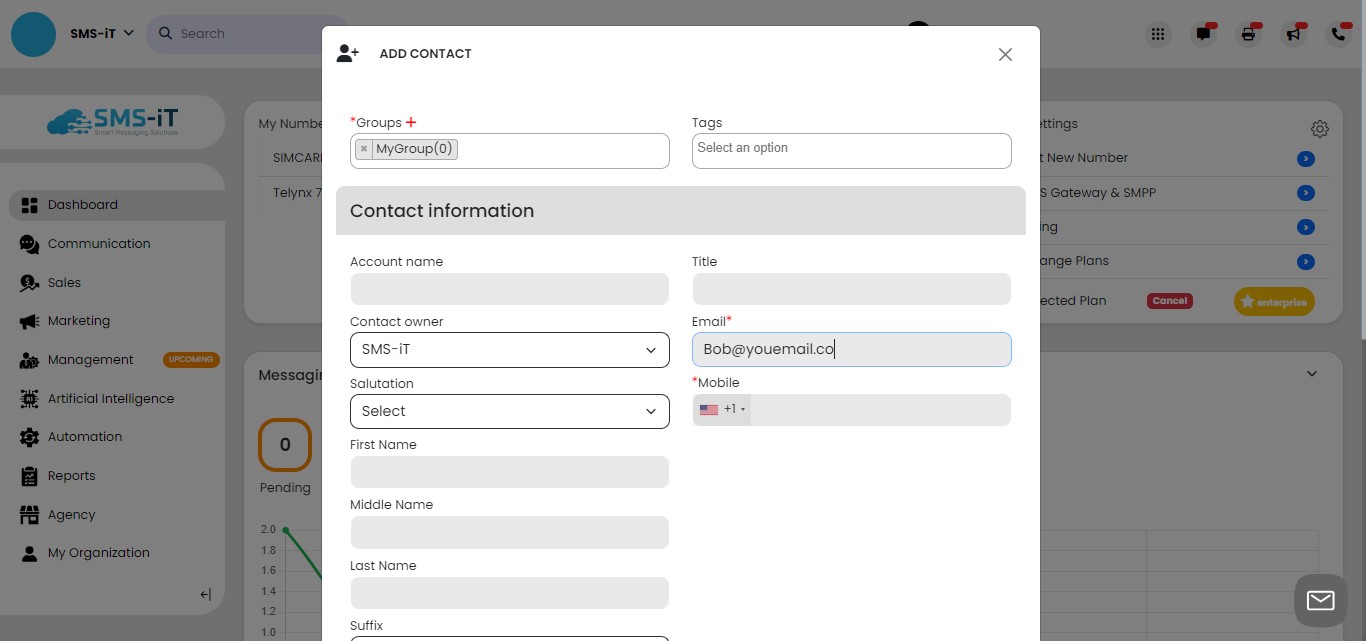
Add a Mobile number. NOTE: It's important to note that a mobile number in this context can also refer to any text-enabled number, including VOIP numbers or text-enabled landlines, as long as it can receive SMS texts at a minimum. Ensure that the provided number is capable of receiving SMS messages before saving the contact.
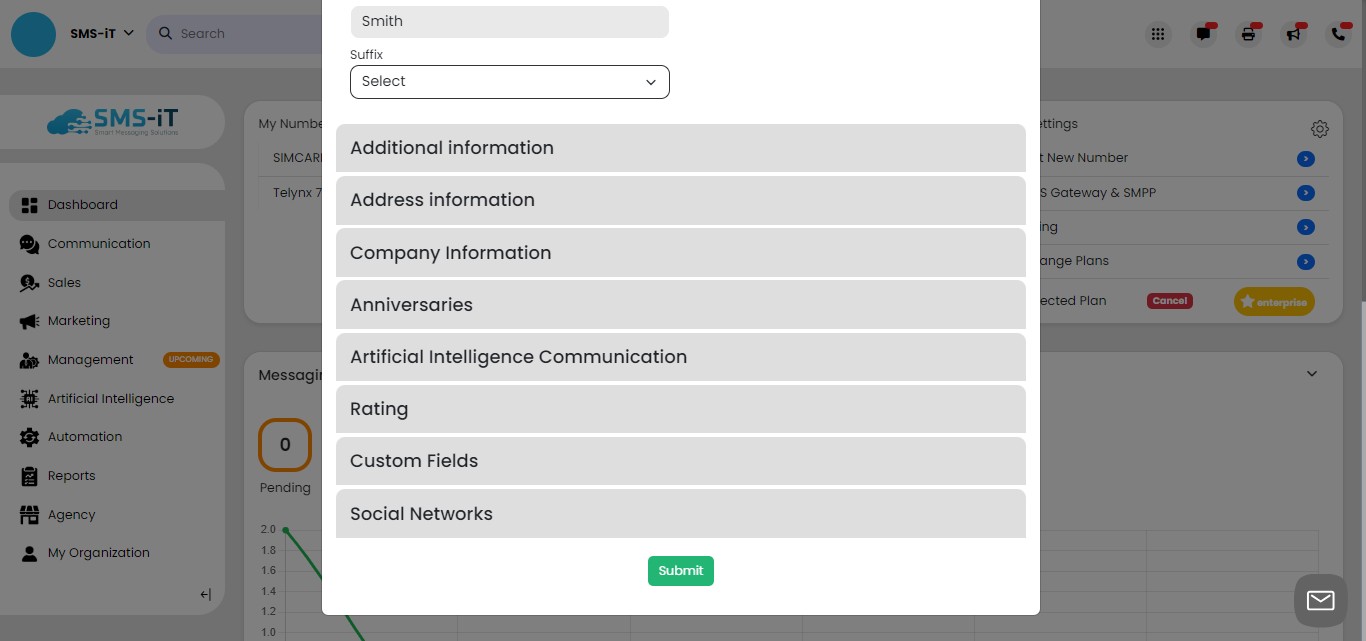
Additionally, include any relevant additional information that can help identify the customer and facilitate guiding them through their customer journey. This could include details such as their name, company affiliation, or any specific preferences or interests they have indicated. The more information you have about the customer, the better equipped you'll be to personalize their experience and provide them with tailored support along their journey.

In addition to the mandatory fields, there are several other information fields available for you to fill out. Clicking on the grey panels will reveal more options such as other phone numbers, fax addresses, company information, anniversaries, AI settings, ratings, custom fields, and social network handles like WhatsApp and Facebook Messenger. These additional fields allow you to capture a comprehensive profile of your contacts, enabling you to better understand and engage with them throughout their customer journey.
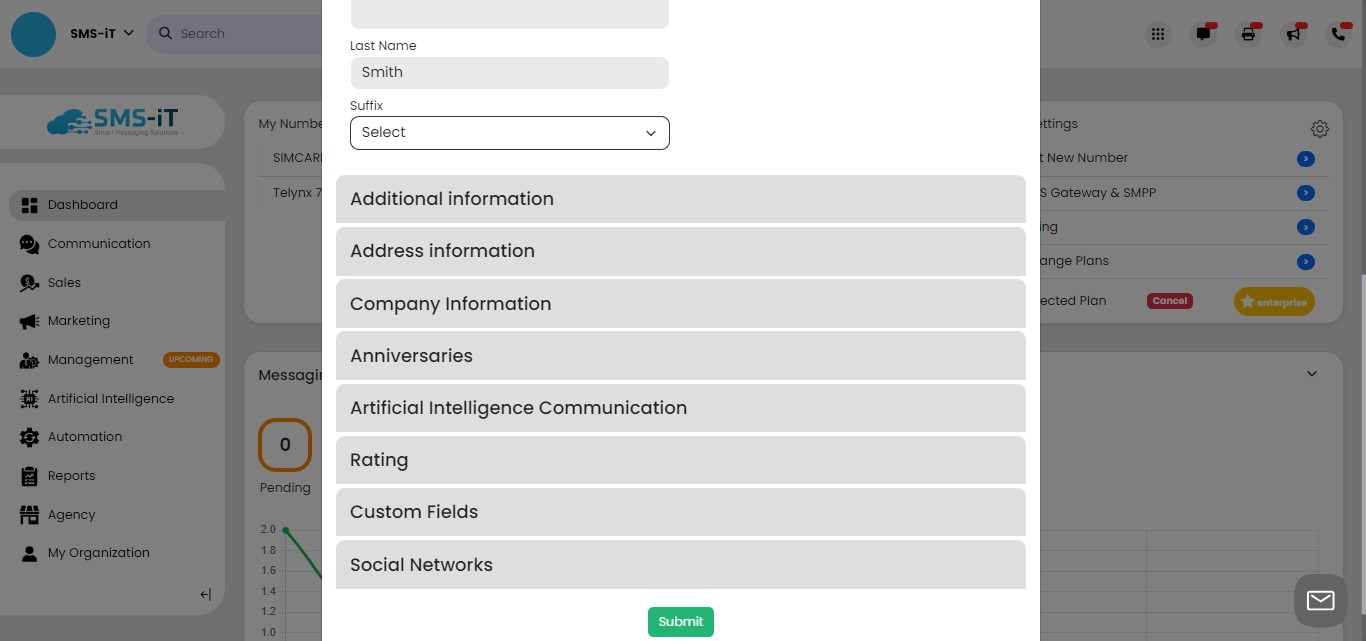
After completing the form with the necessary information, click on "Submit" to enter the contact into the designated group and platform. This action will save the contact entry and make it accessible for further communication and management within the SMS-iT platform.
TIP: You can now connect Smart Tools for customer retention, bulk texting for prospects, or any pipeline or automation campaign to guide your new customer or prospect through their unique customer journey. Remember, a number must be opted in to receive text messages before you can text them. Utilize the Smart Tools available within SMS-iT to engage with your contacts effectively and nurture them along their journey with your business.
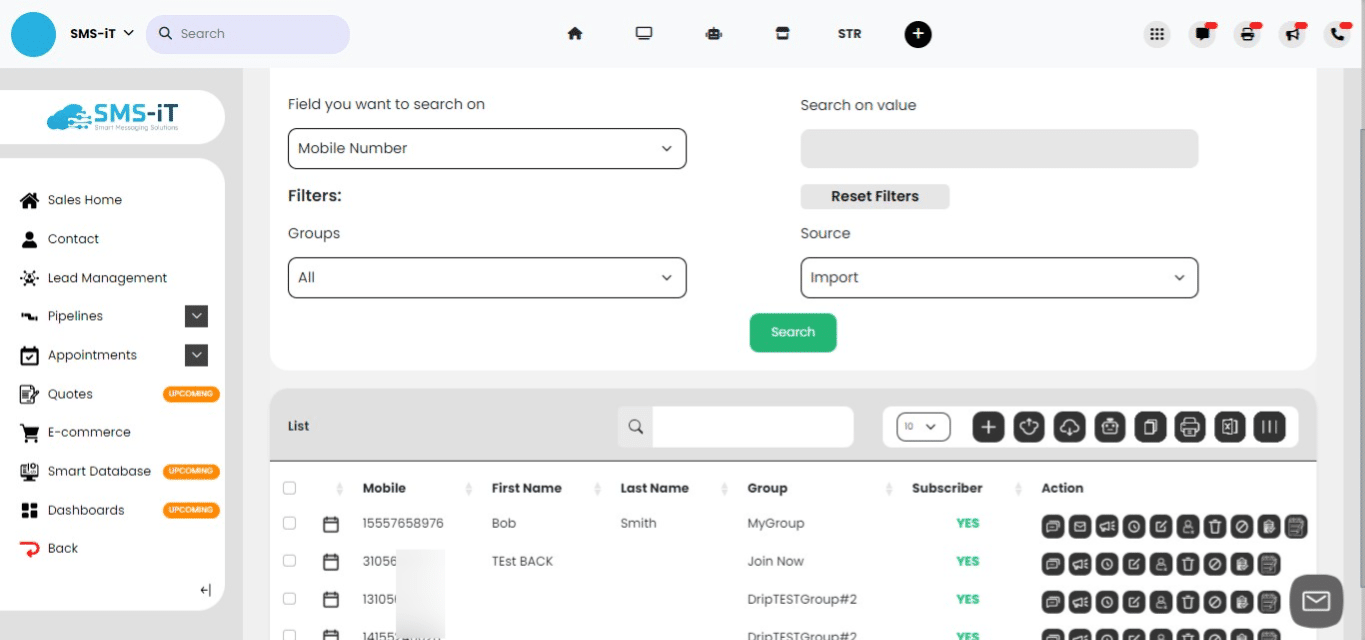
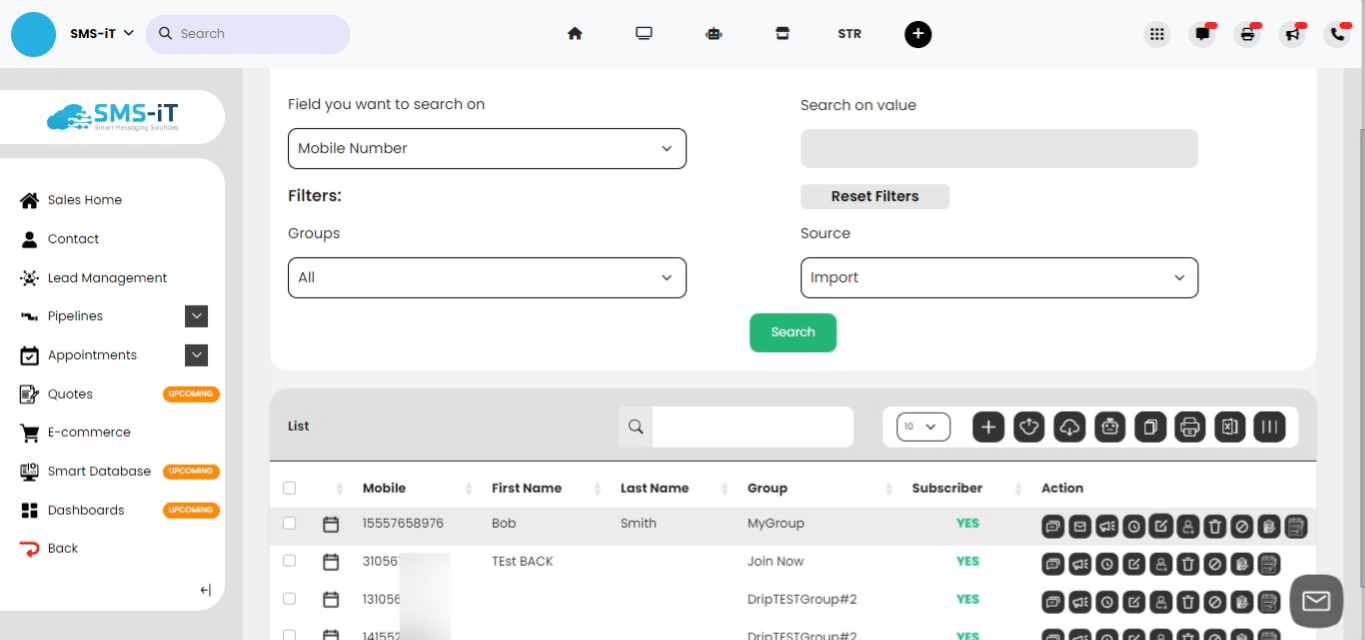
To confirm your contact has entered the system click "Quick Links"
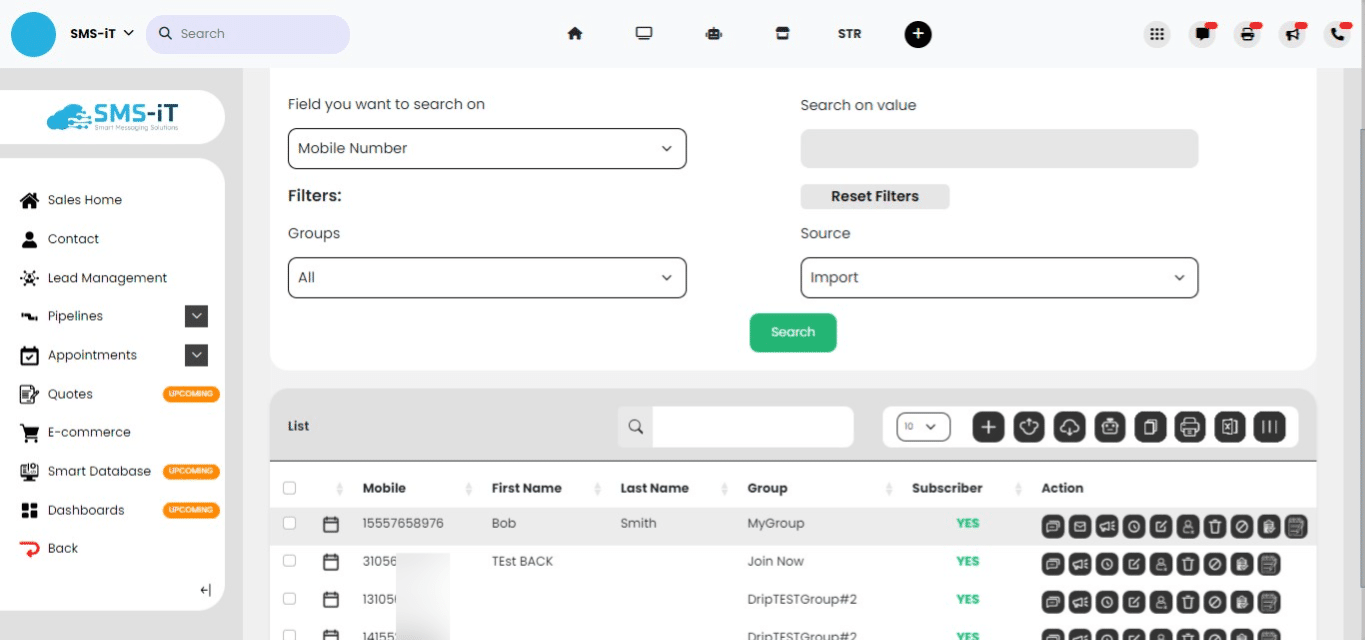
Click on "Contacts"
And you'll see your contact.
To edit the contact click on the "Pencil" icon
Once the contact form comes up, you can make any additional changes or updates as needed. After making the necessary adjustments, simply click "Submit" again to save the updated information and enter it into the platform.
Done!